
Hosting a wedding or party? Savvy brides and party hostesses know that a great option for enhancing their events is to provide a special take-away treat for their guests. Purchased favors can be pricey, but there’s no need to cut our favors if you’re trying to stick to a budget! Instead, head for to the kitchen to whip up your own edible favors. Creating handmade treats yourself is fun, rewarding, and a fantastic option for keeping costs down, without compromising on elegance.
As a professional wedding and event planner, I’ve seen some amazingly creative wedding favors and handcrafted treats. One of my favorite ways to DIY my own party favors is to add sprinkles. To me, sprinkles are just synonymous with celebrating! They’re the ultimate accessory for elevating basic treats into something really special, that will wow your guests. (And I’m all about WOW!) I’m sharing three super easy ways to use my favorite Sprinklefetti blends from Baker’s Party Shop to create your own amazing party favors.
(PSSST! Here’s a coupon code for 20% off ANY Sprinklefetti you like, it’s good til April 14th! Just enter SPRINKLEFETTIFUN at checkout at Bakers Party Shop when you buy any Sprinklefetti variety)
Dip It, Dip It Good
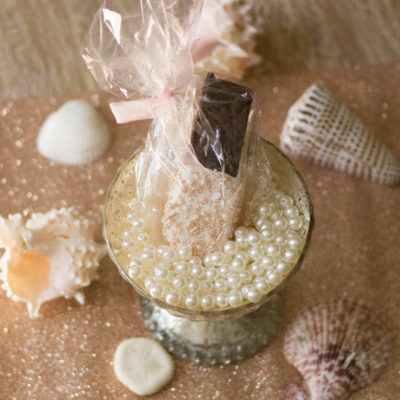
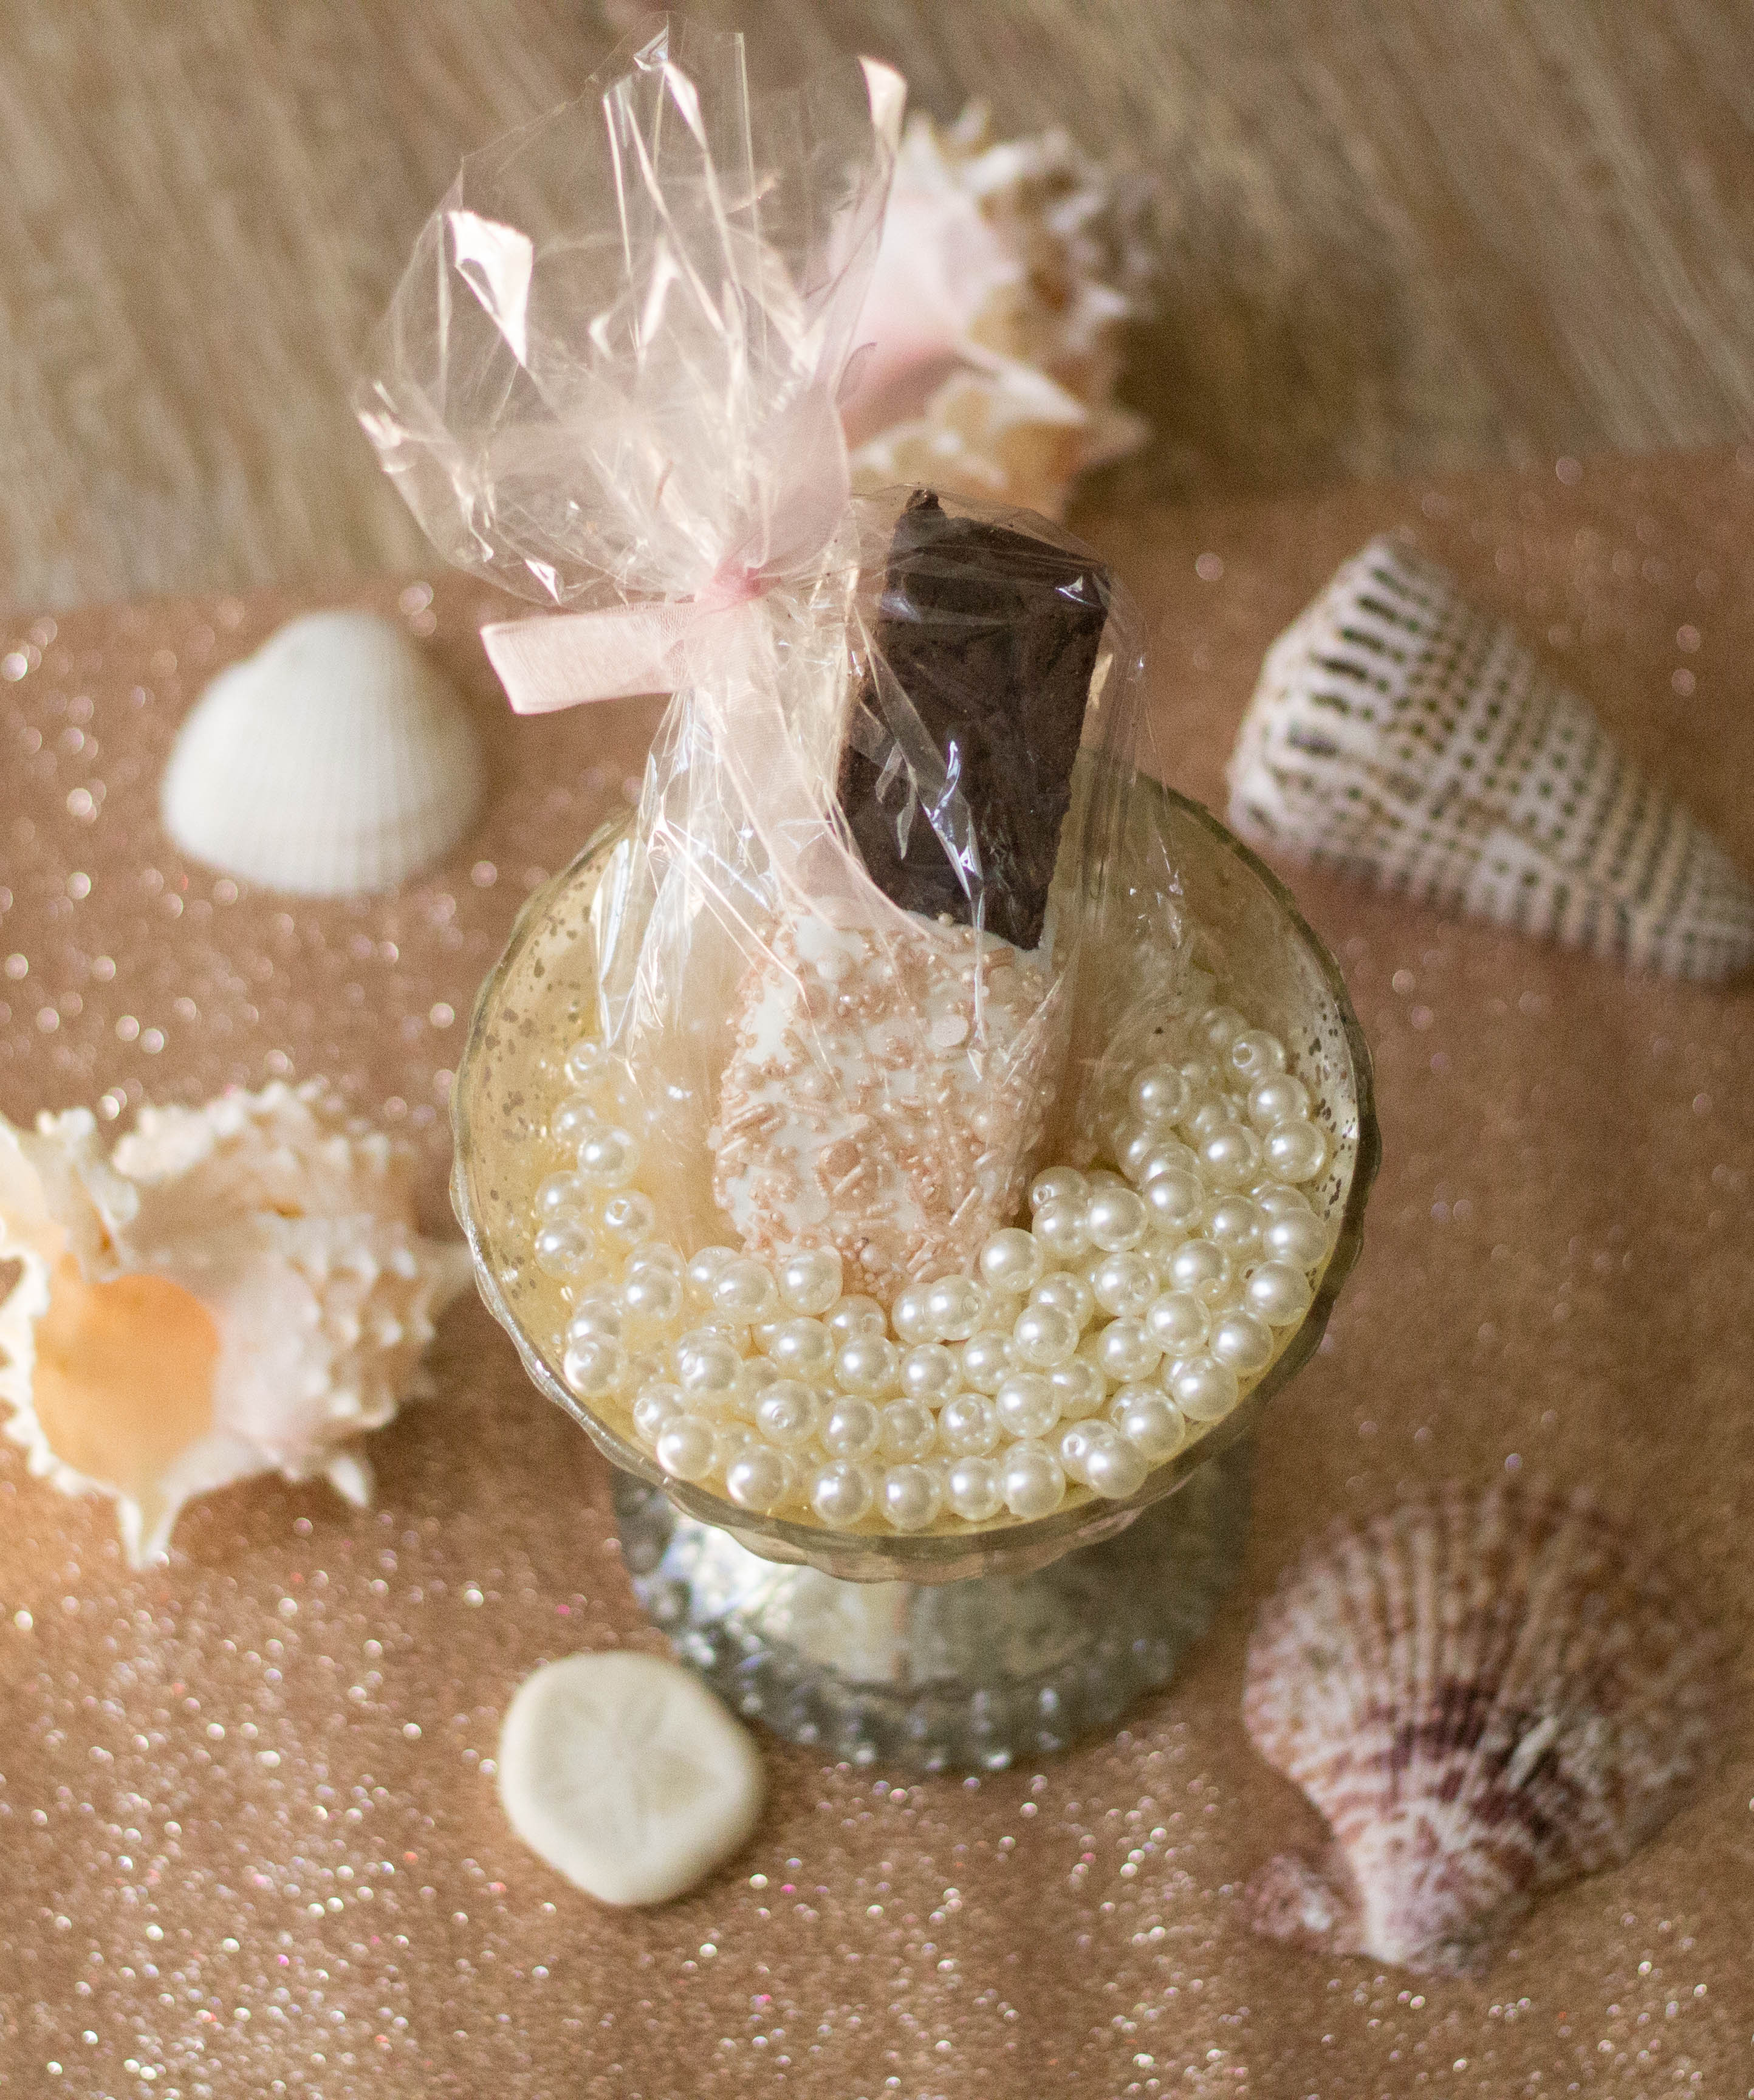
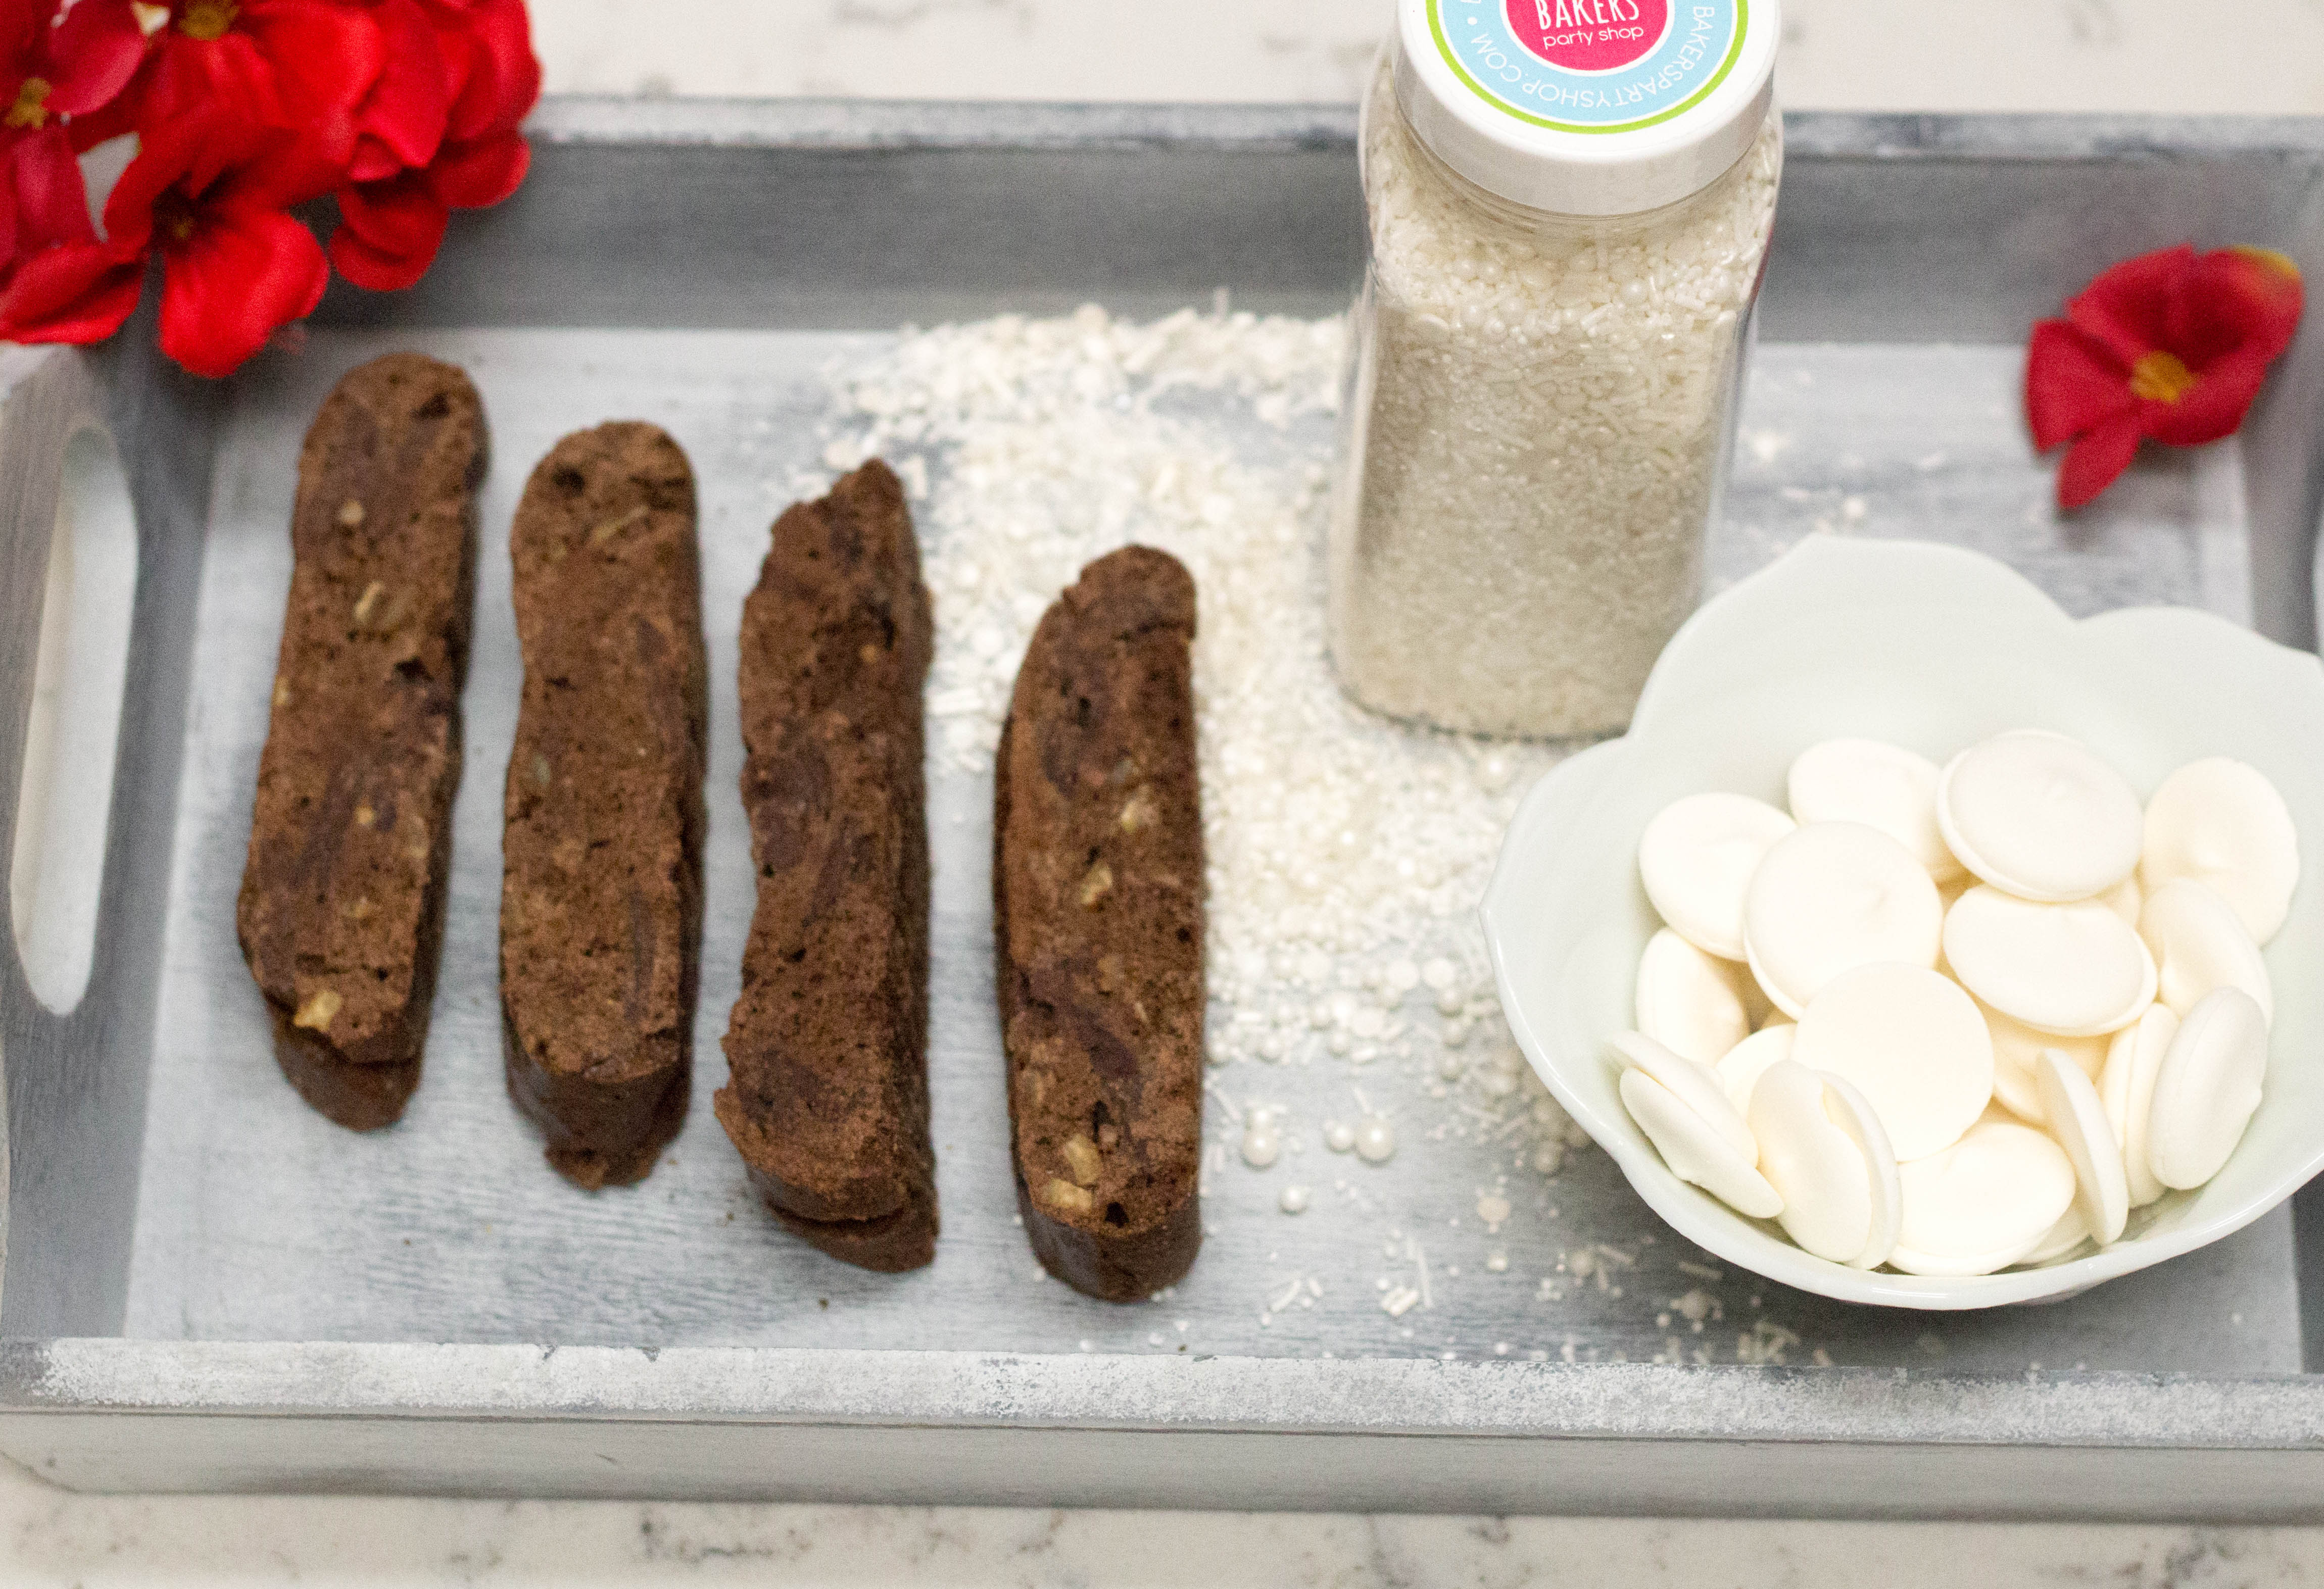
This chocolate biscotti is already tasty right out of the package, but when half-dipped in white chocolate and adorned with Rose Gold Sprinklefetti, you can see it takes on a classy look that’s perfect for a rose gold wedding.
What You’ll Need:
- Store bought chocolate biscotti
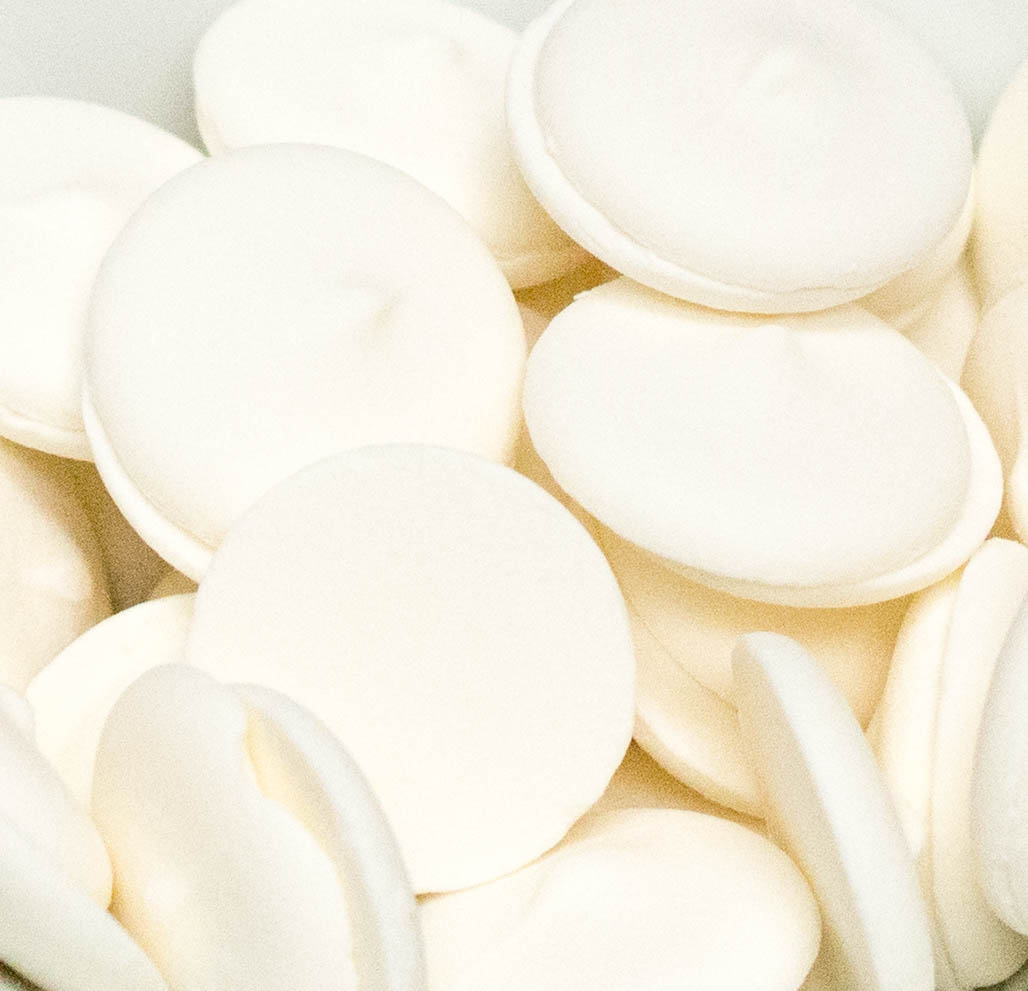
- Wilton Pure White Candy Melts
- White Sprinklefetti mix from Bakers Party Shop
- Edible Art Paint in Rose Gold
- Gold Disco Dust

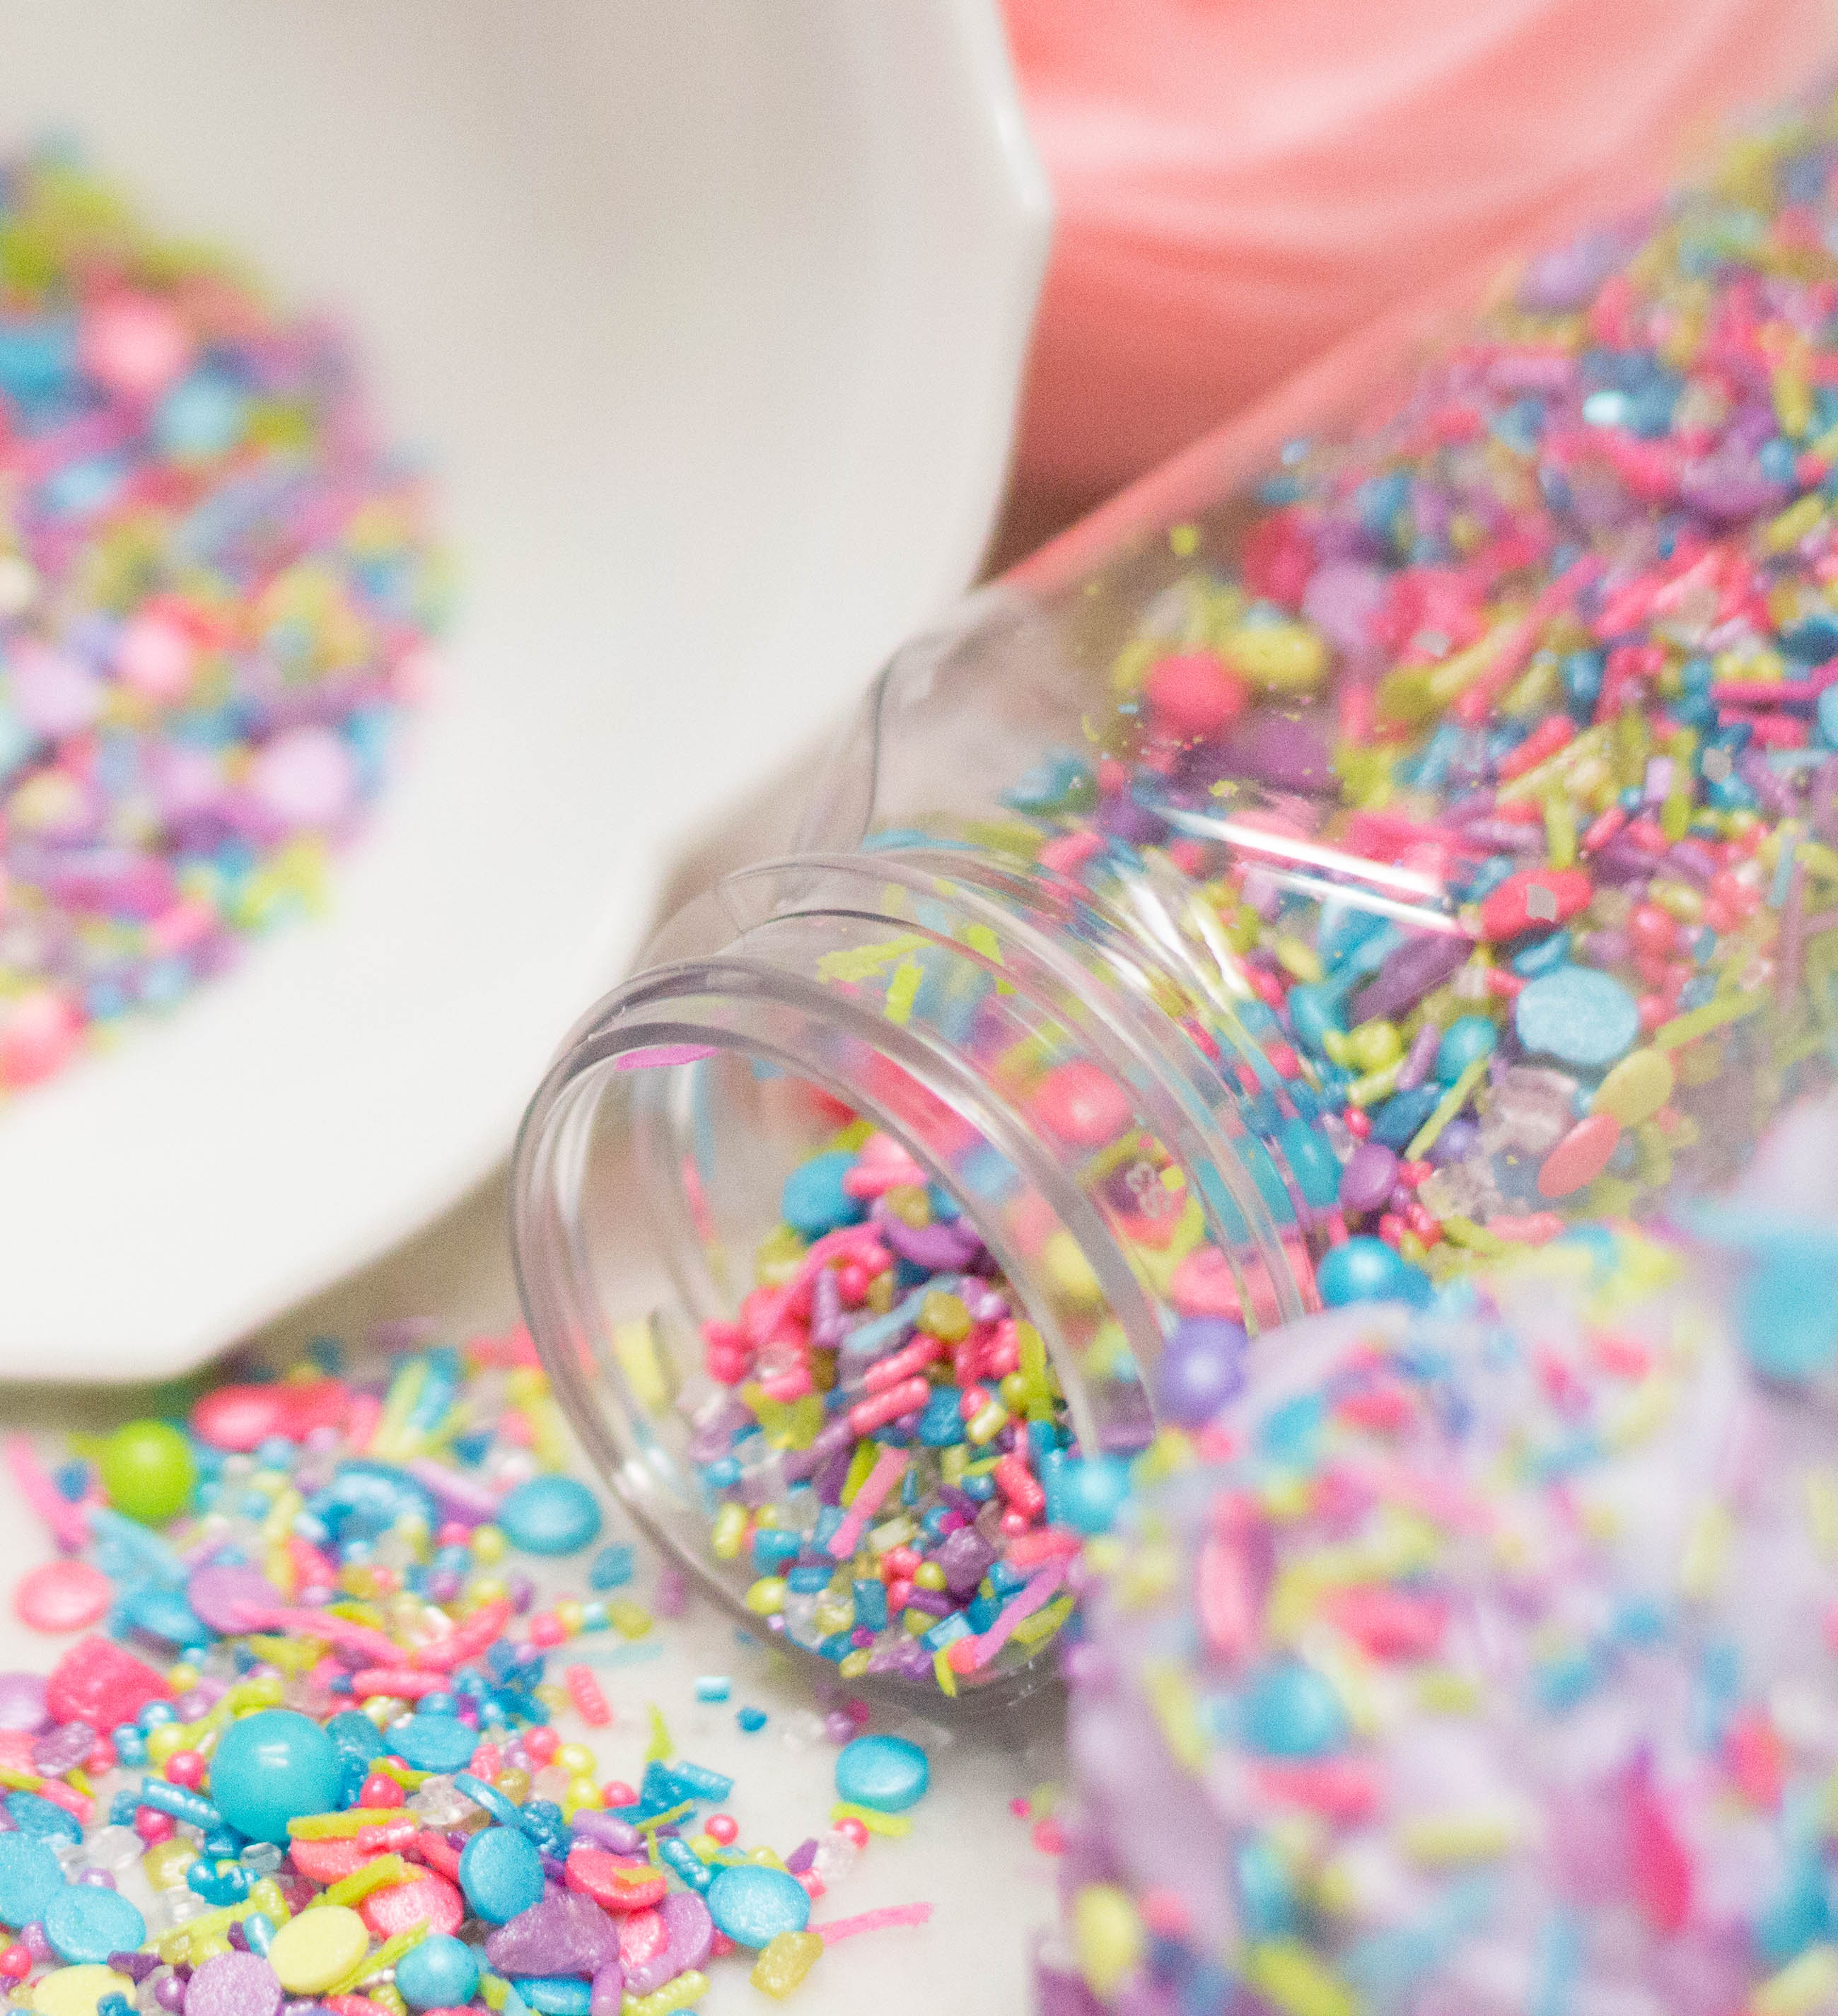
To create the sprinkles, add about 1/4 cup white Sprinklefetti to a bowl, then add a few drops of the rose gold paint, and mix well to coat the sprinkles. Add a pinch of disco dust, and continue mixing until the sprinkles are fully covered.
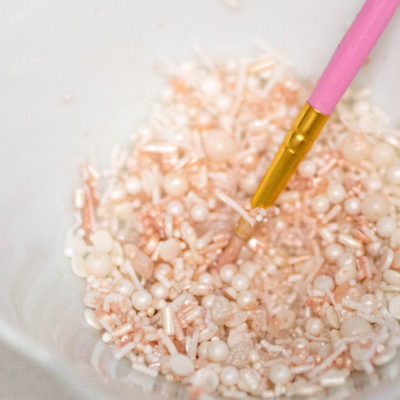
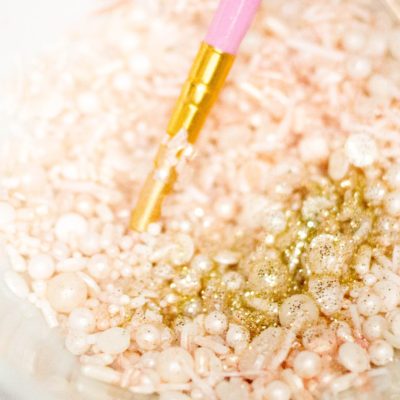

Pour the contents of the bowl out on a sheet of parchment paper so that they don’t stick together as they dry, and allow to dry for about 15 minutes.
Meanwhile, melt the white candy in the microwave until it’s smooth and creamy. Holding a biscotti cookie firmly between your thumb and forefinger, dip the cookie halfway into the melted chocolate and give it a gentle twist, coating the bottom half of the cookie in chocolate. 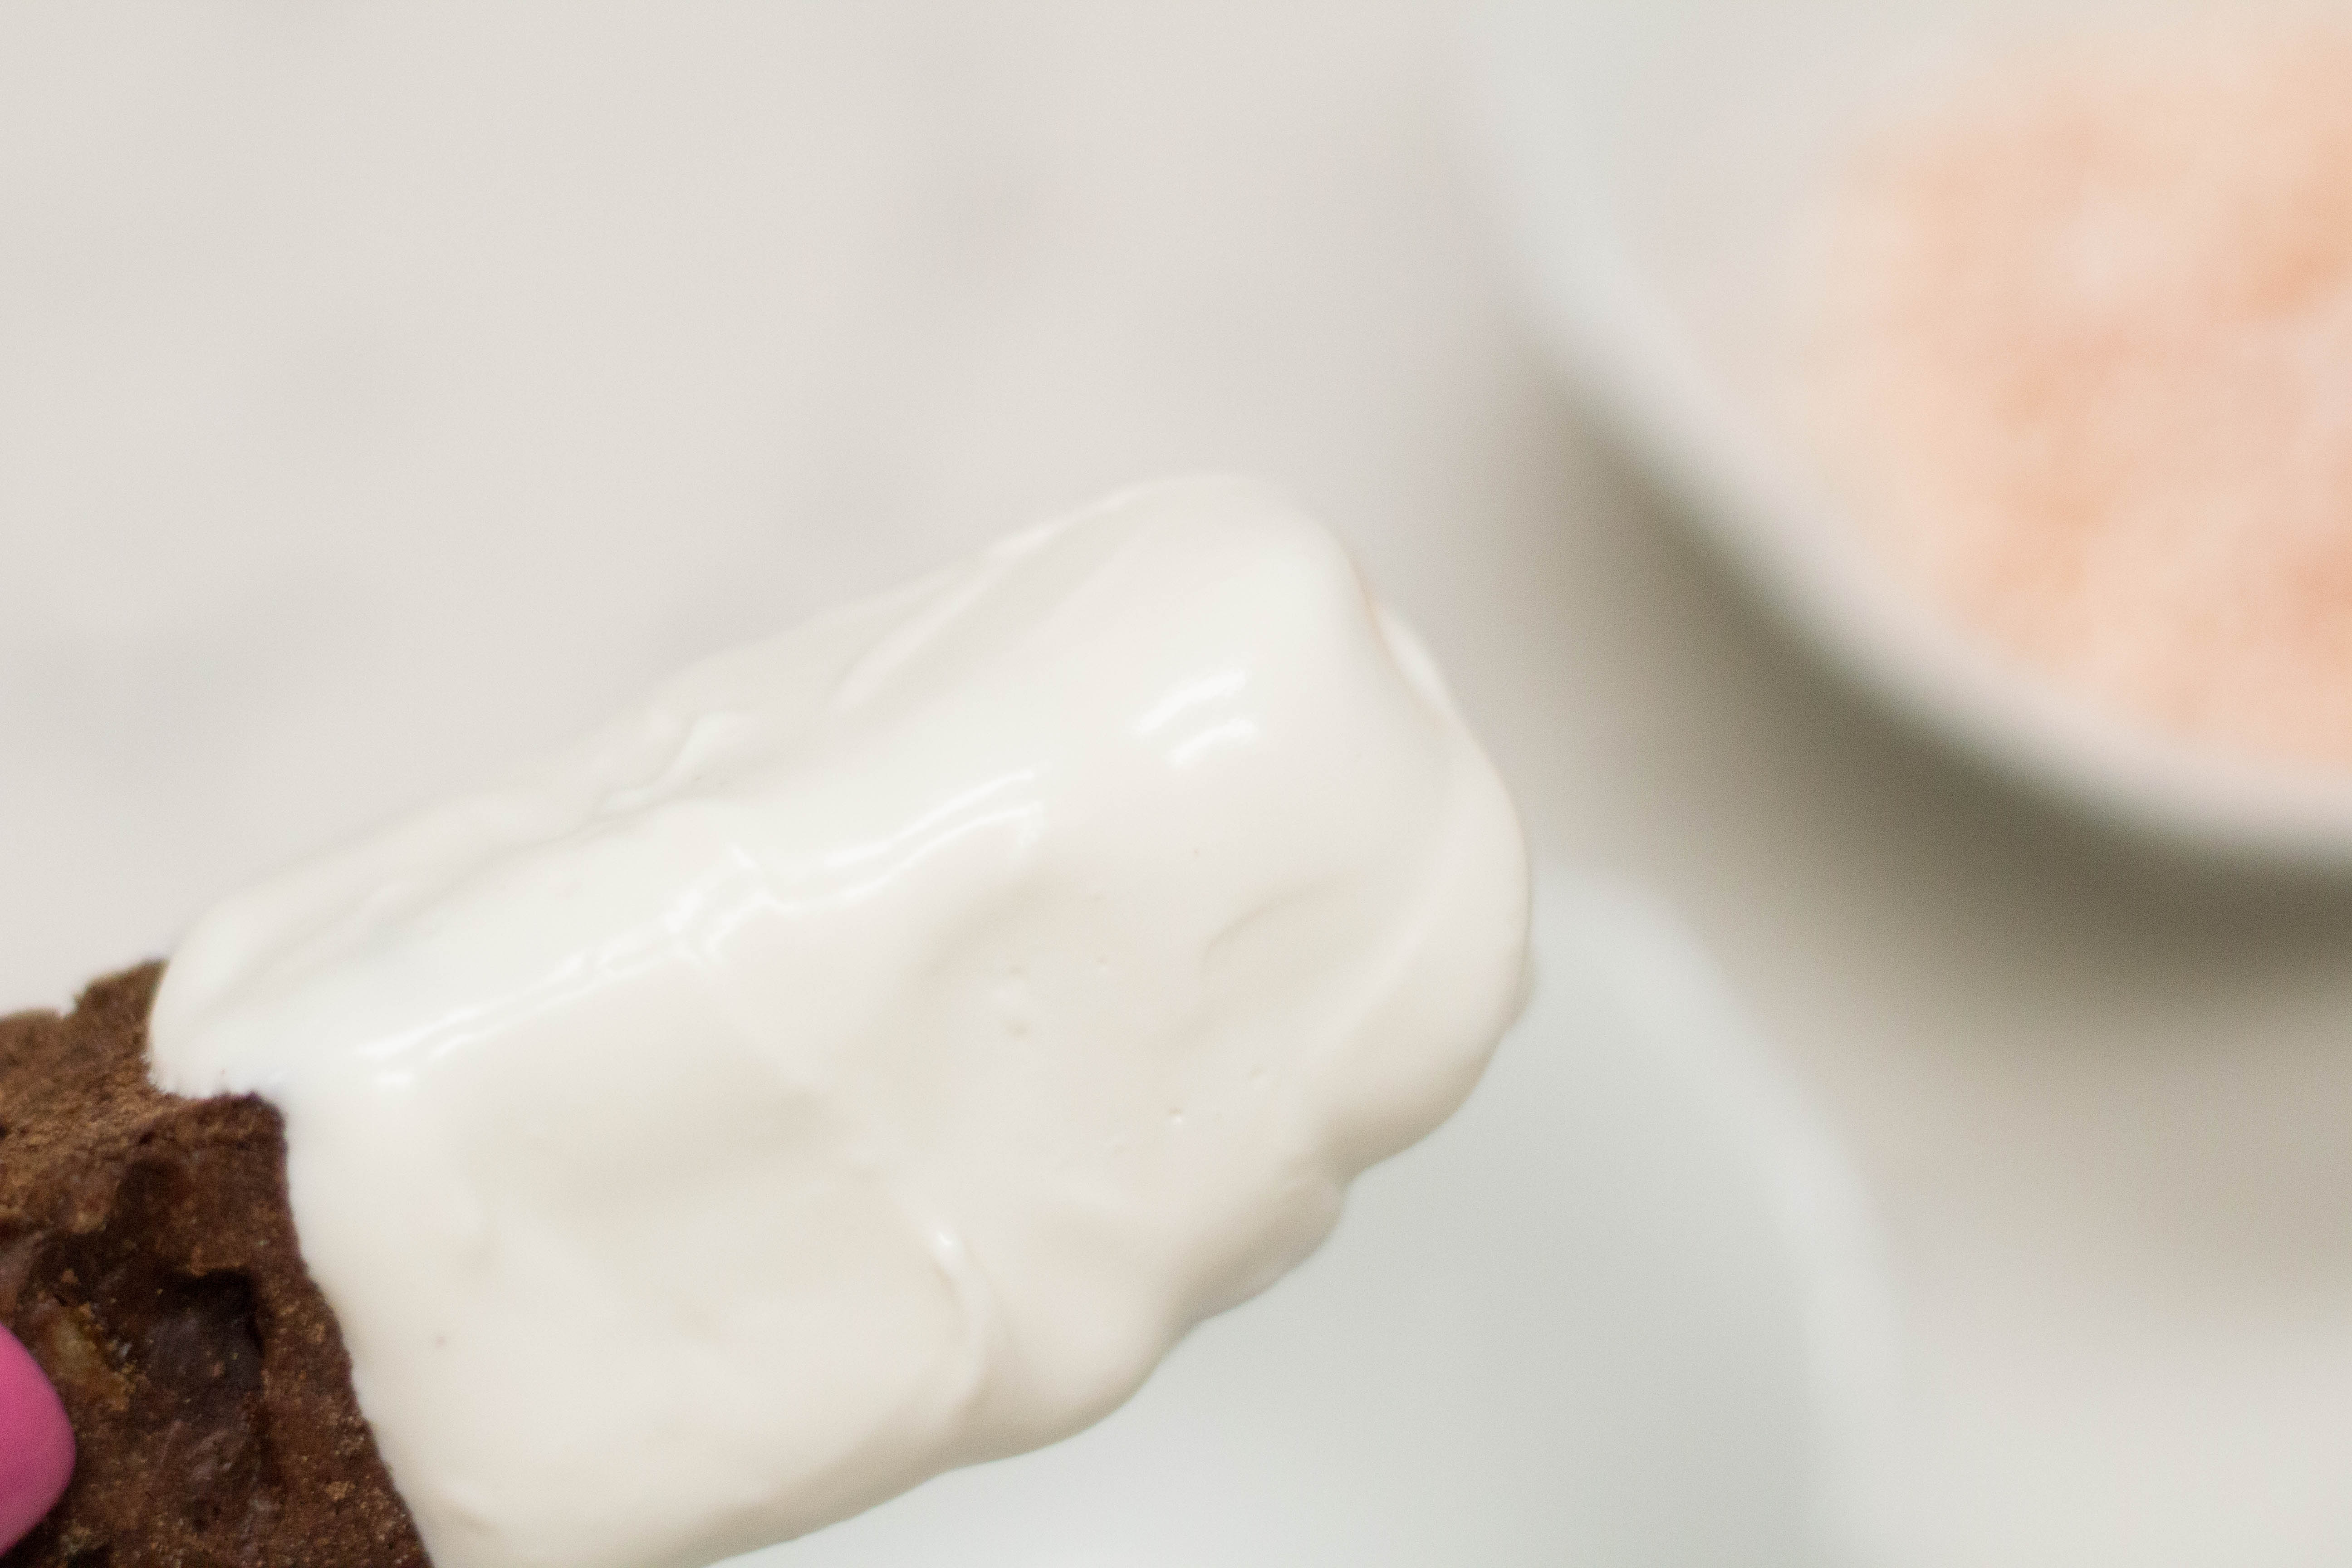
Allow excess to drip off, then add sprinkles a pinch at a time, until you get the look you like.
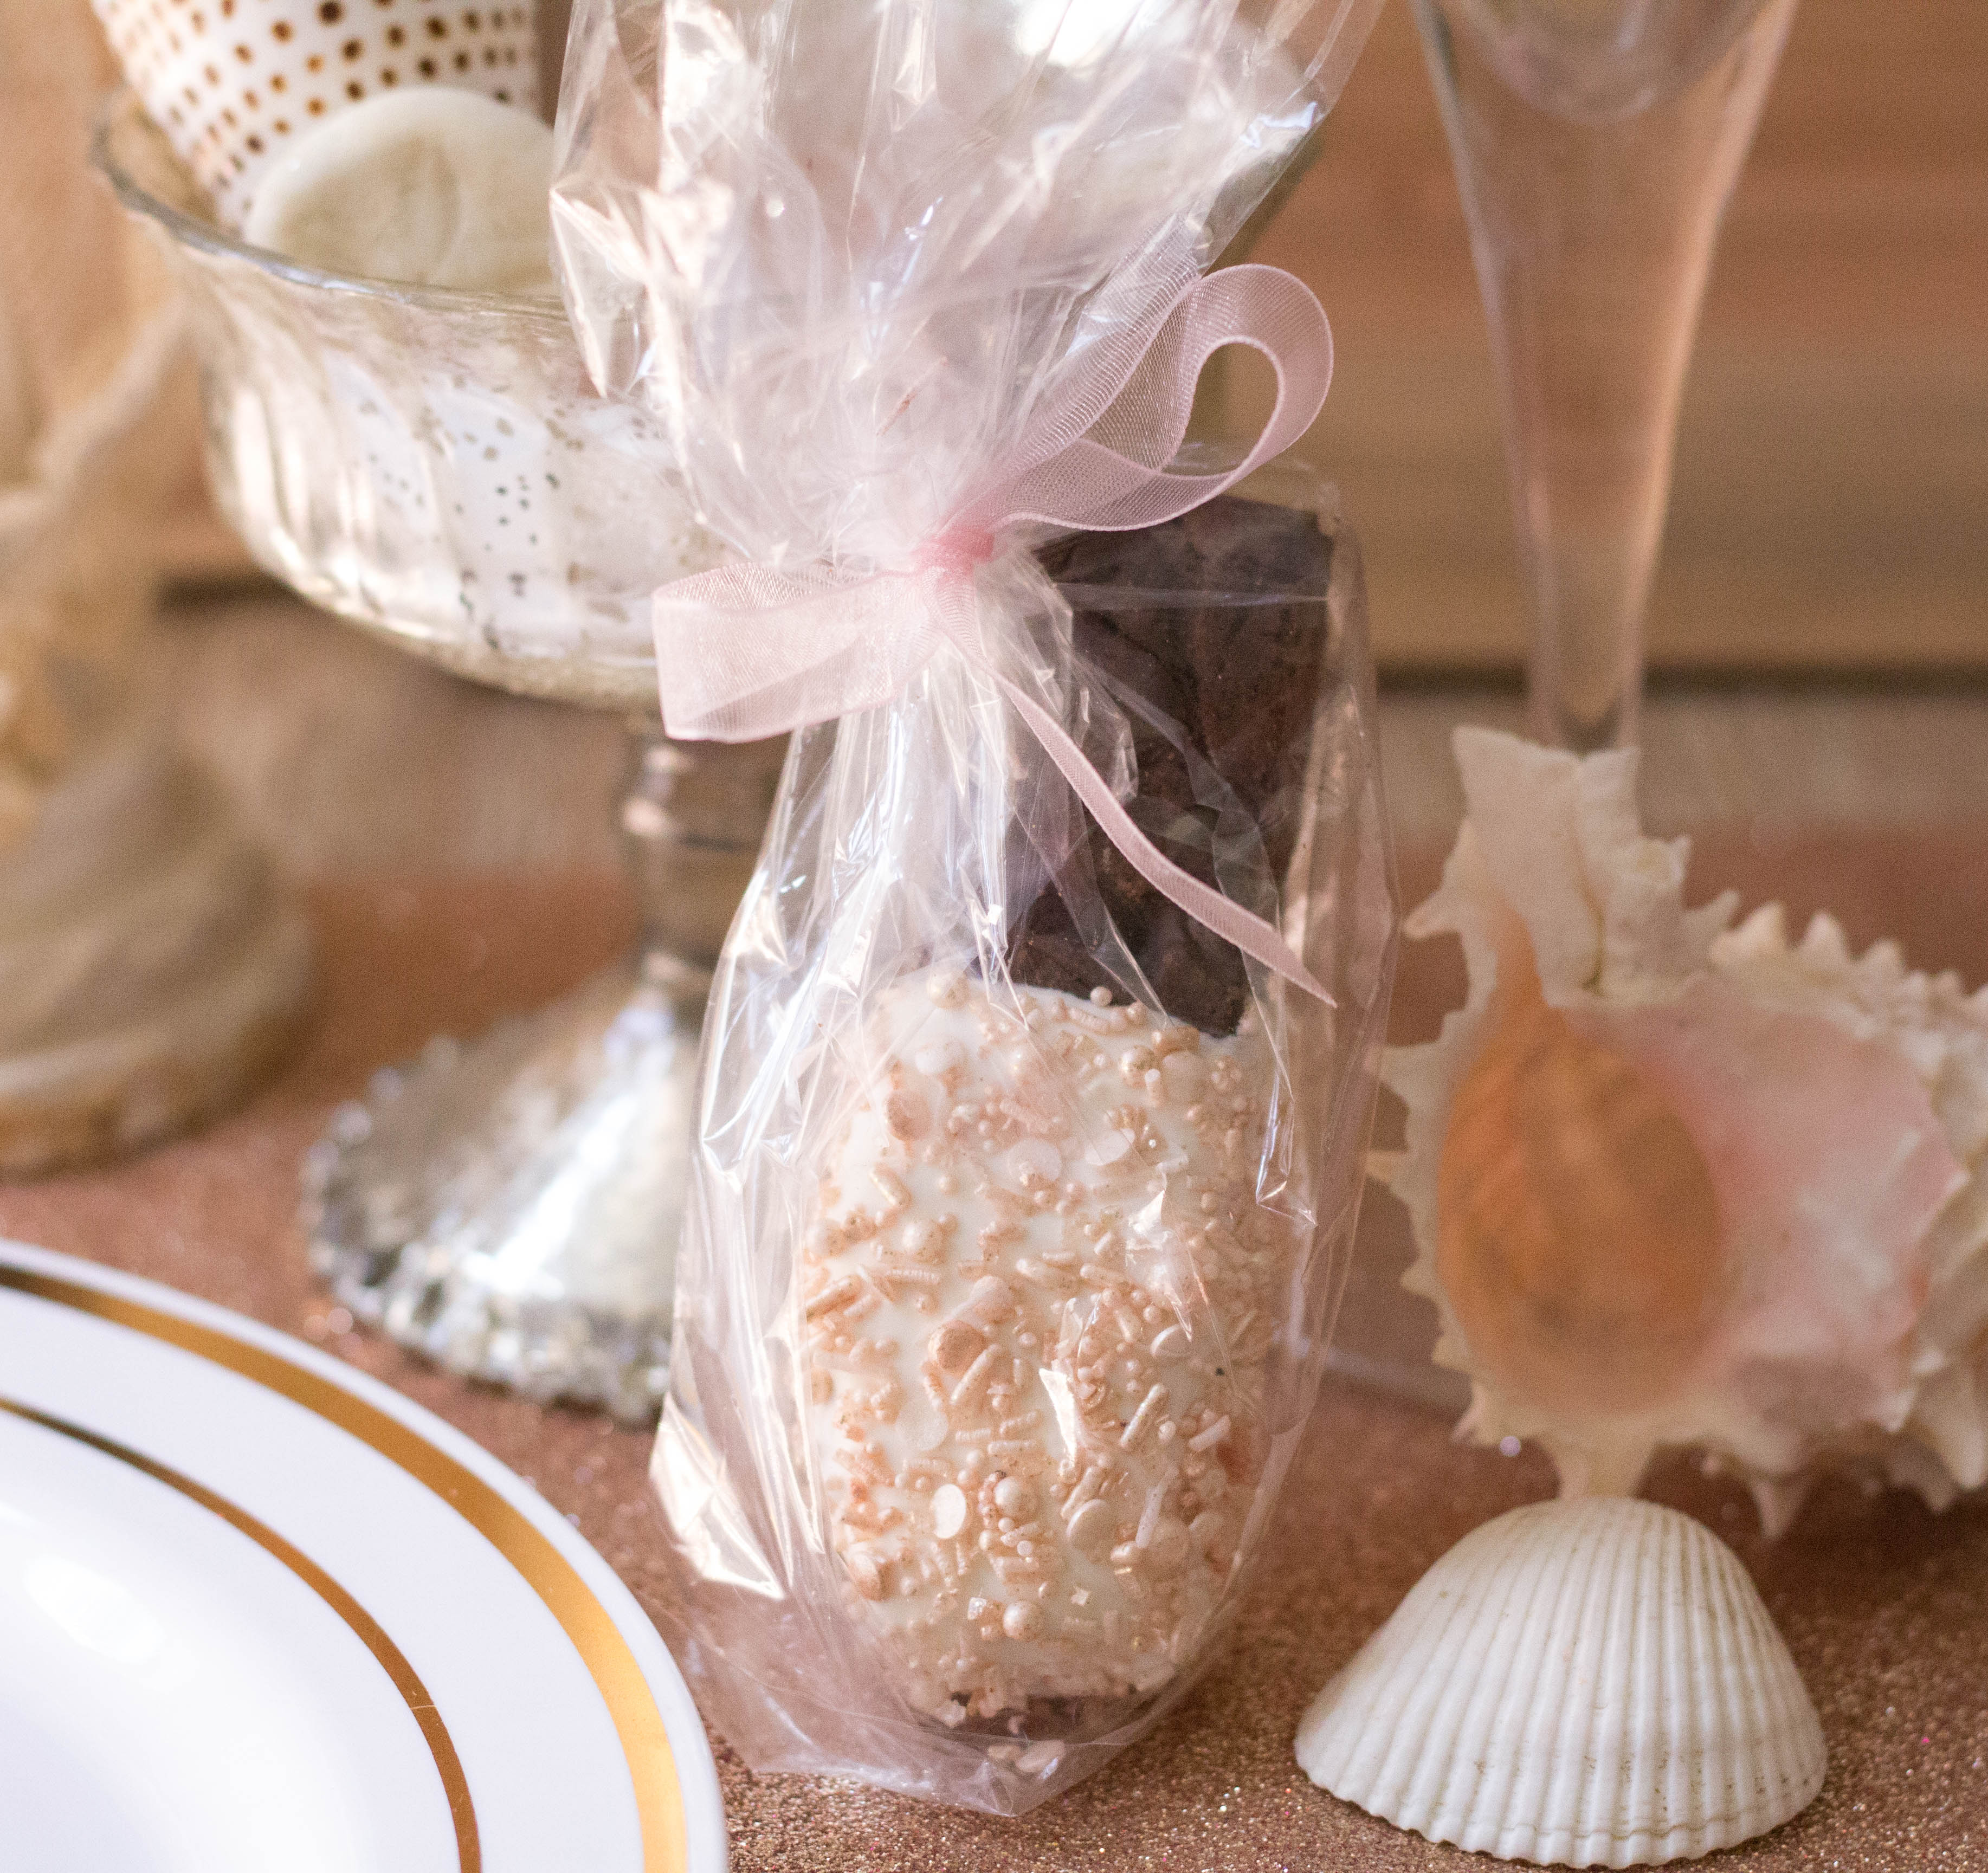 Lay the finished item on waxed paper and allow the chocolate to set until dry. These can be wrapped in cellophane bags and tied with a ribbon in your event theme color.
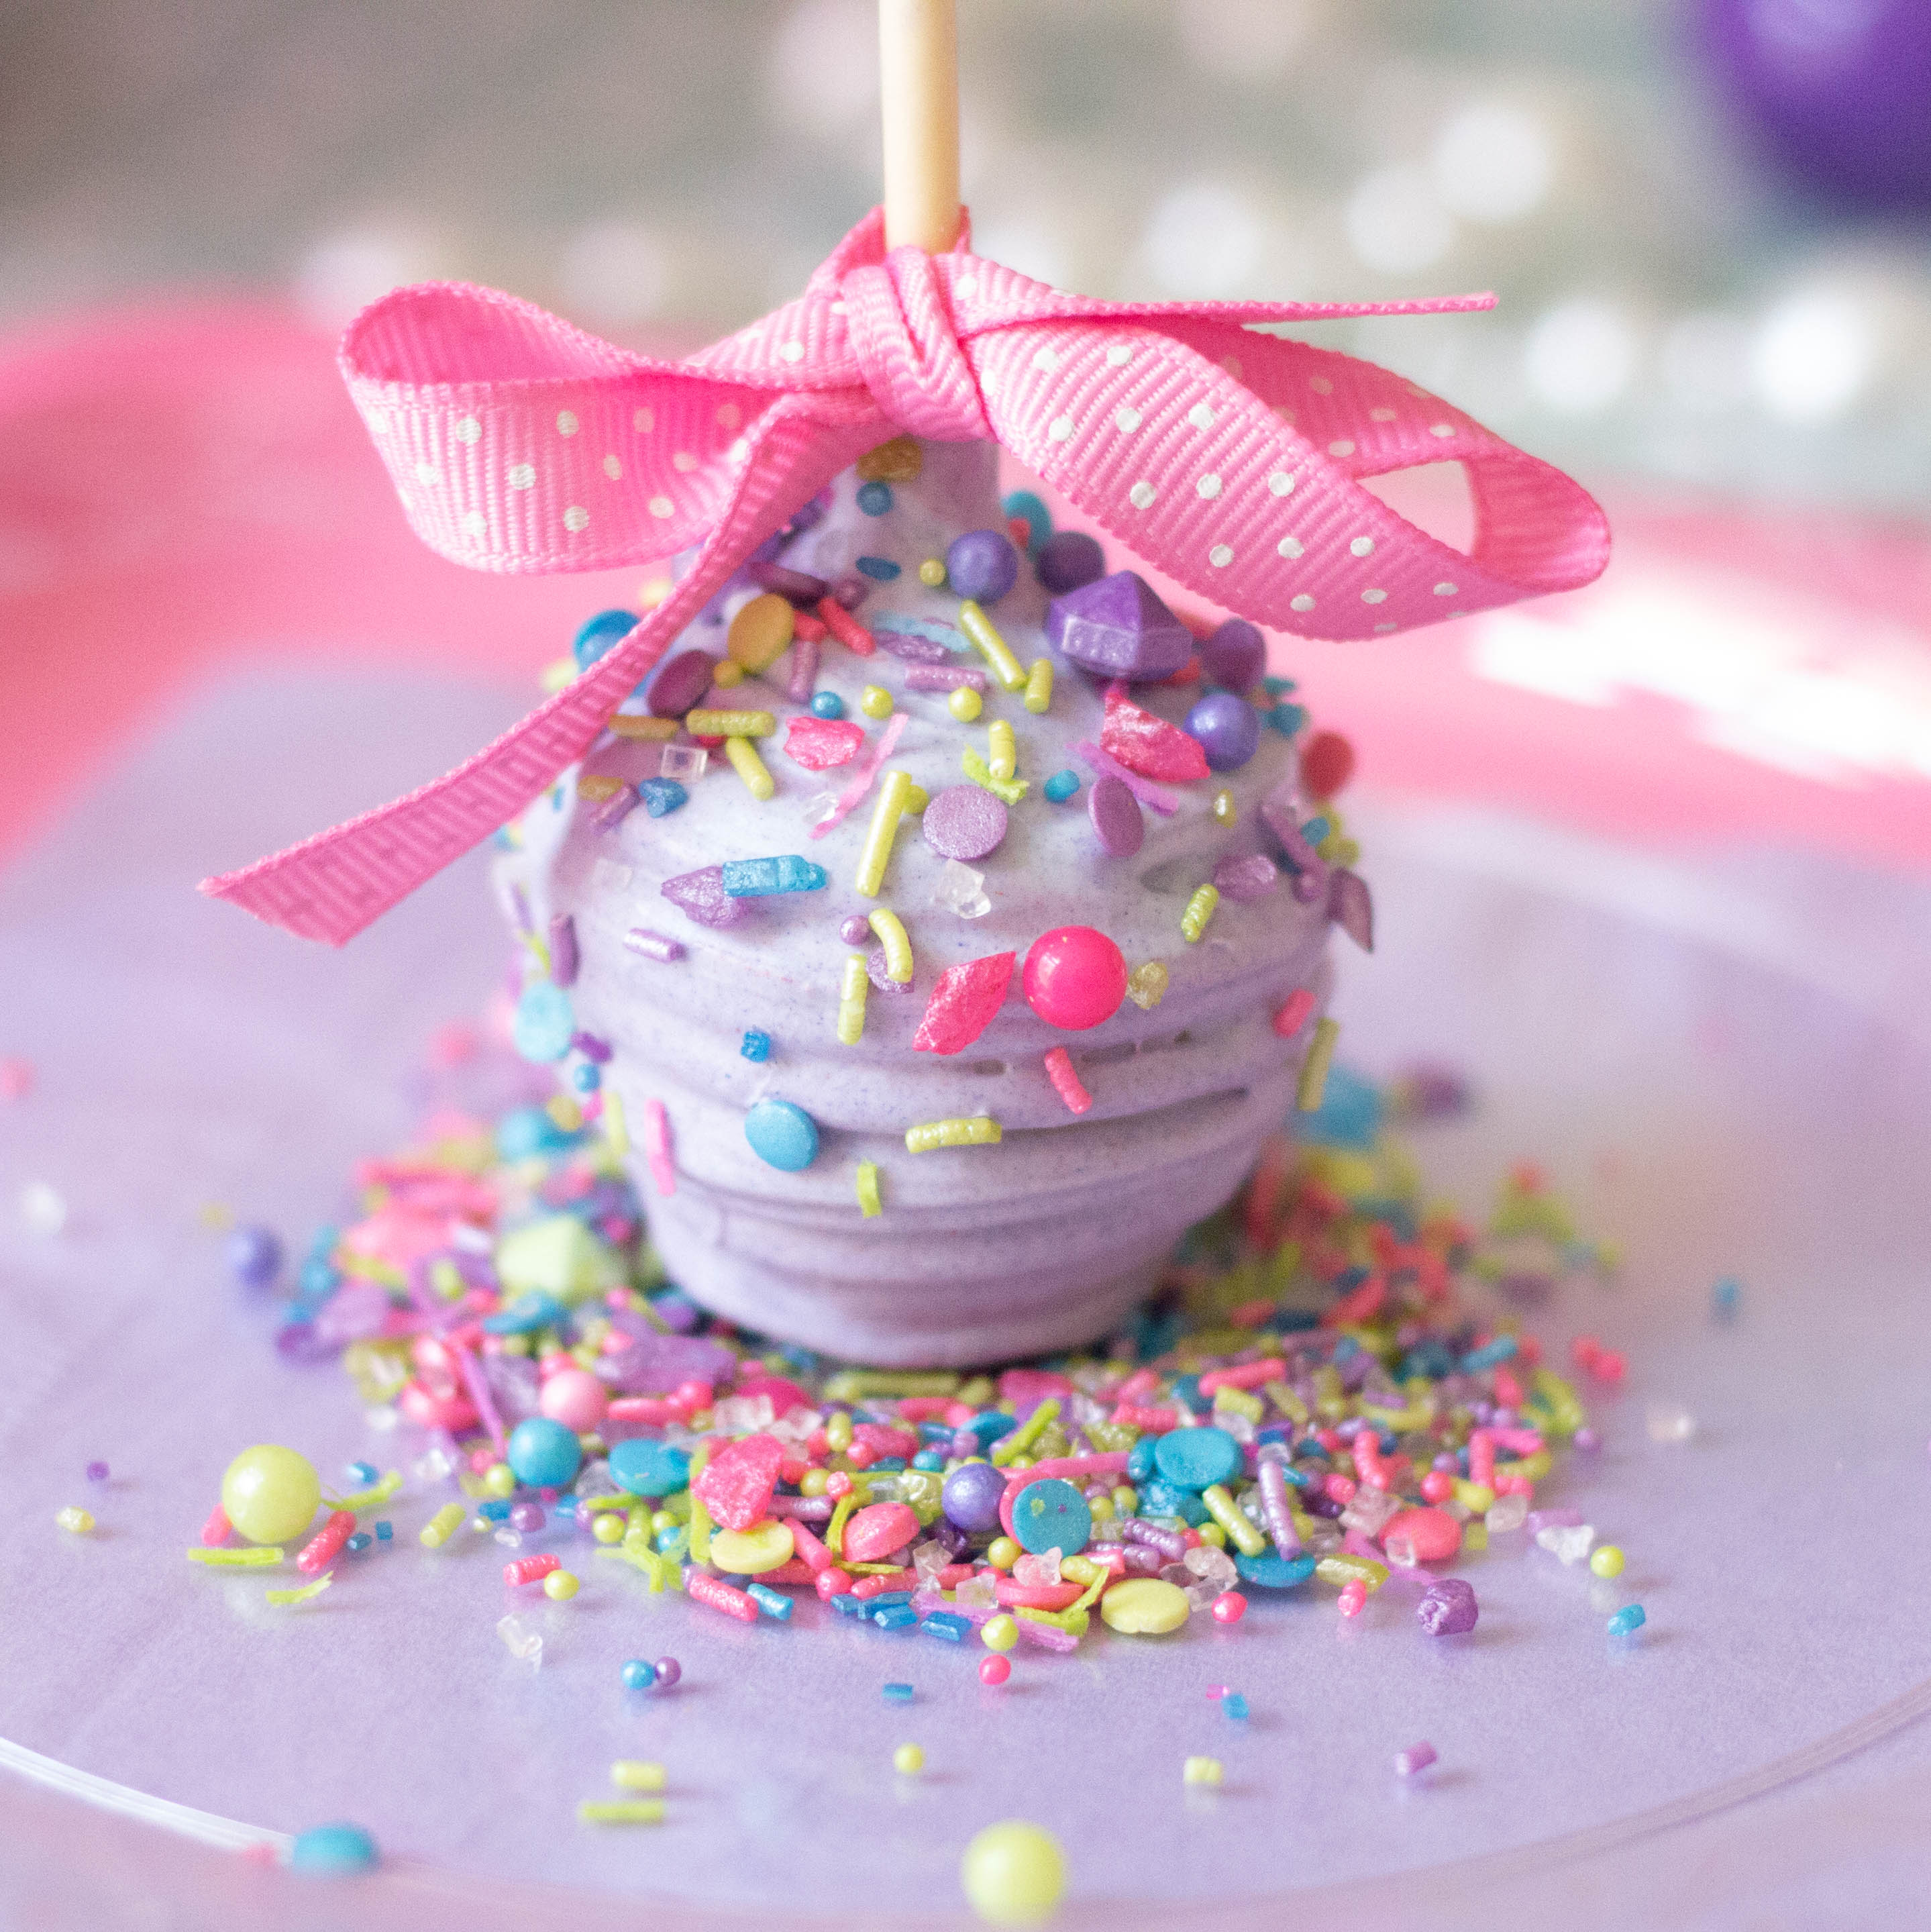
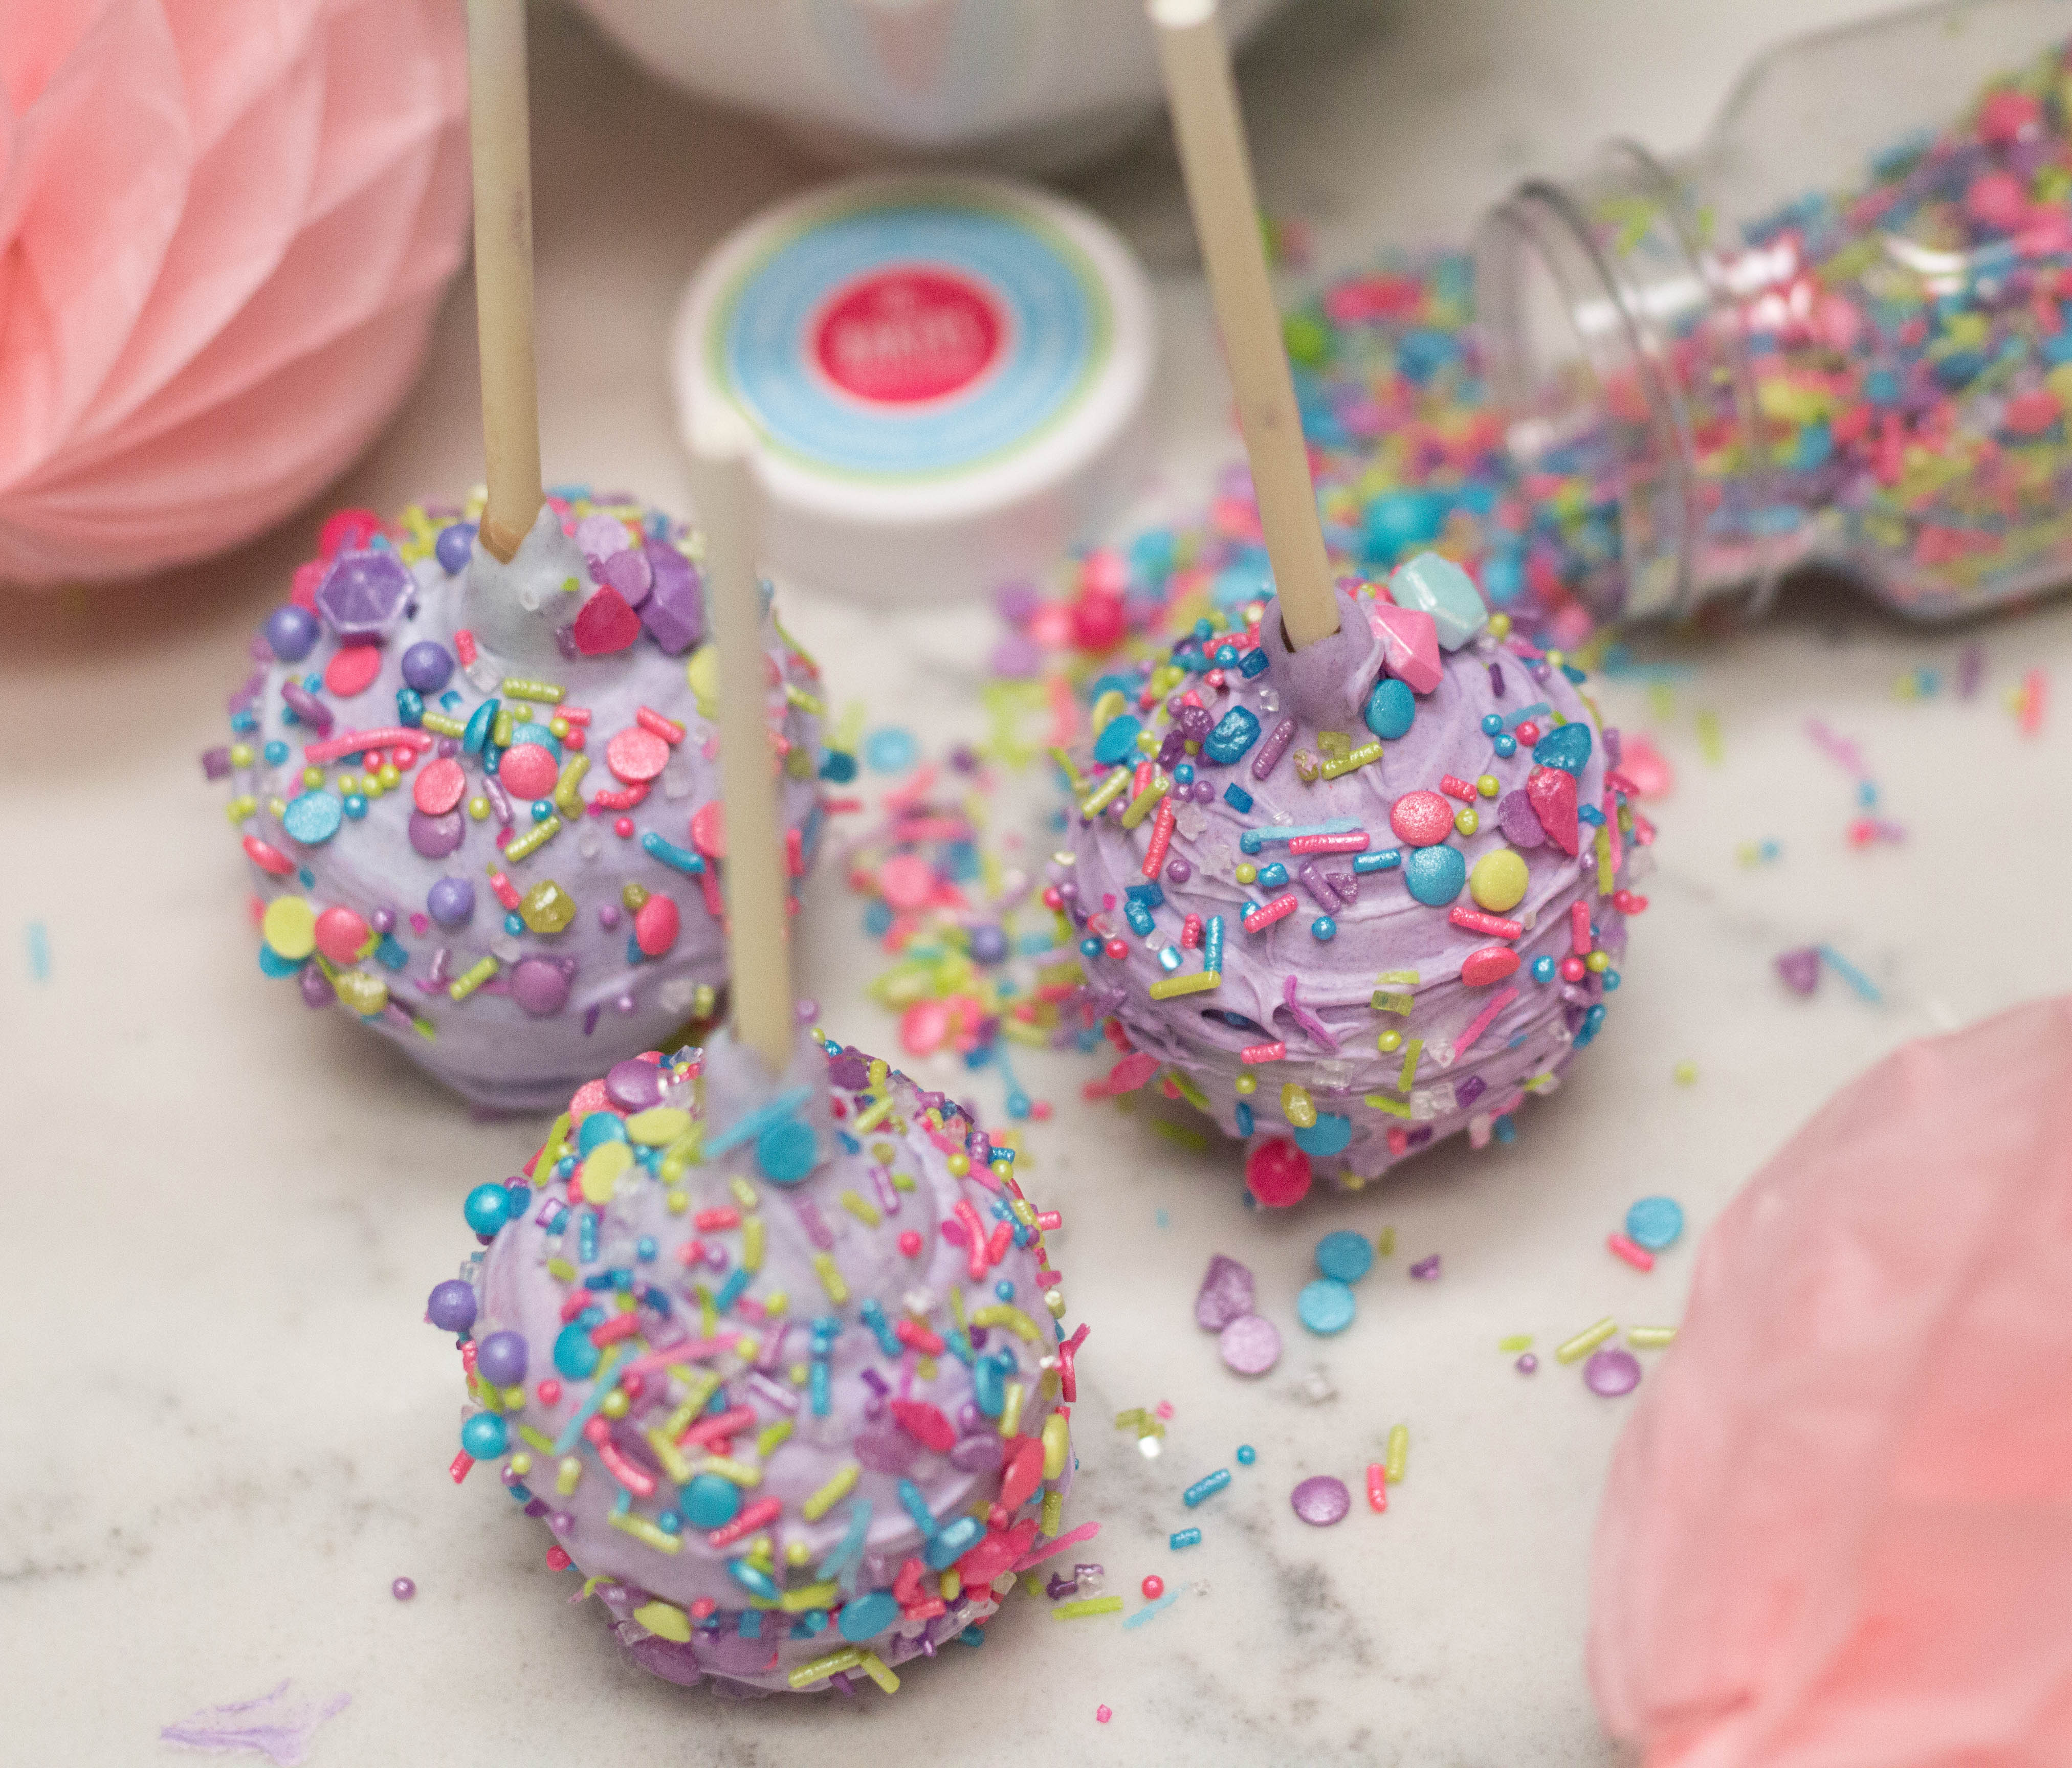
Put the POP in Cake Pops
Wedding cake pops are a fantastic addition to a reception, and look beautiful arranged in a dessert display, or placed at table settings with other table decor. Sprinklefetti makes them extra special!
What You’ll Need:
- Pre-made Cake Pops
- Wilton Pure White Candy Melts
- White Sprinklefetti
- Purple Mini Baking Wrappers
- Adhesive Chalkboard Heart Labels
Pour about 1/2 cup White Sprinklefetti into a small bowl and set aside.
 In the microwave, melt the candy melts until smooth and creamy. Dip the cake pops into the melted chocolate and gently twist to coat. Carefully tap off the excess, then lay each side of the pop into the bowl of Sprinklefetti until well covered.
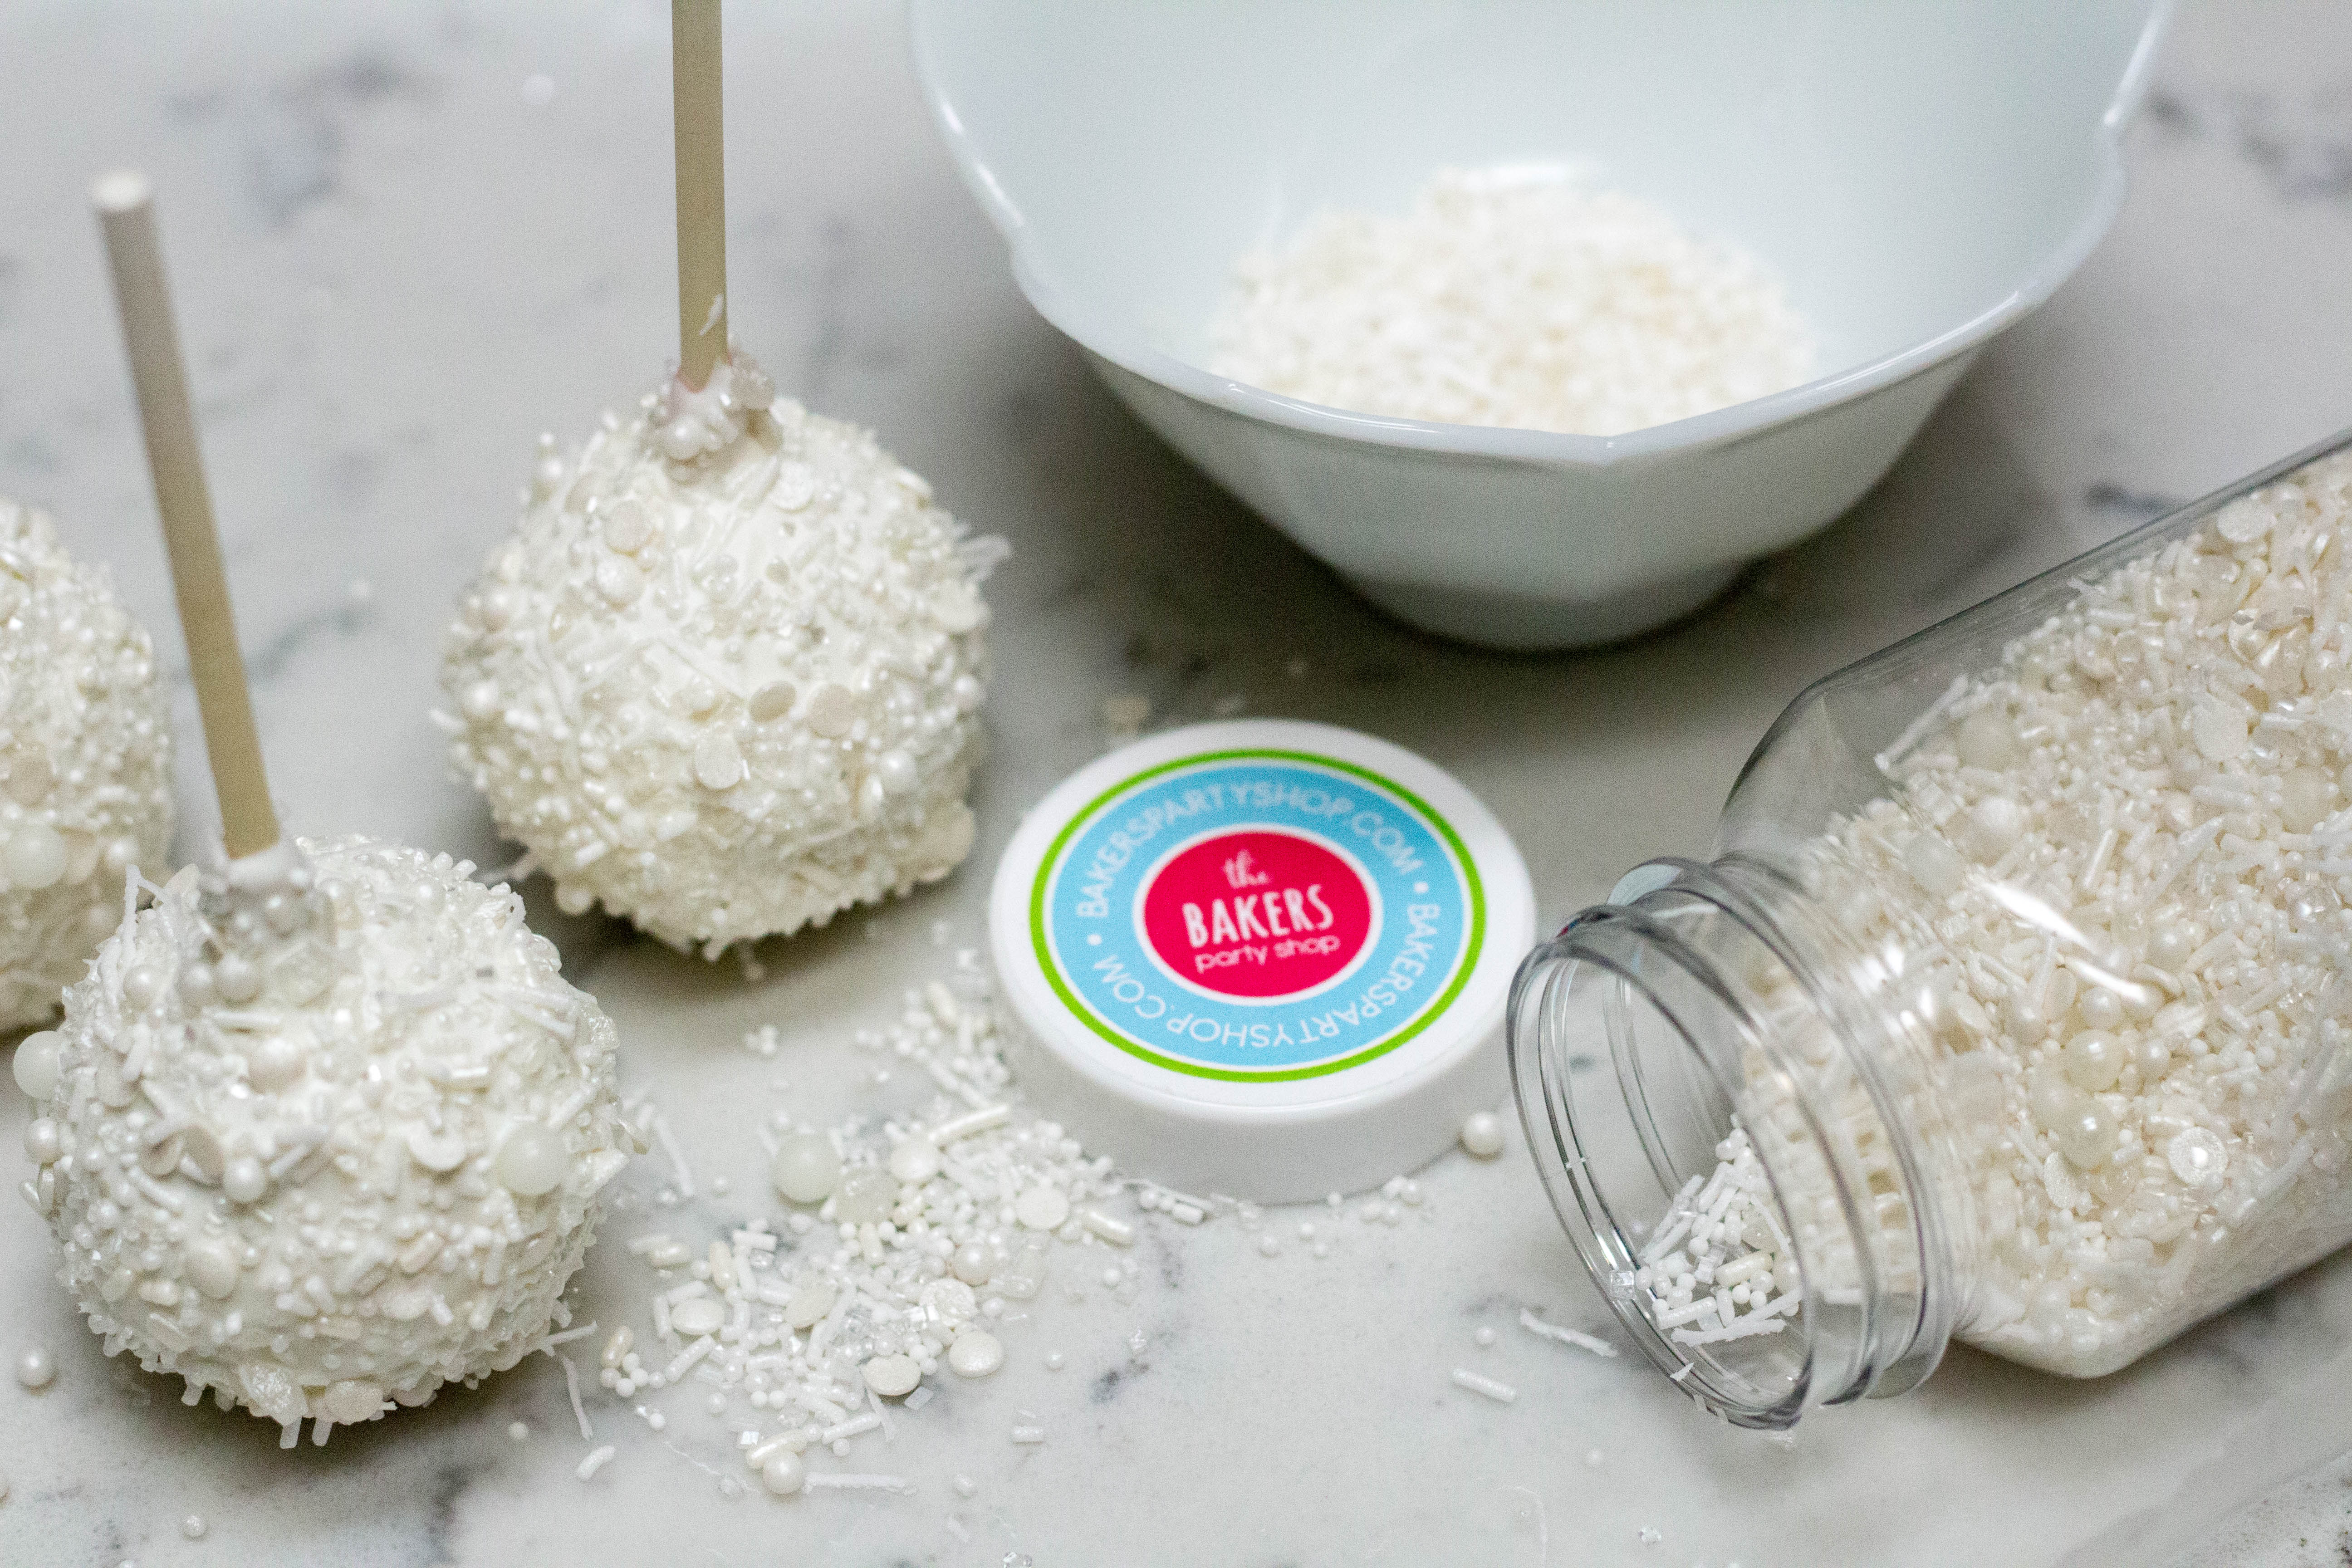
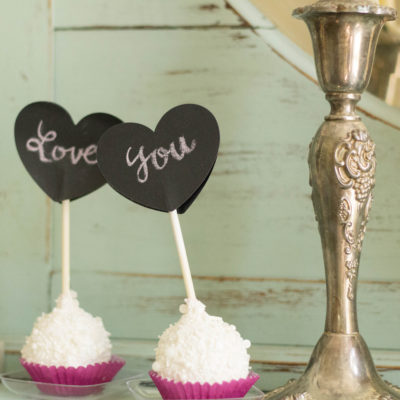
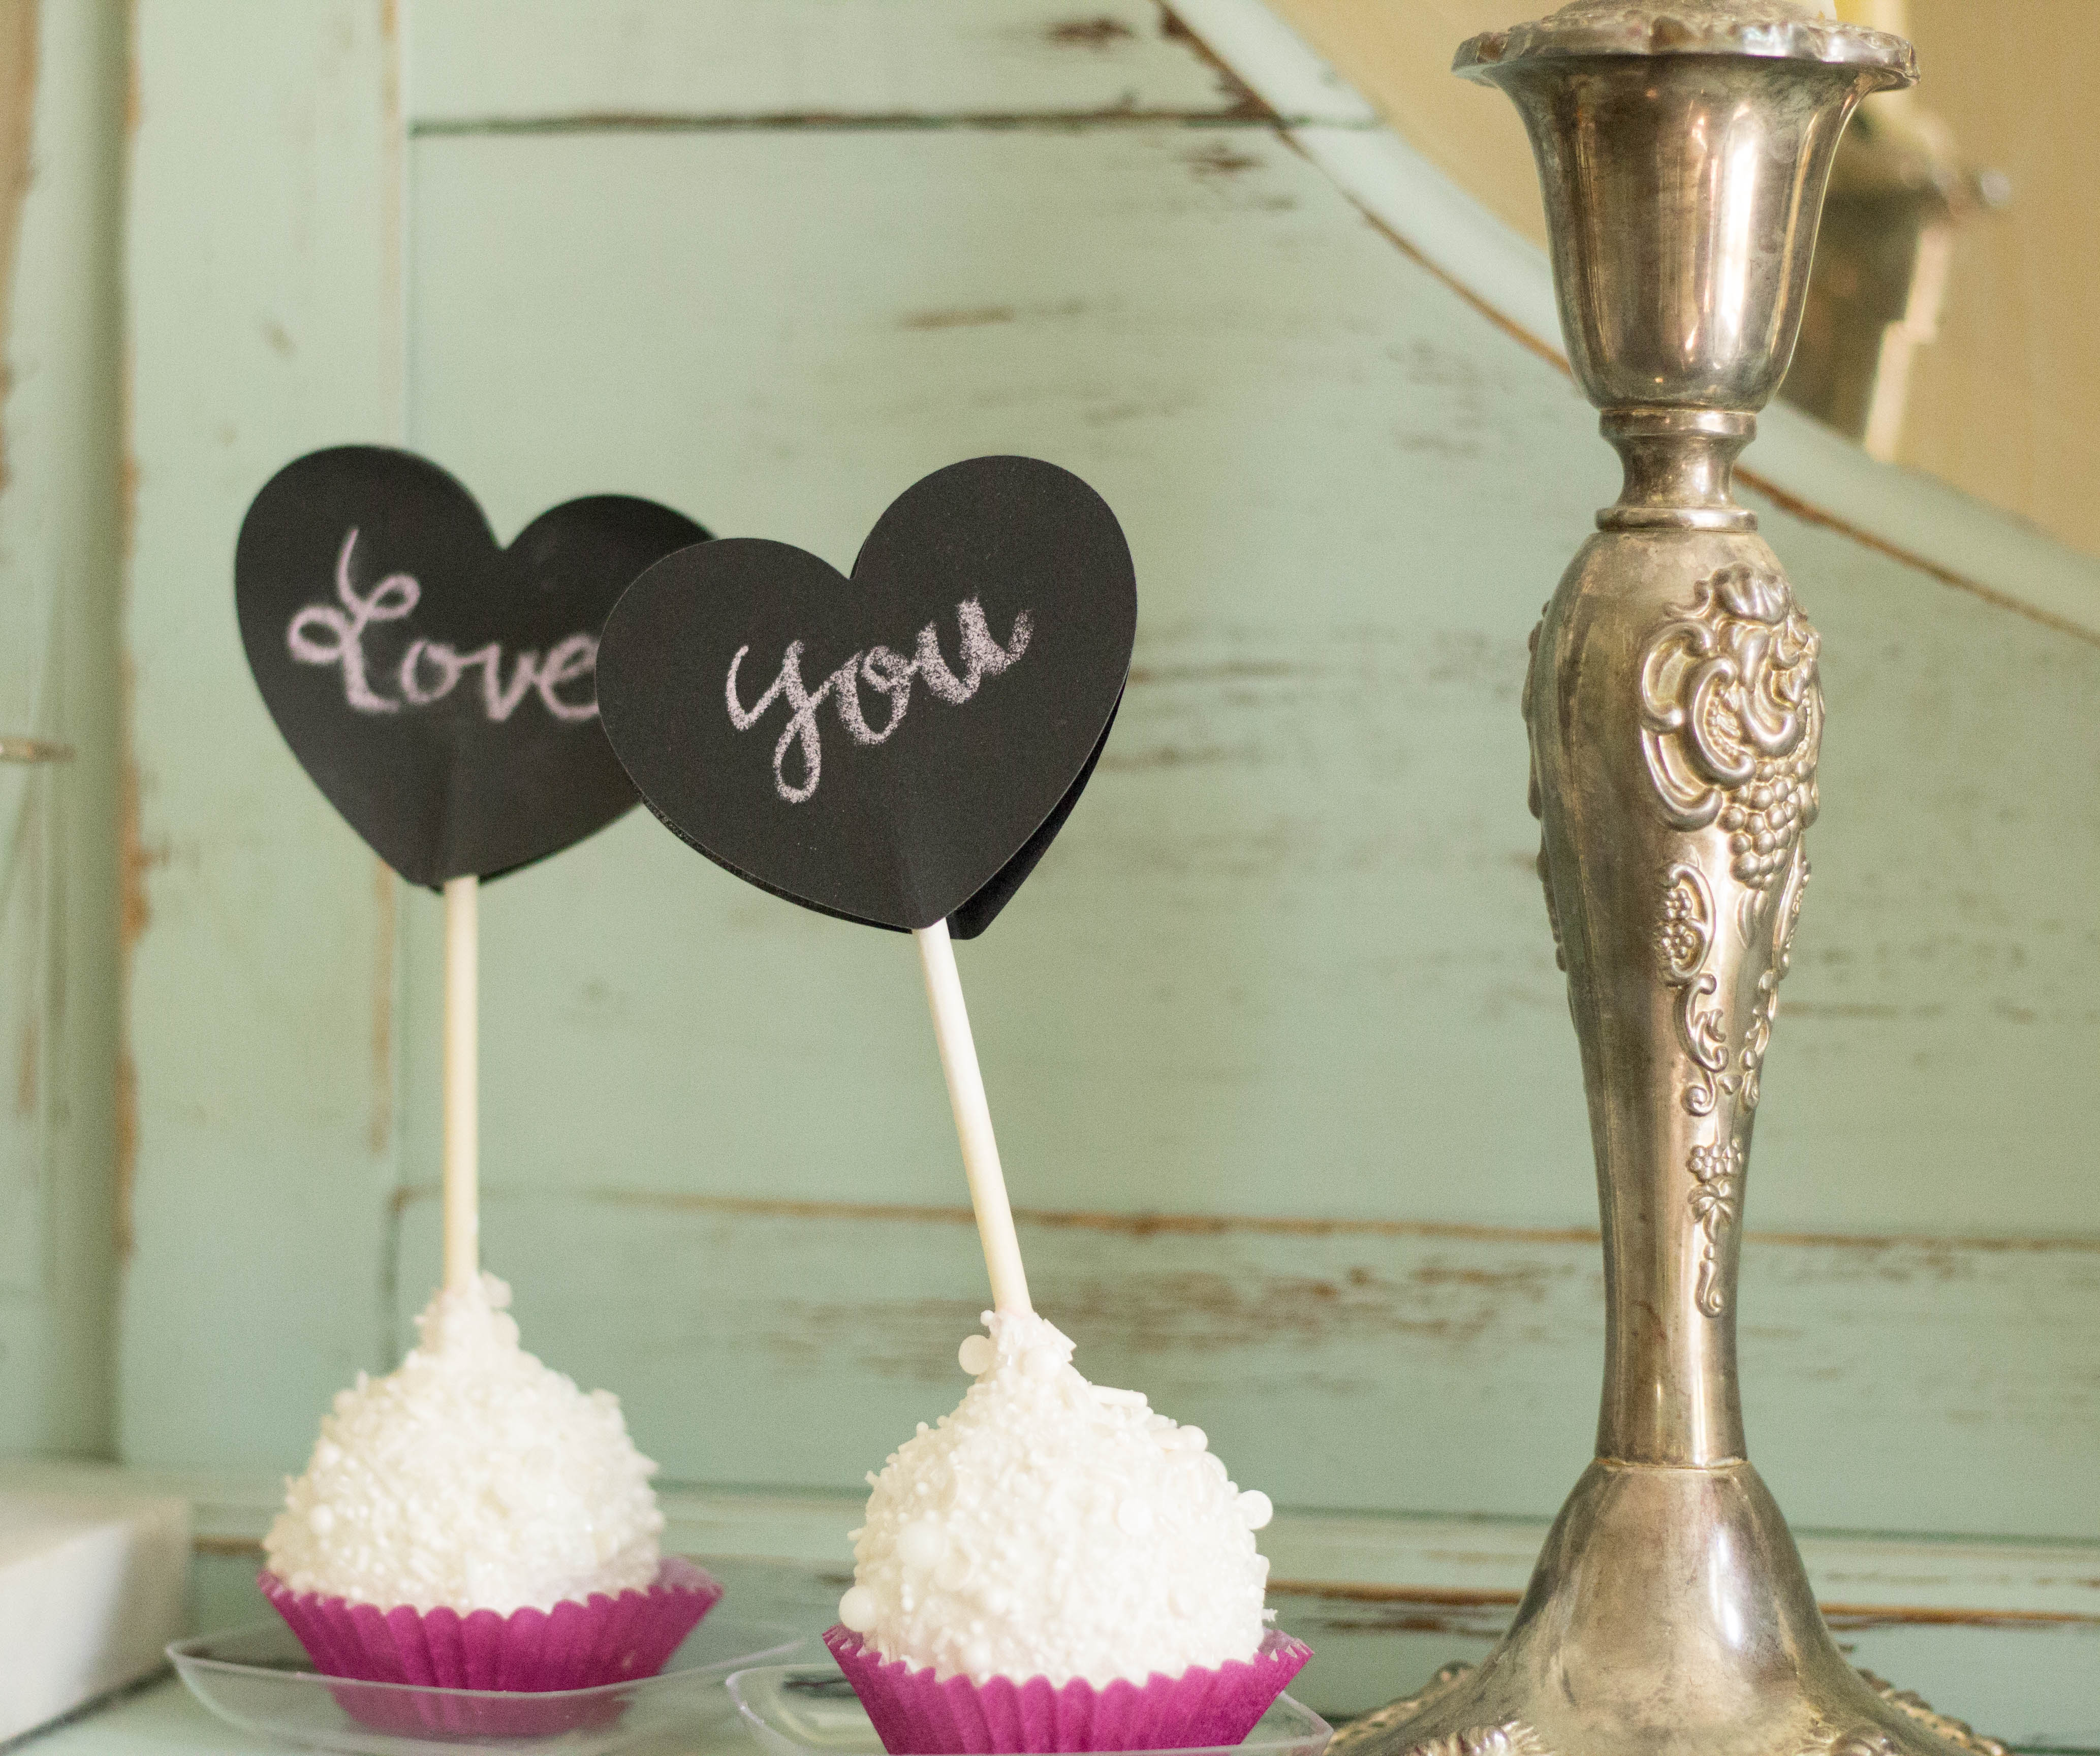
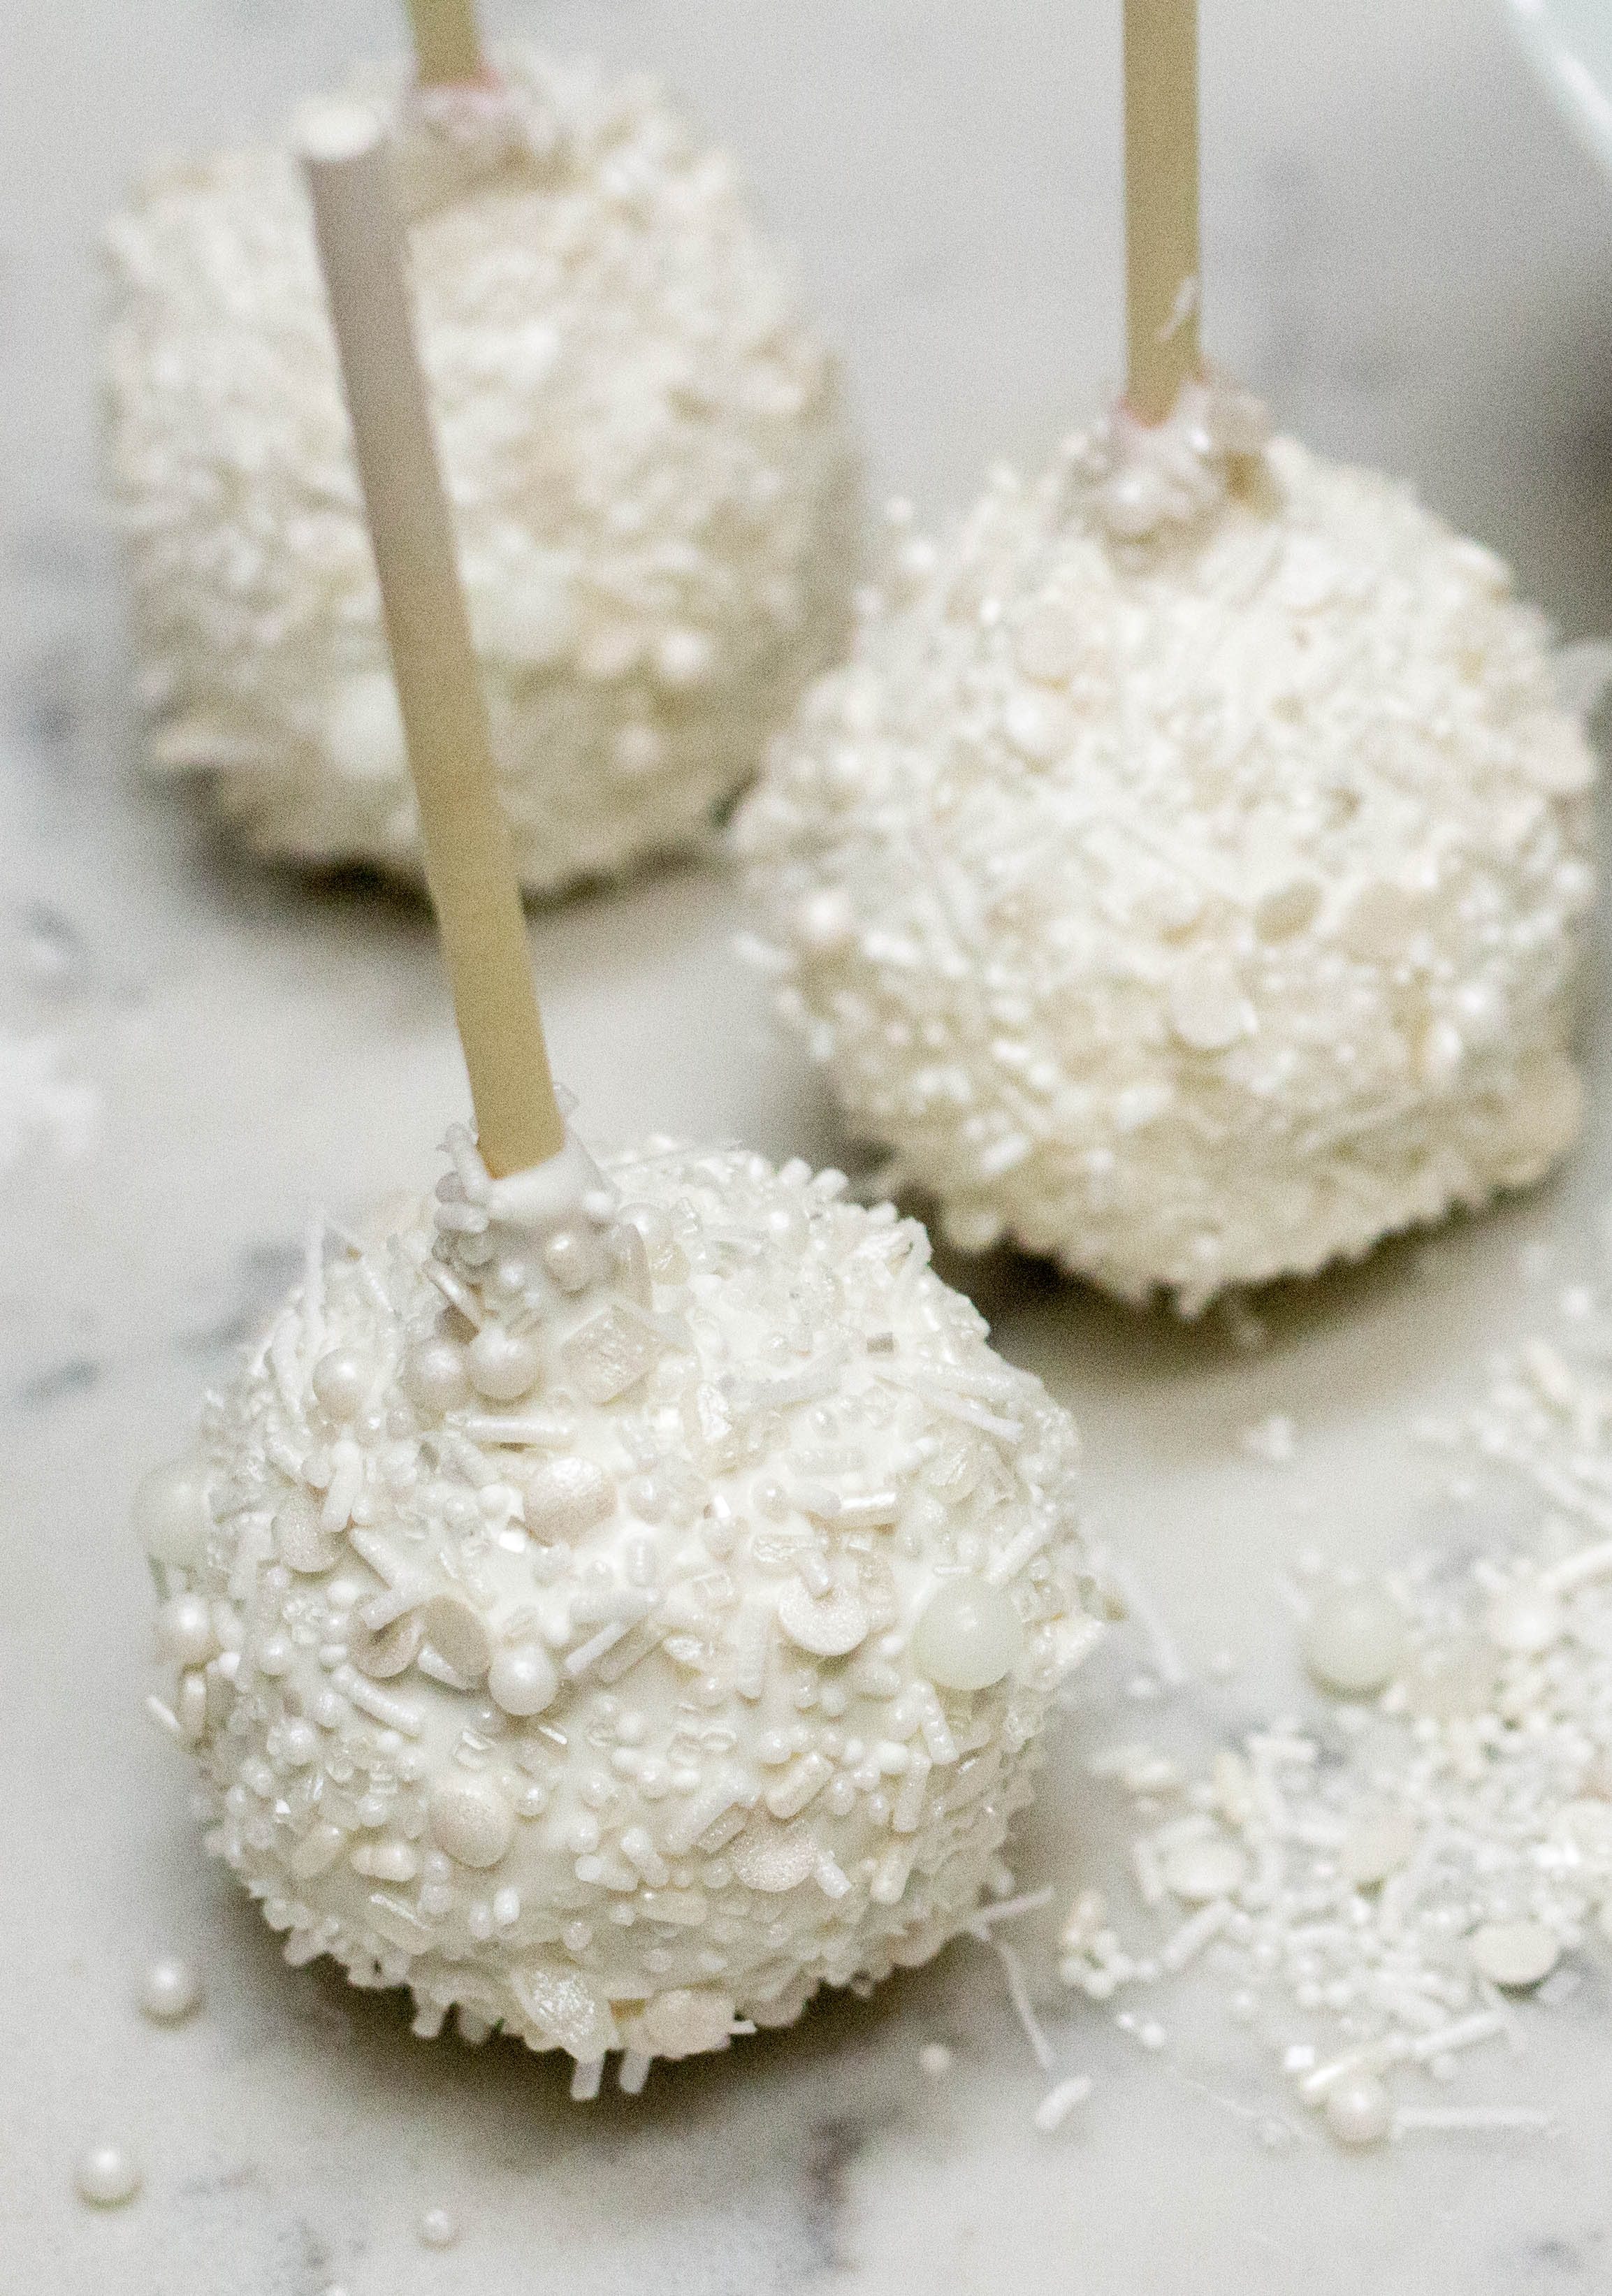 Place pops on waxed paper until the chocolate has set. I used these pretty purple mini baking wraps, and added two chalkboard heart labels, (adhered back to back), to top the sticks.
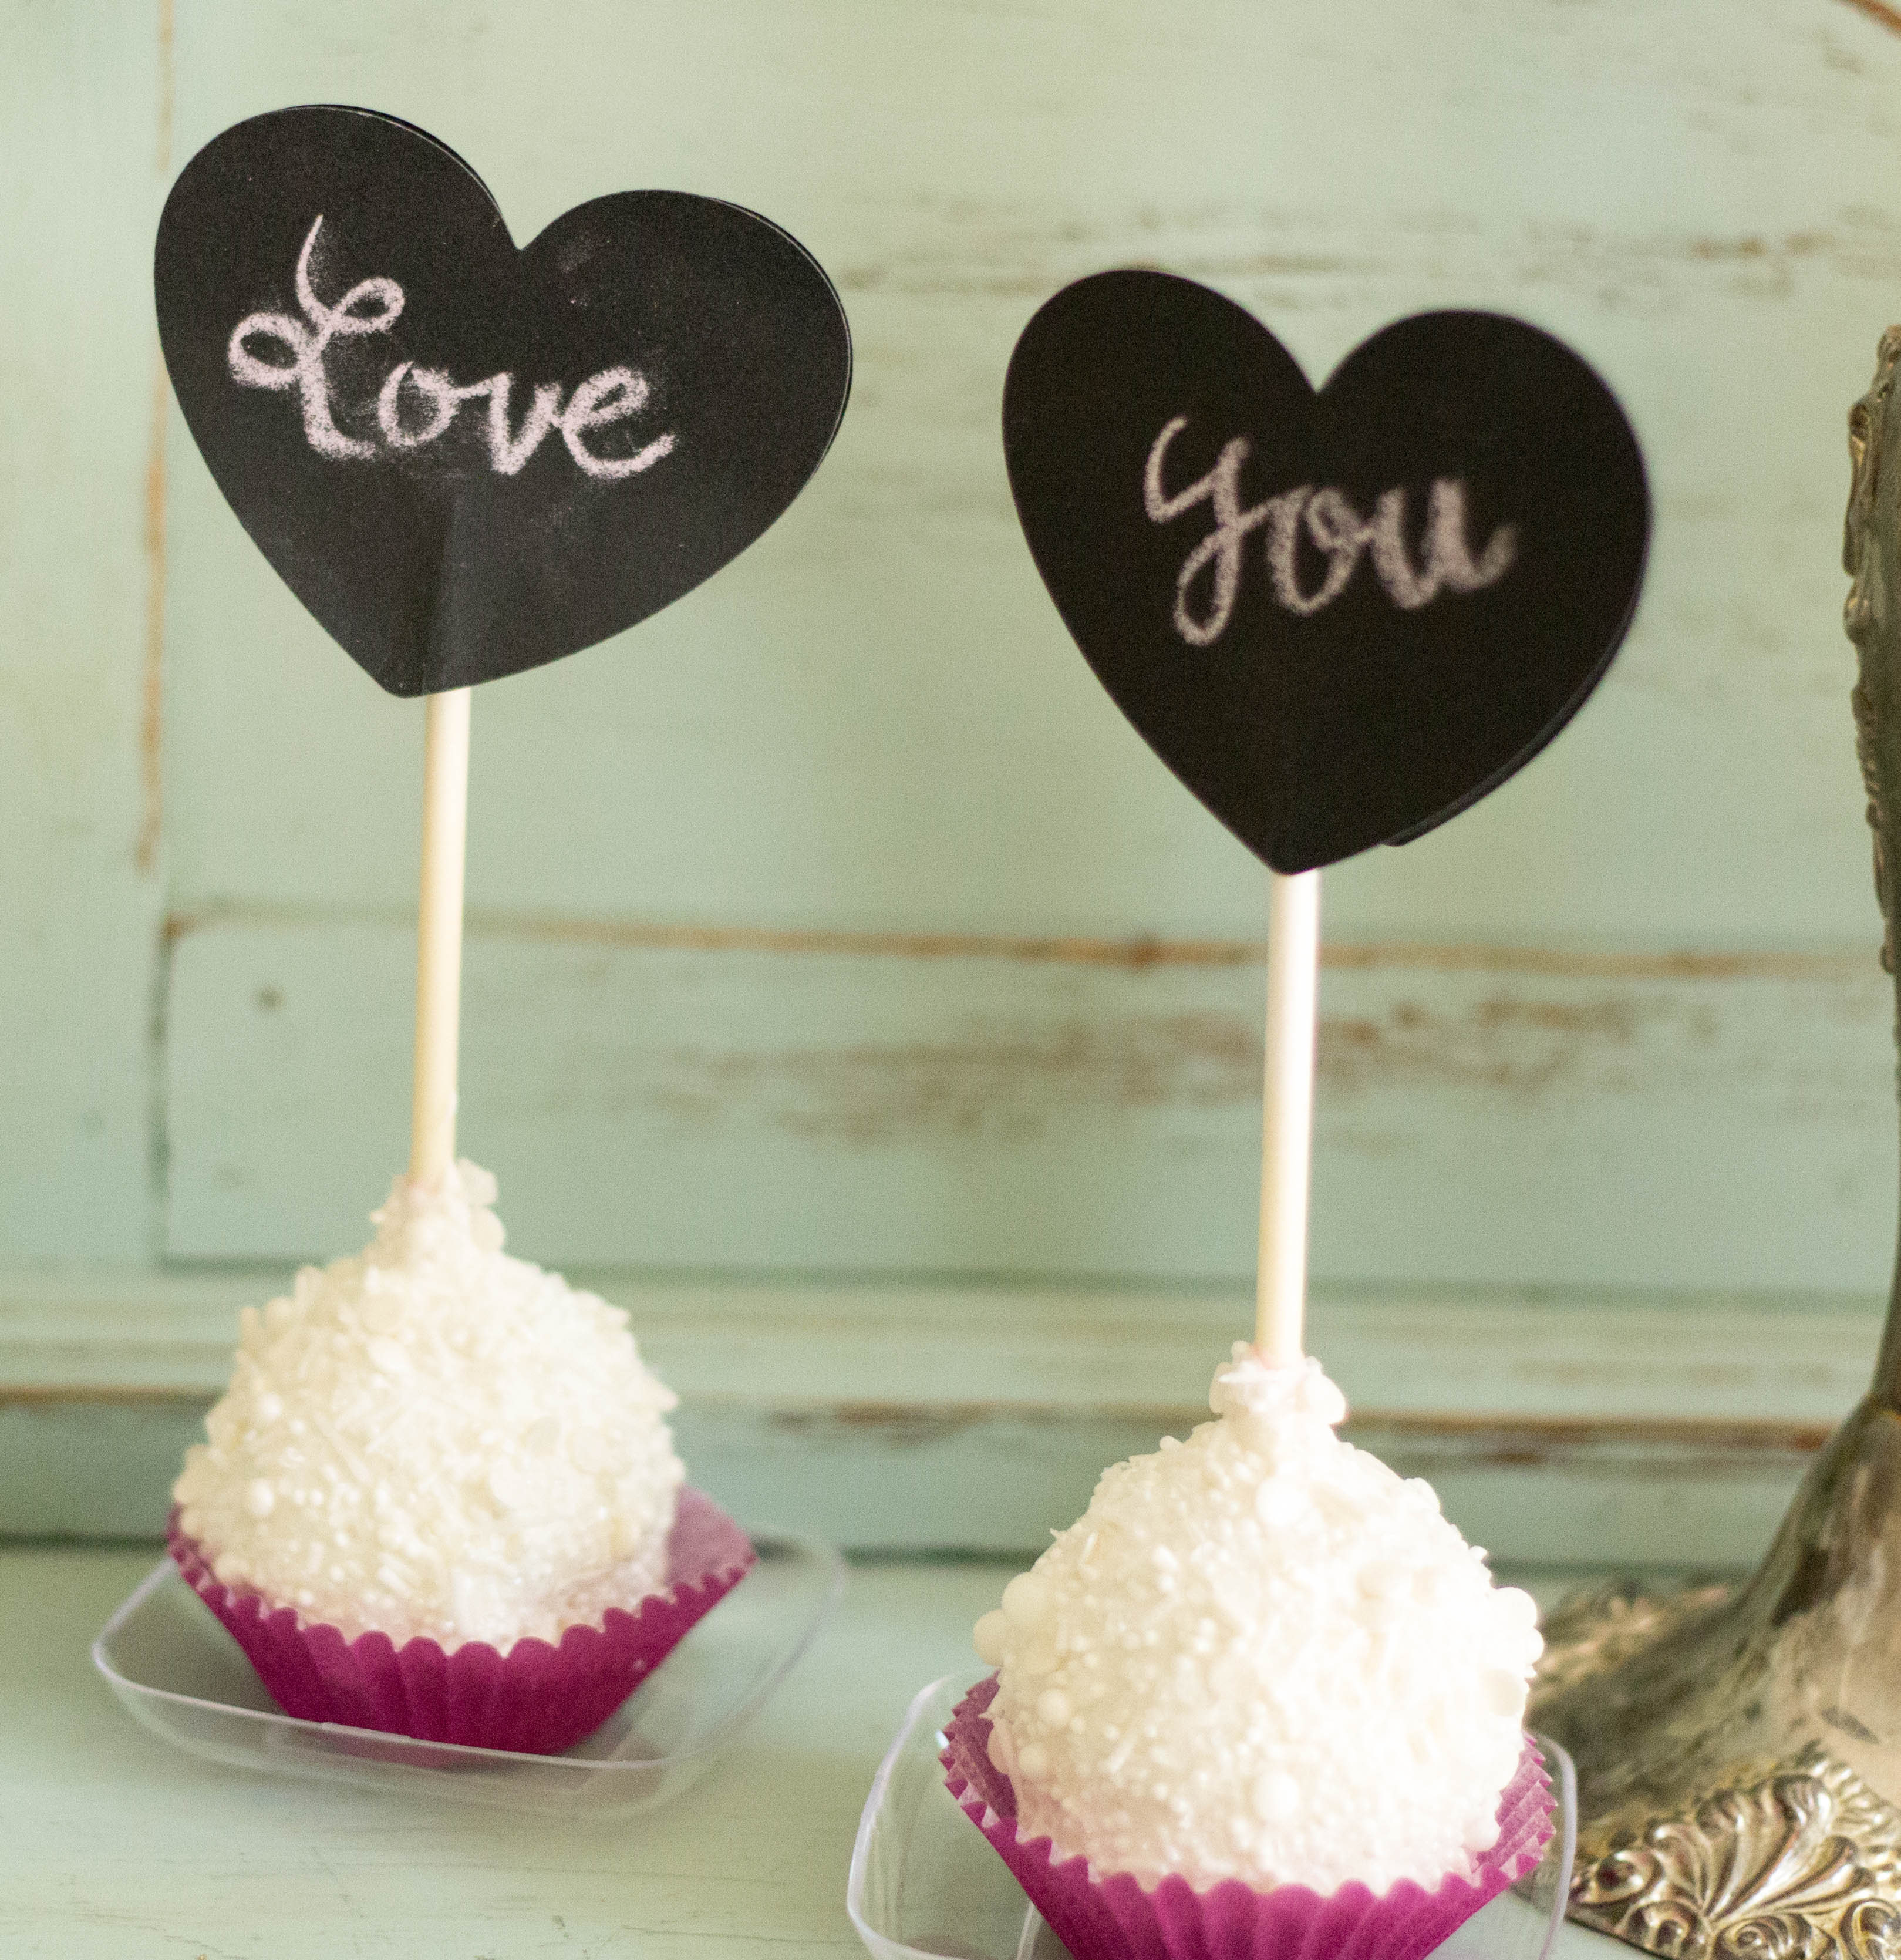 I love these because you can write any message you like on them for an extra personalized touch!
Fancy Favors Aren’t Just For Weddings!
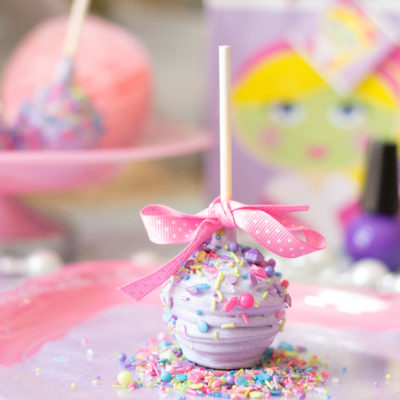
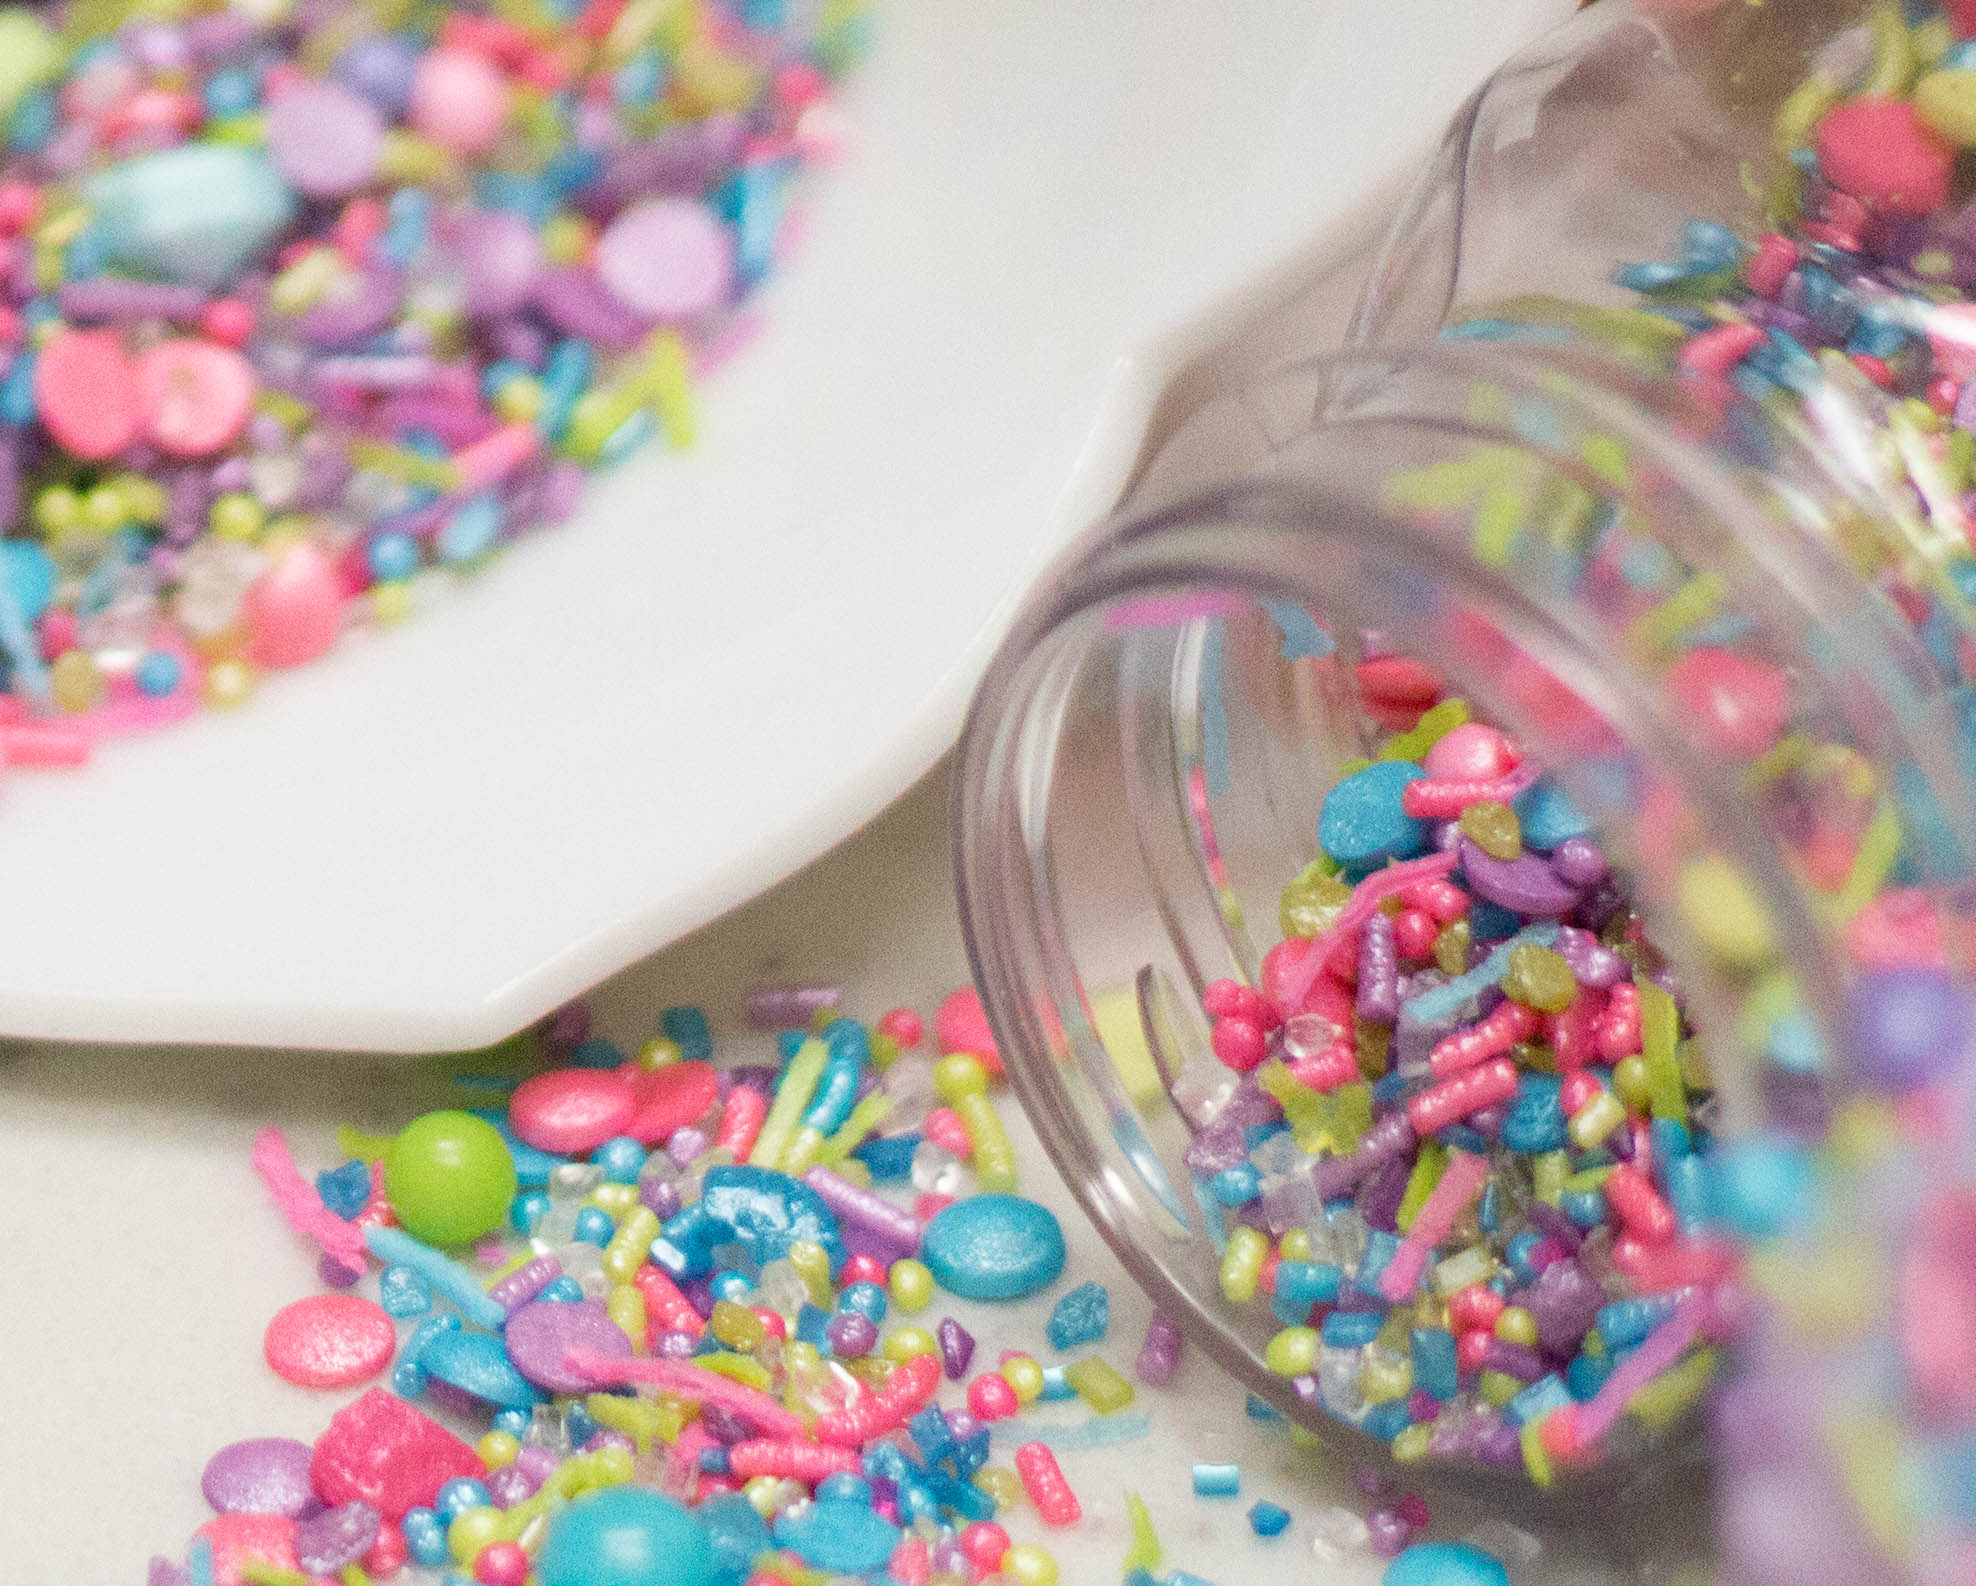
These DIY favors aren’t just perfect for weddings; kids love them too! I’ve used the same technique described above to create these brightly colored cake pops for a Girl’s Spa Party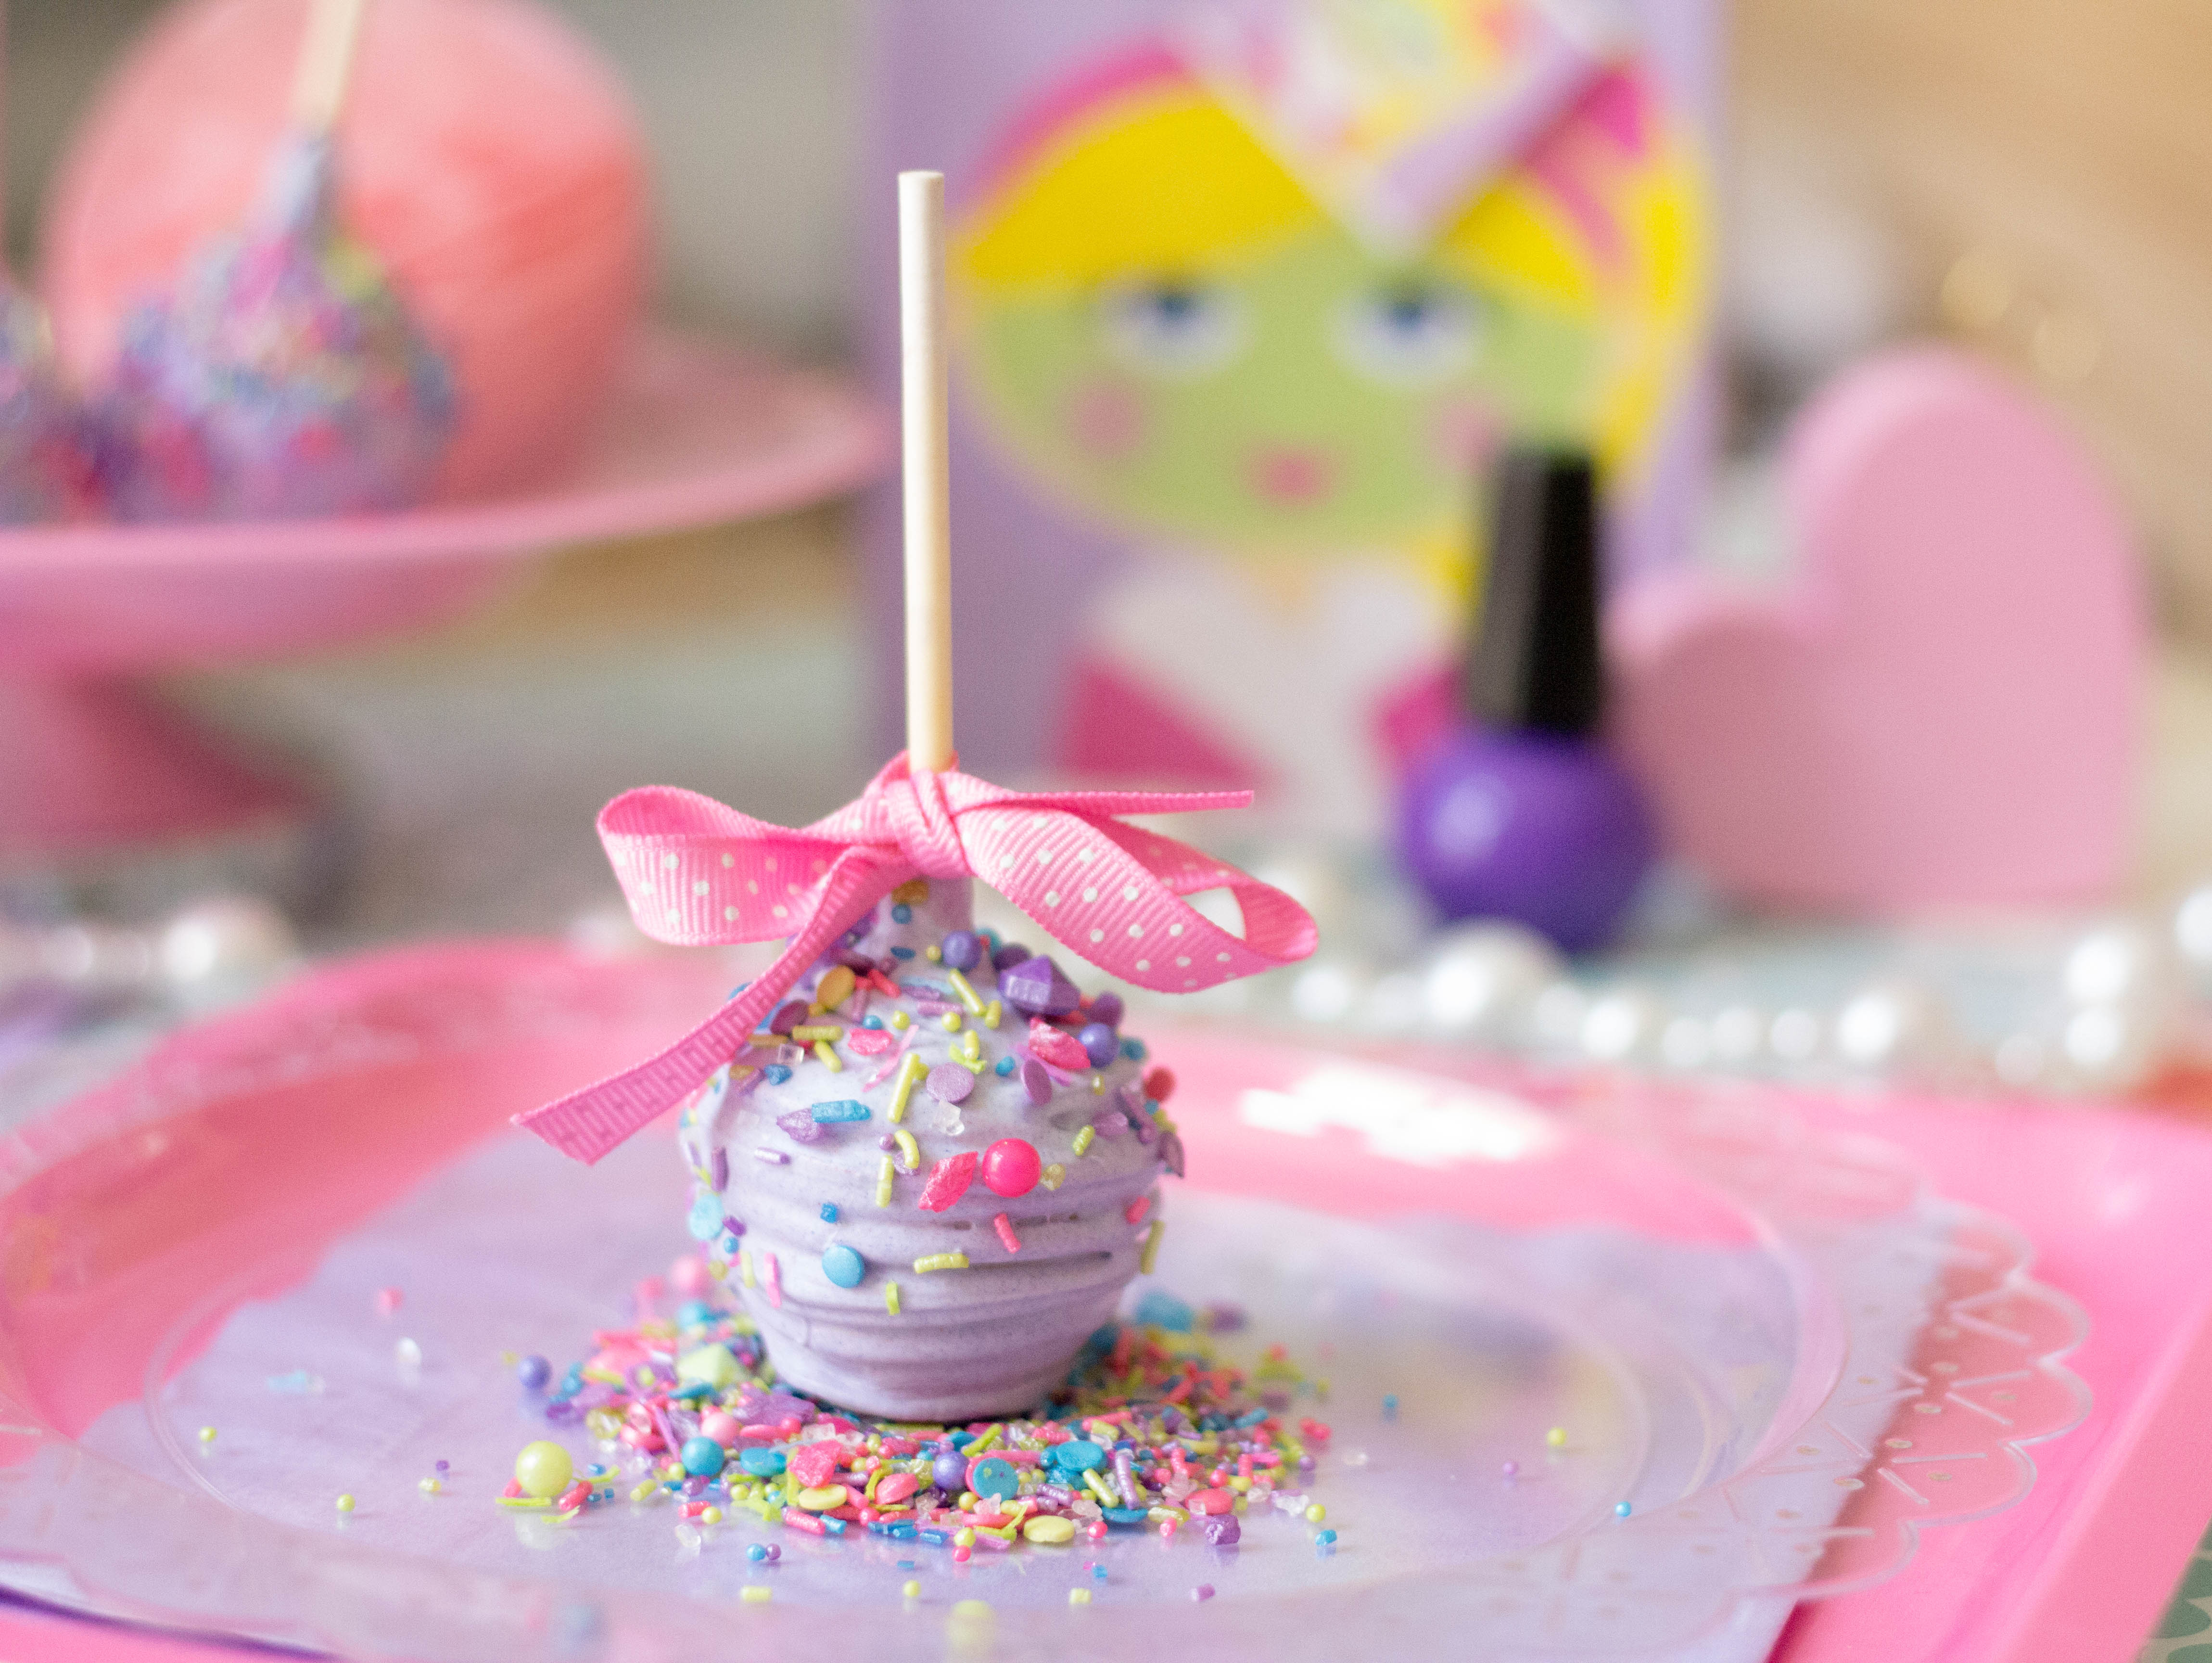 . The Jewel Tone Sprinklefetti is amazing with its blend of colors and tiny jewel shaped pieces.
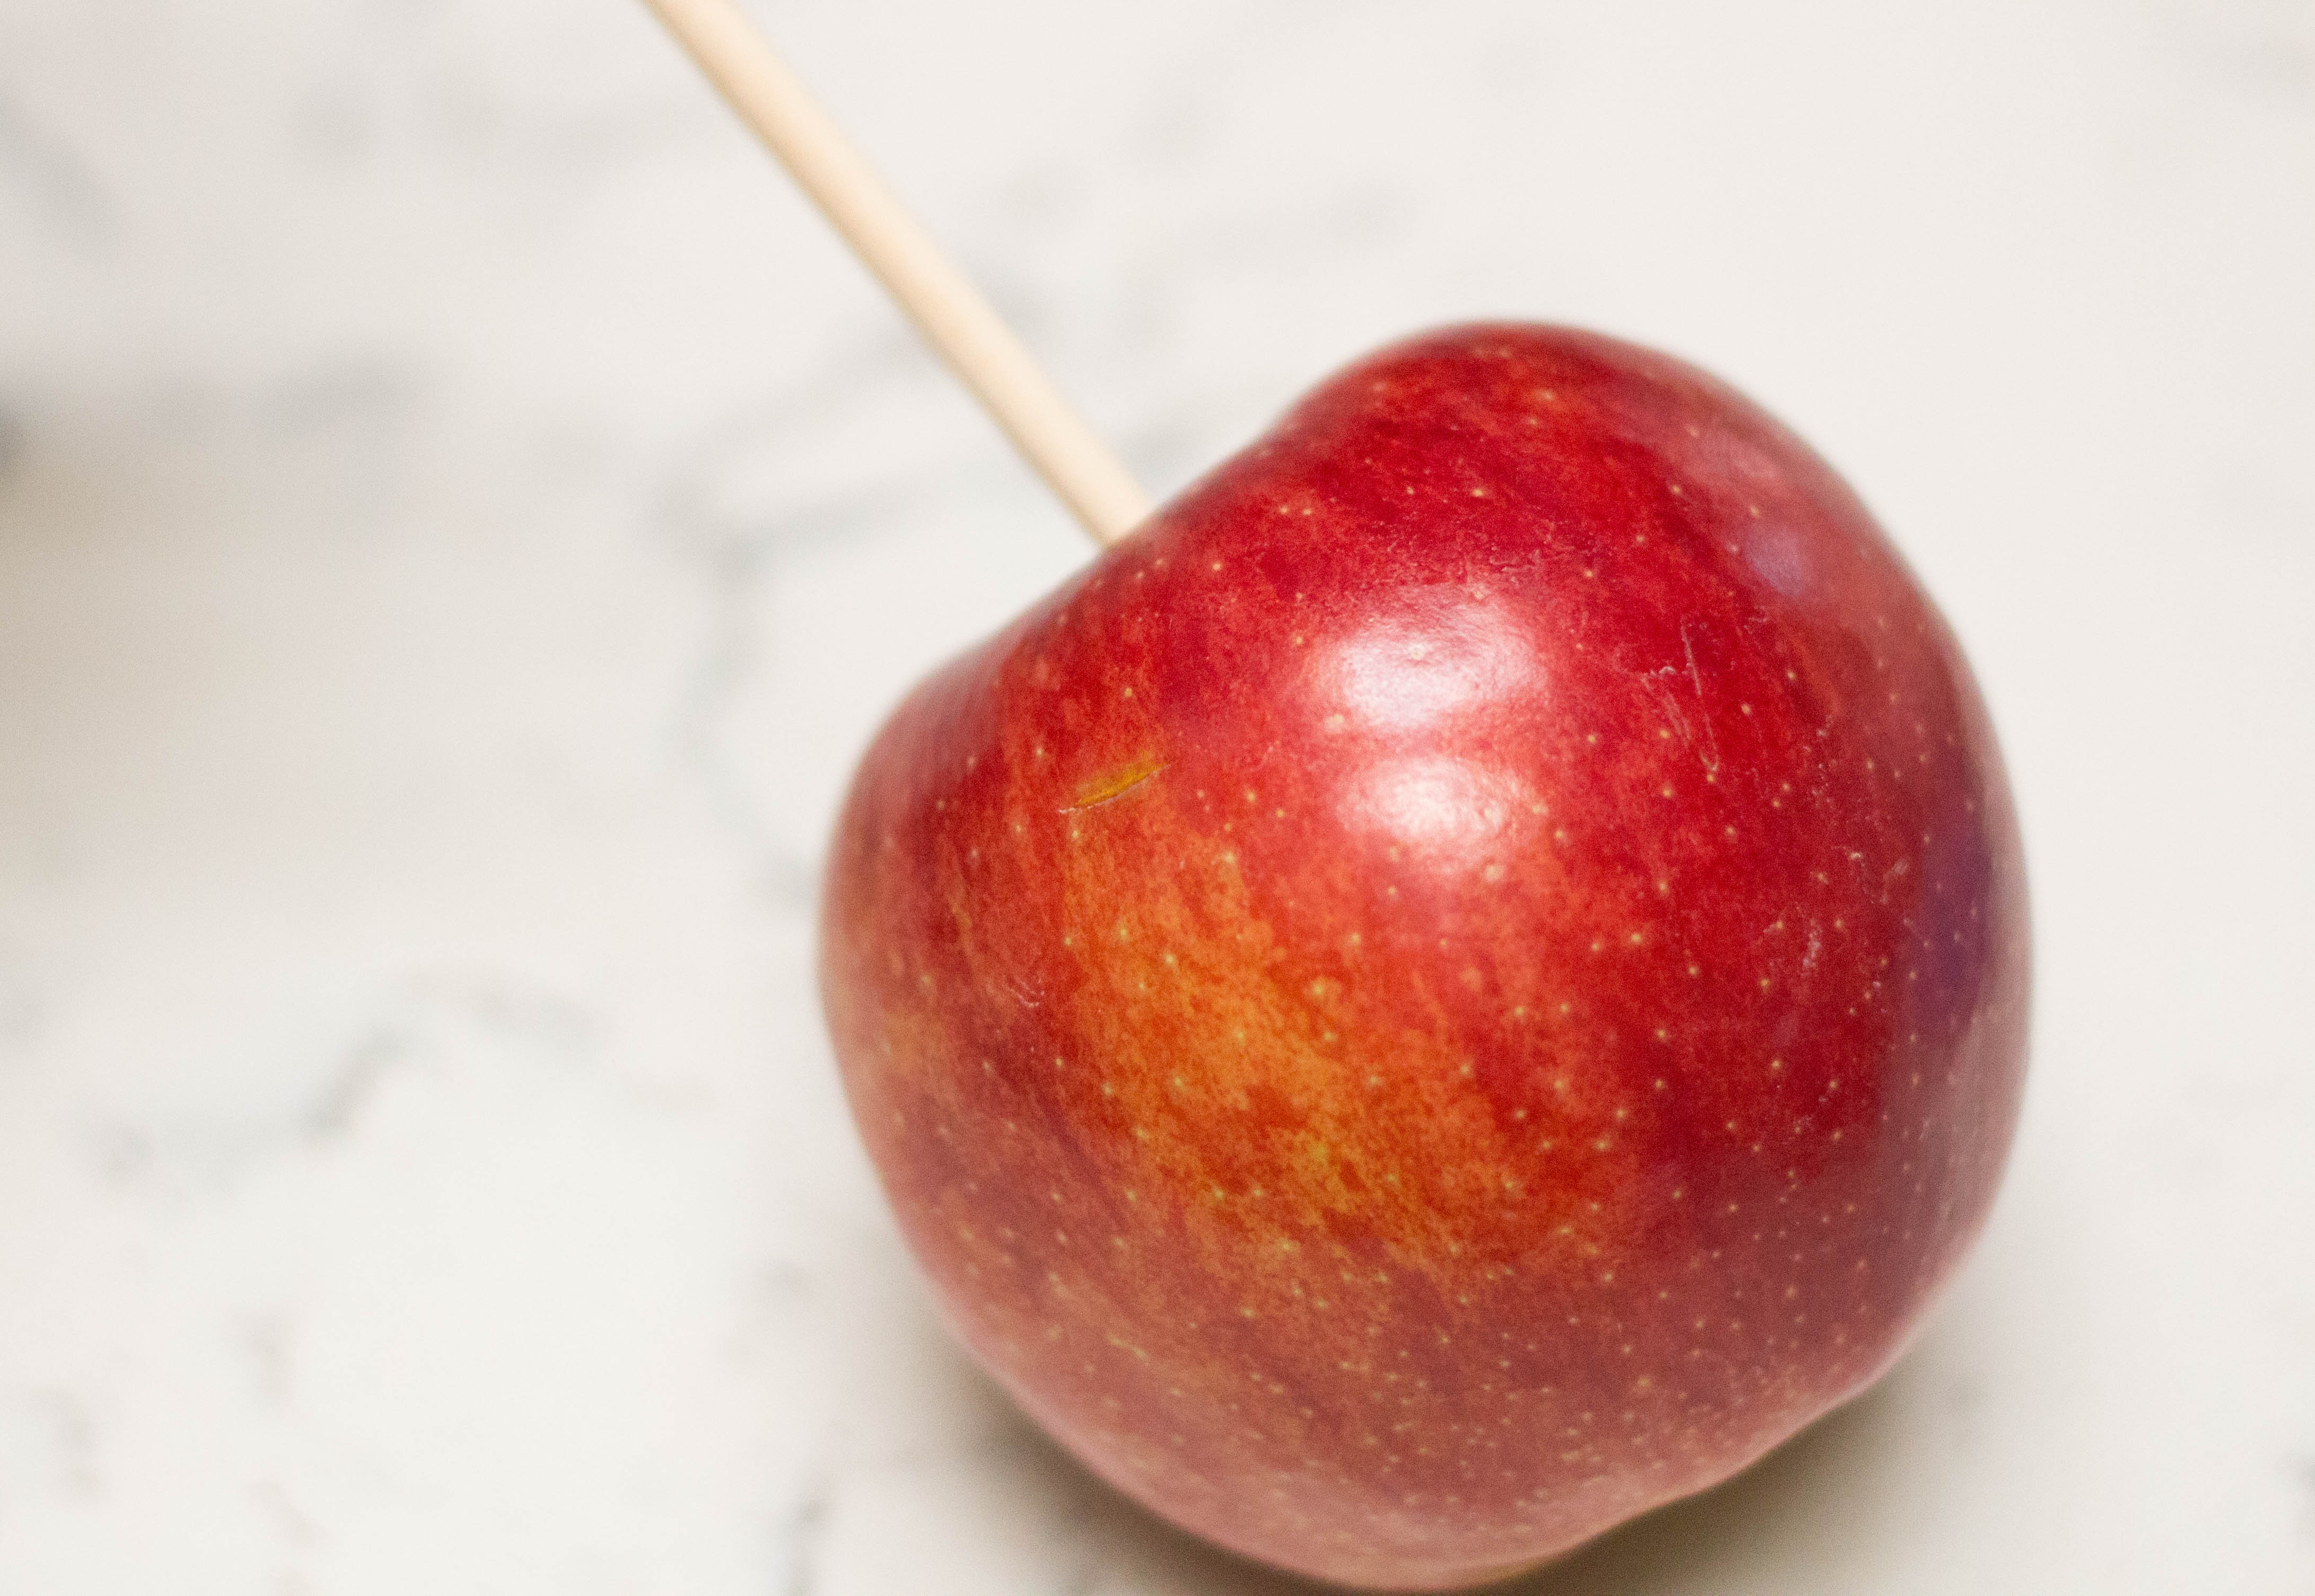
The Apple of Your Guest’s Eye
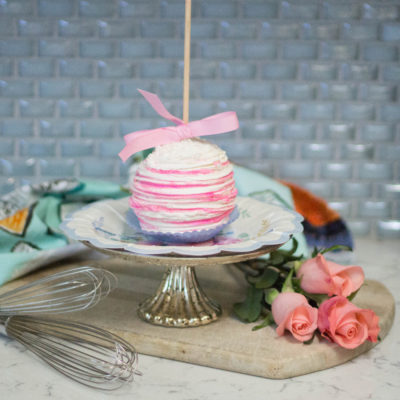
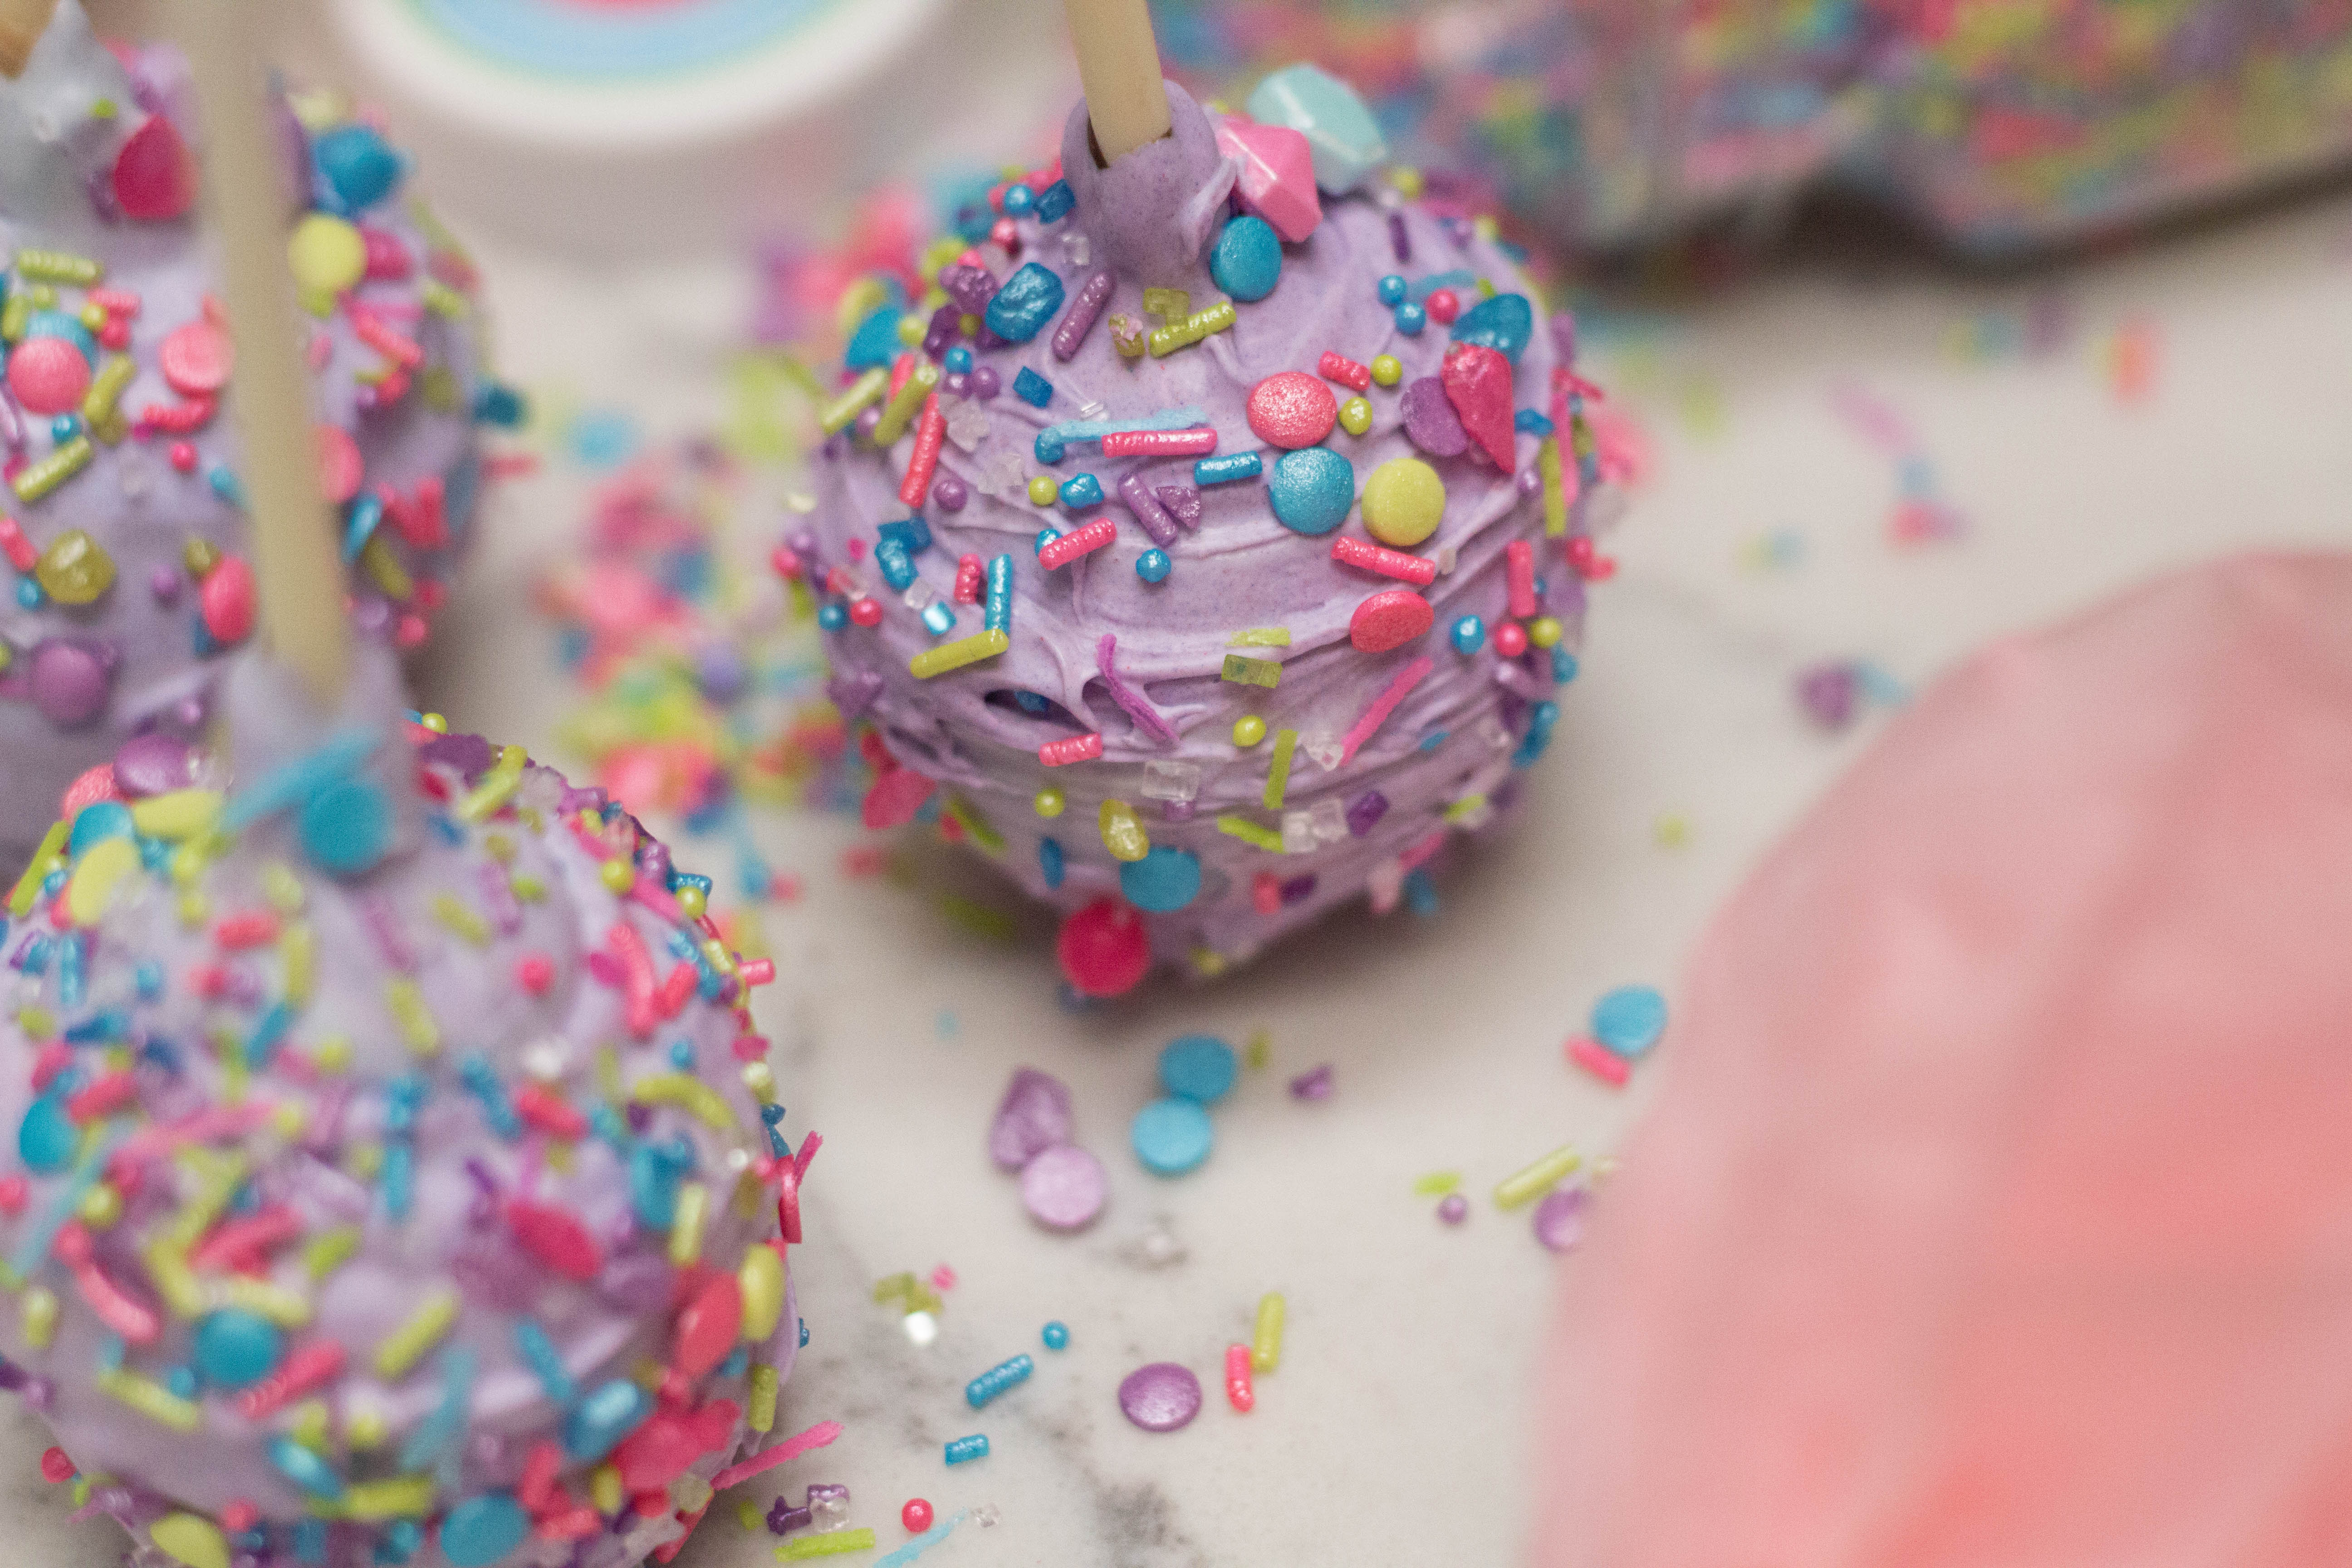
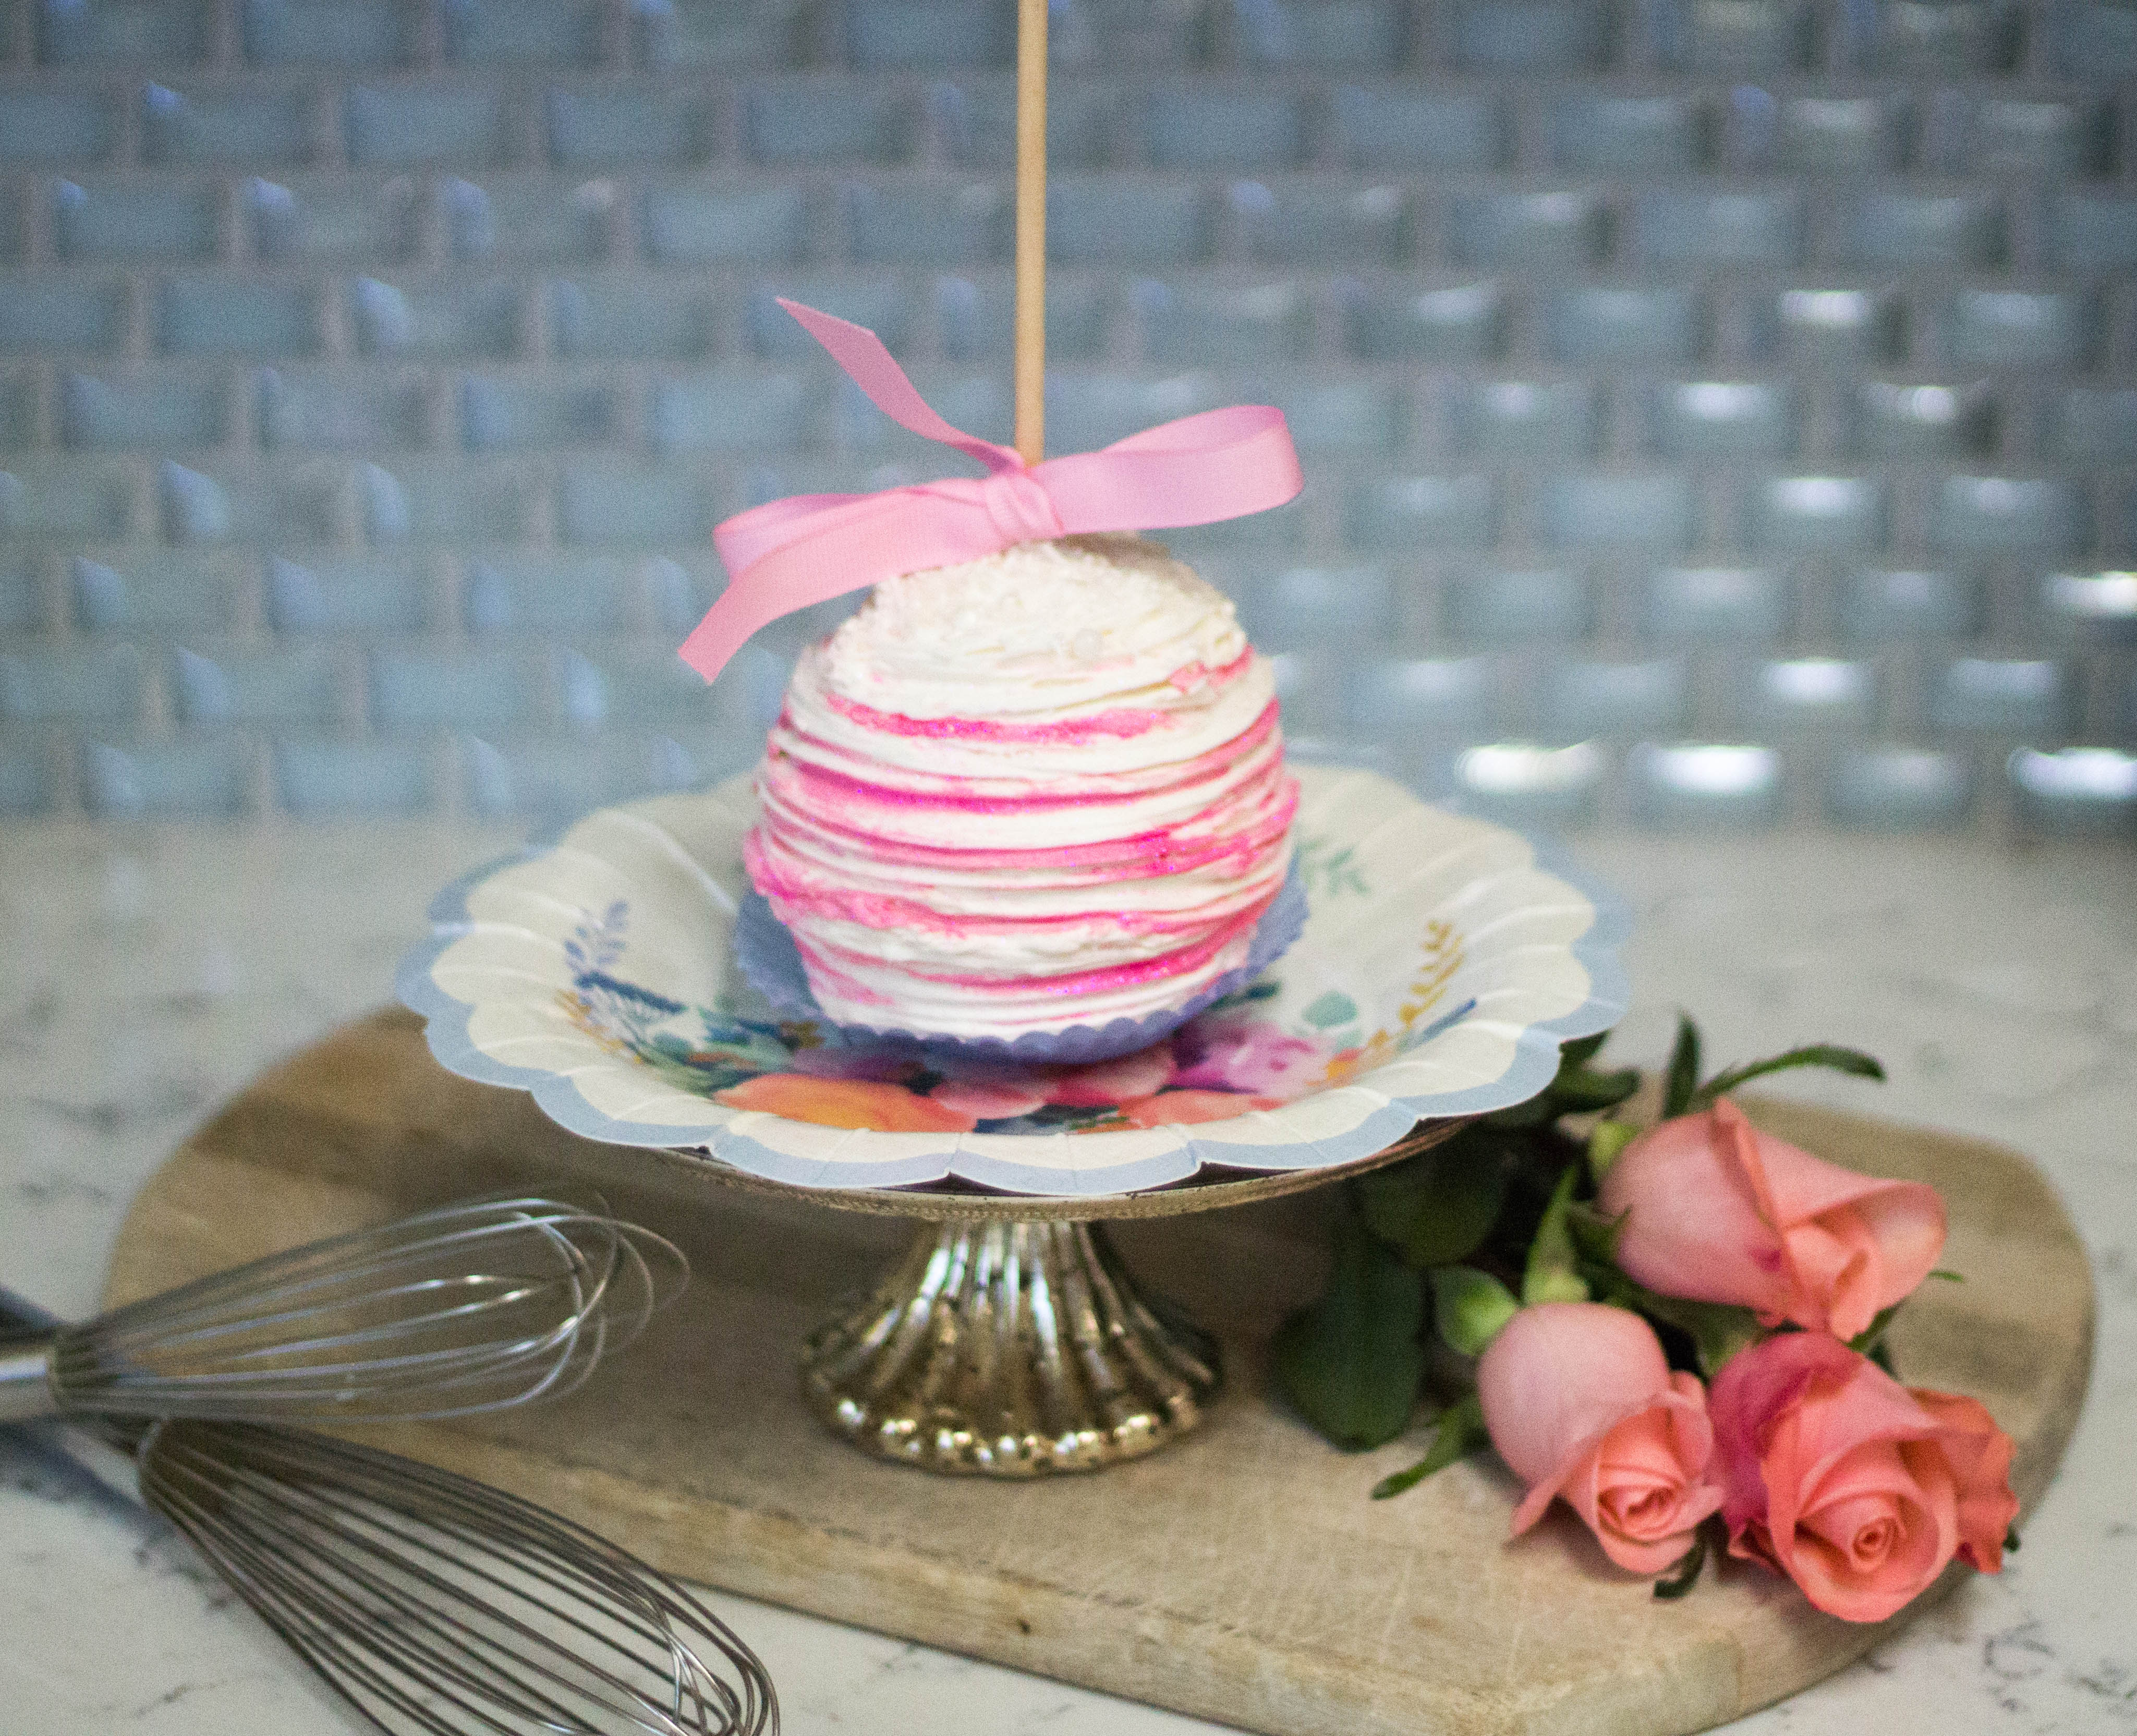
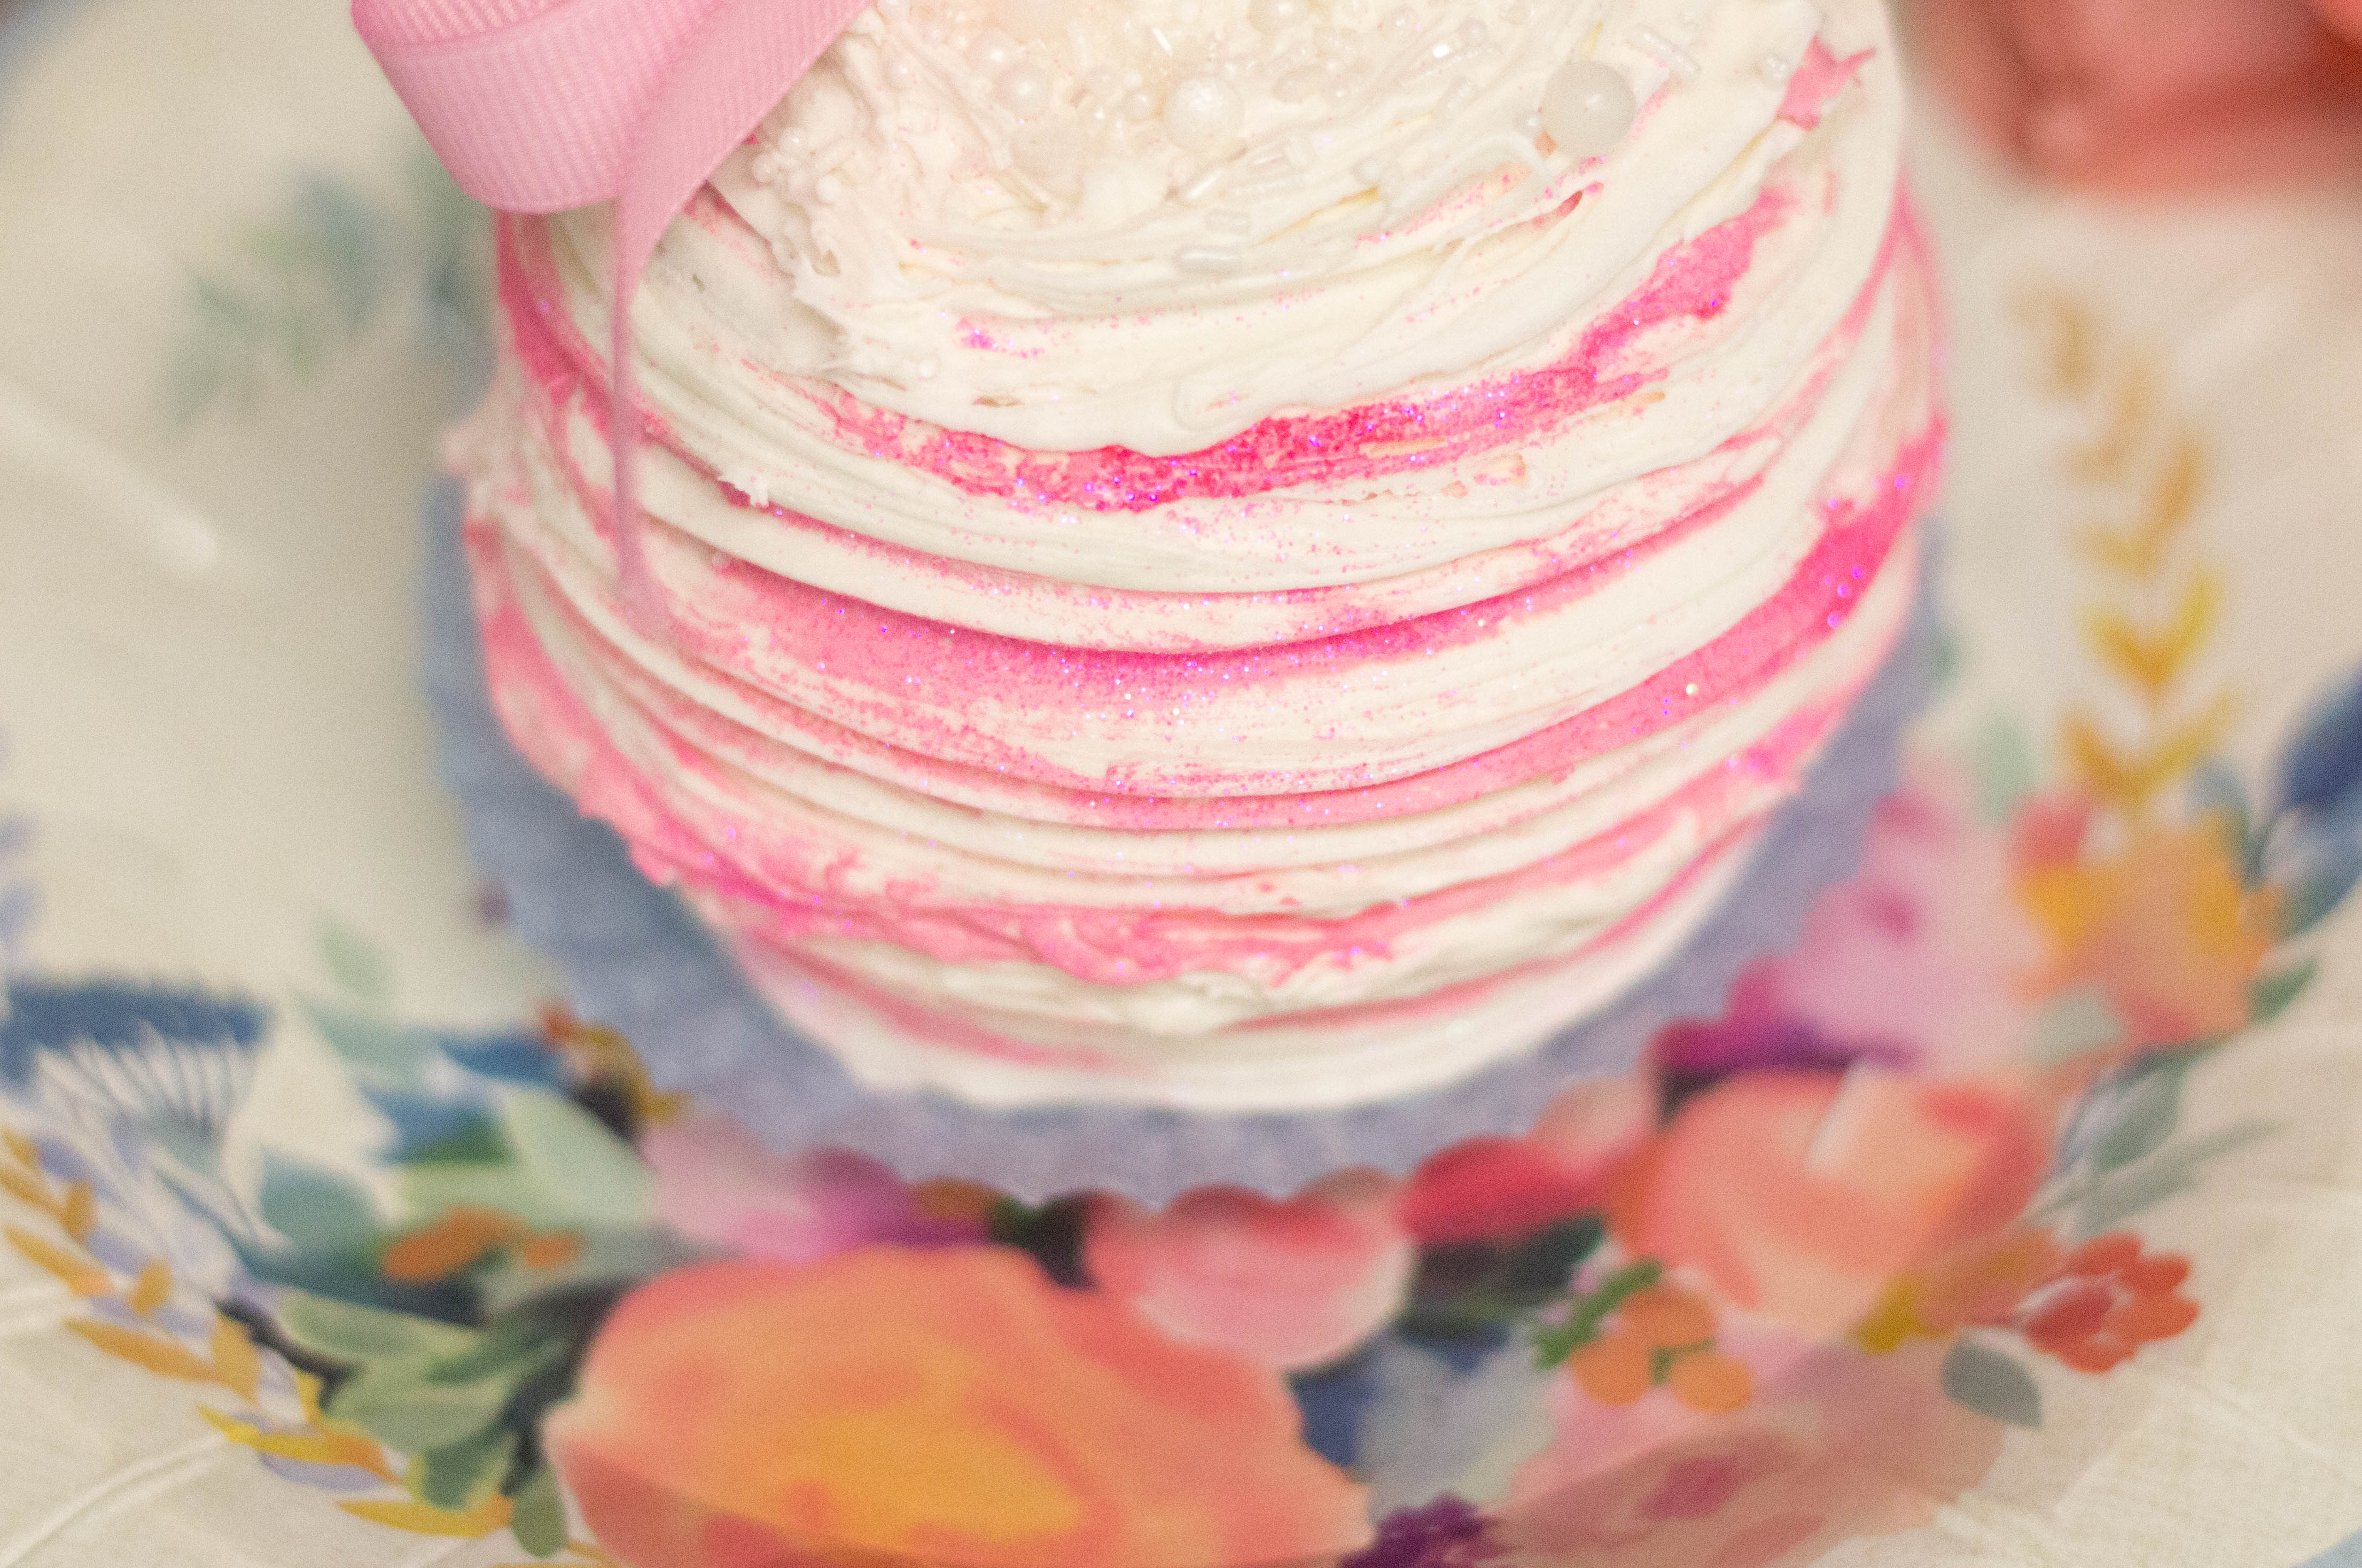
Here’s a stunning treat that will be a coveted party or wedding favor; chocolate covered apples. These use the same dipping concept as the cake pops, just on a larger scale. For this version, we created a rustic effect in the chocolate, and added pink stripes using edible art paint, for a whimsical effect. These would be perfect for a gender reveal party, an Alice in Wonderland themed party, or as a pop of fun color for a wedding.
What You’ll Need:
- One Large Apple, (We like Honeycrisp or Granny Smith for a great result)
- White Candy Melts
- Wood Apple Sticks
- White Sprinklefetti Mix
- Pastel Pink Edible Art Paint
- Hot Pink Disco Dust
- Blue Cupcake Liners
Insert a wood stick vertically into the apple, and check to ensure it’s securely attached.
 Dip the apple in chocolate, spinning and twisting it to fully coat. Use the tines of a fork to create the rustic effect we used here, by holding the fork in one position, and spinning the apple against it.
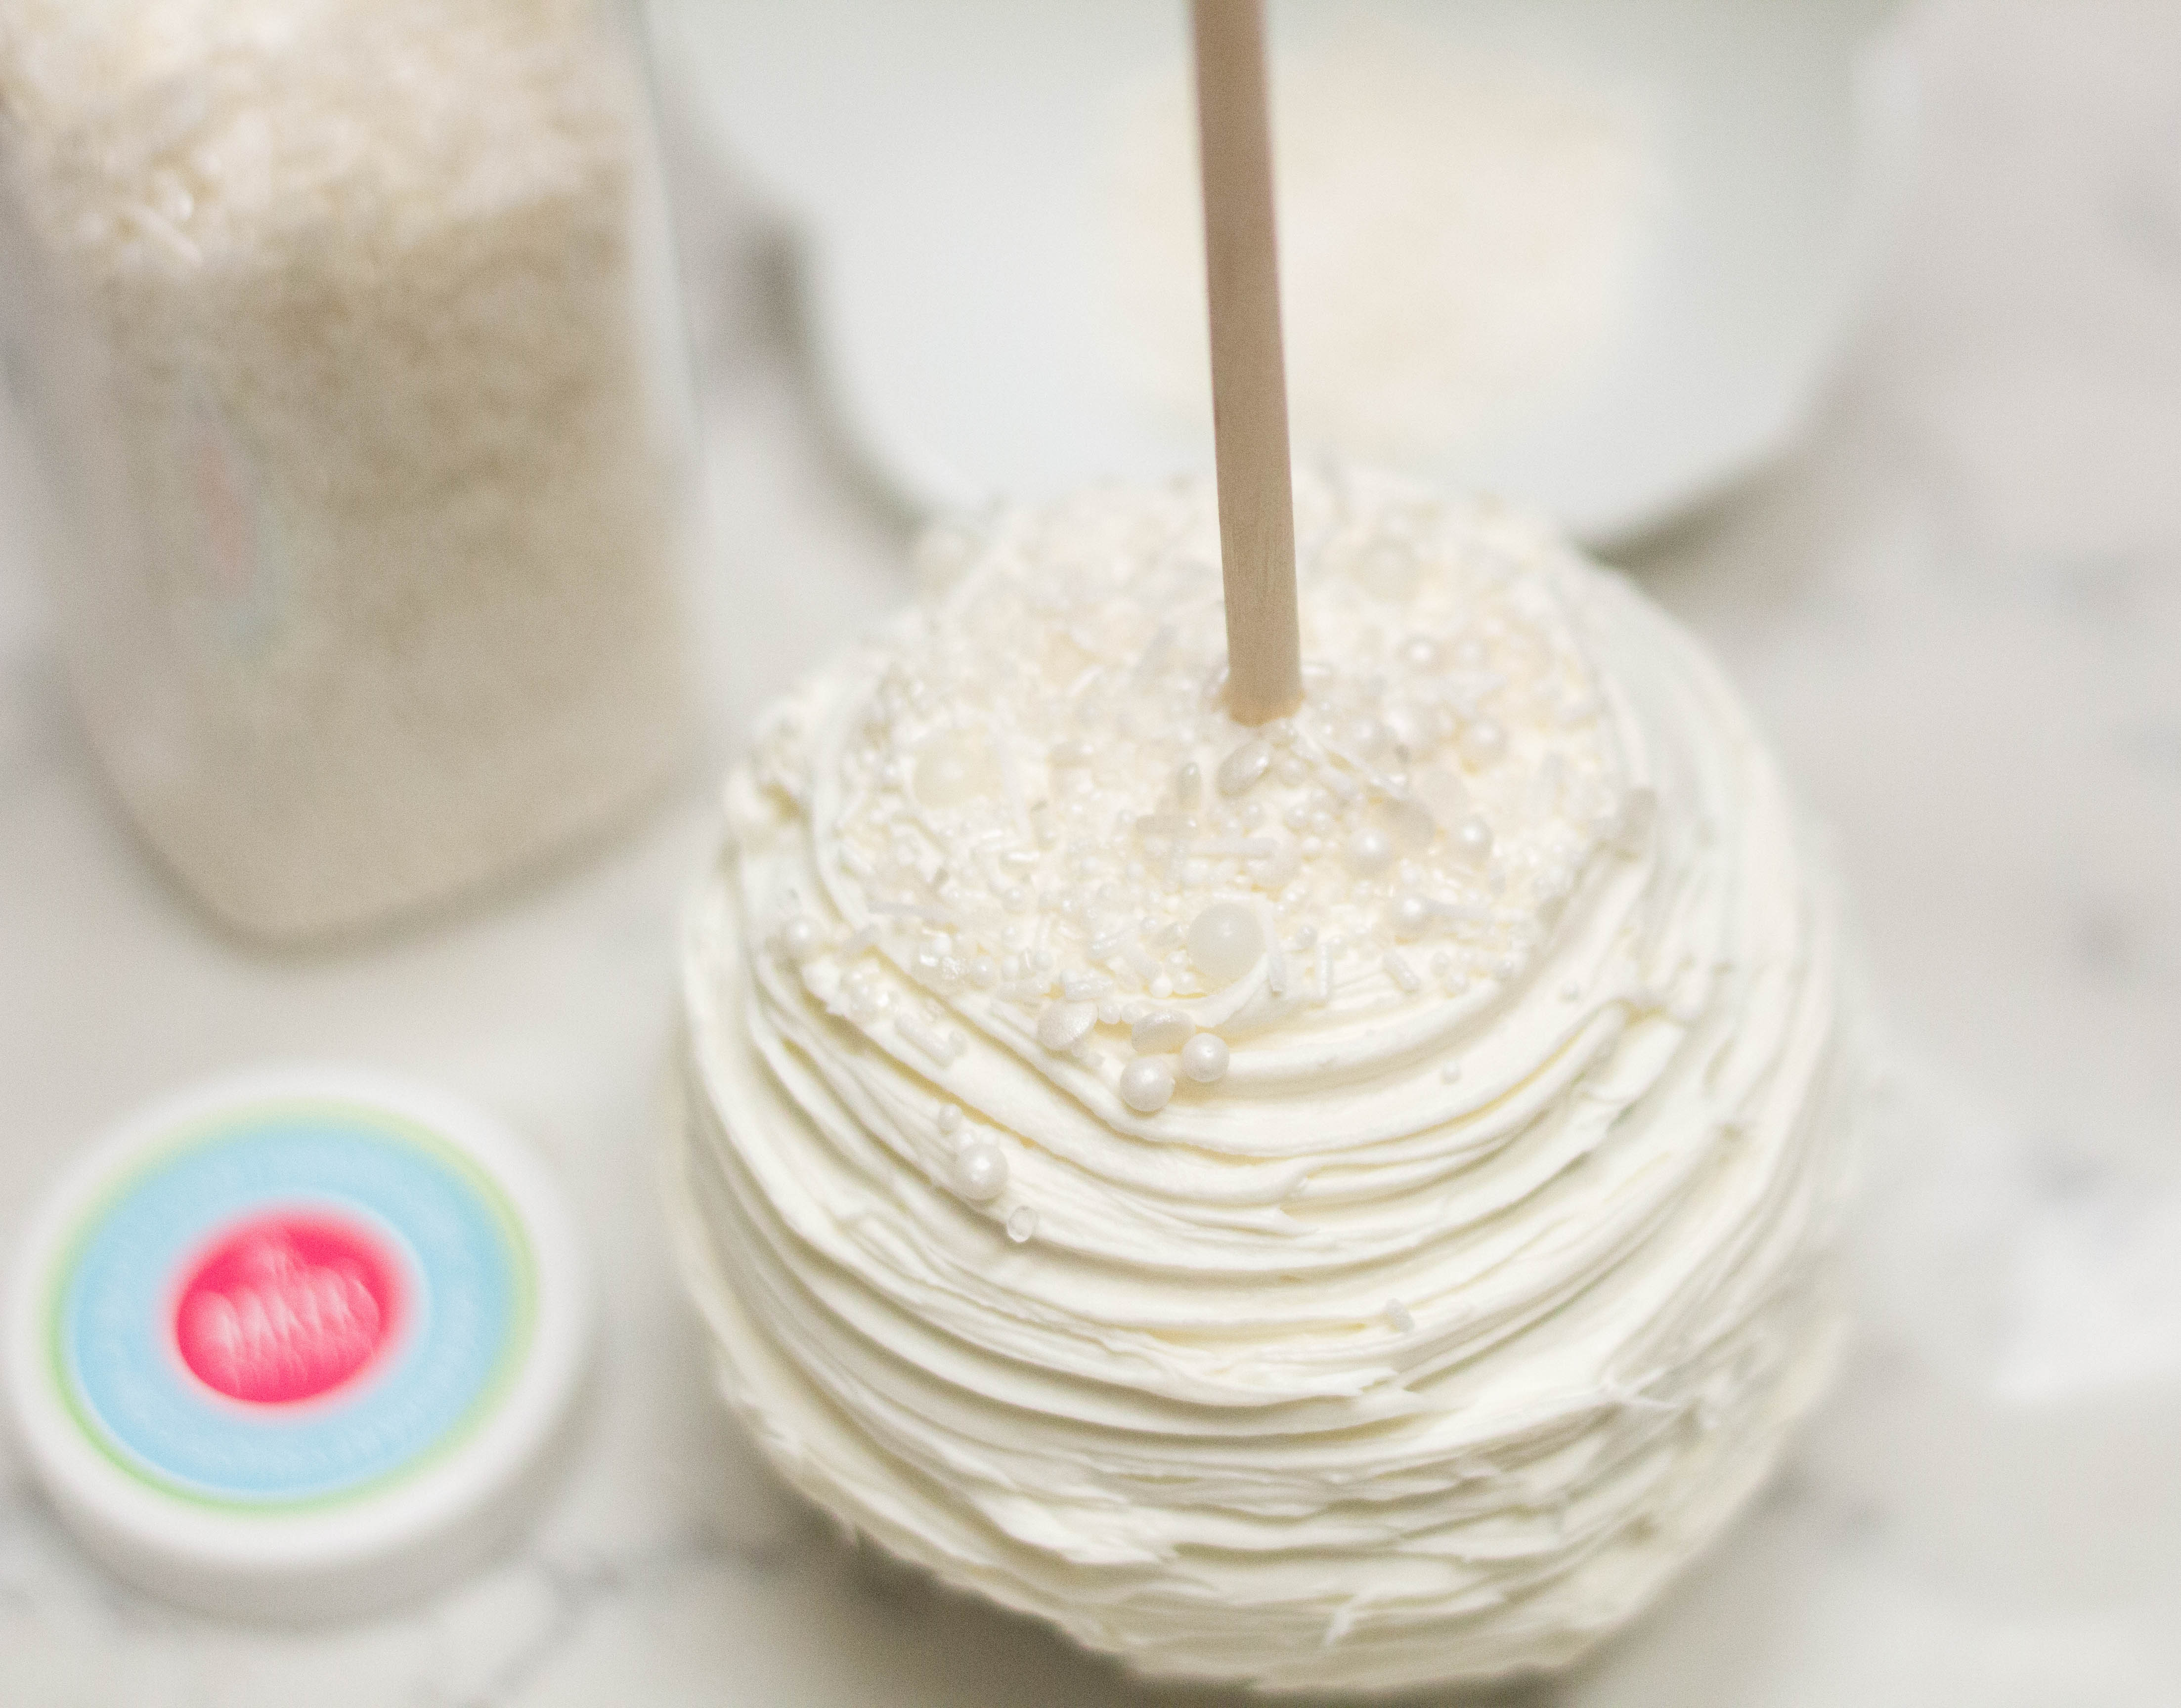
Add White Sprinklefetti to the top portion of the apple.
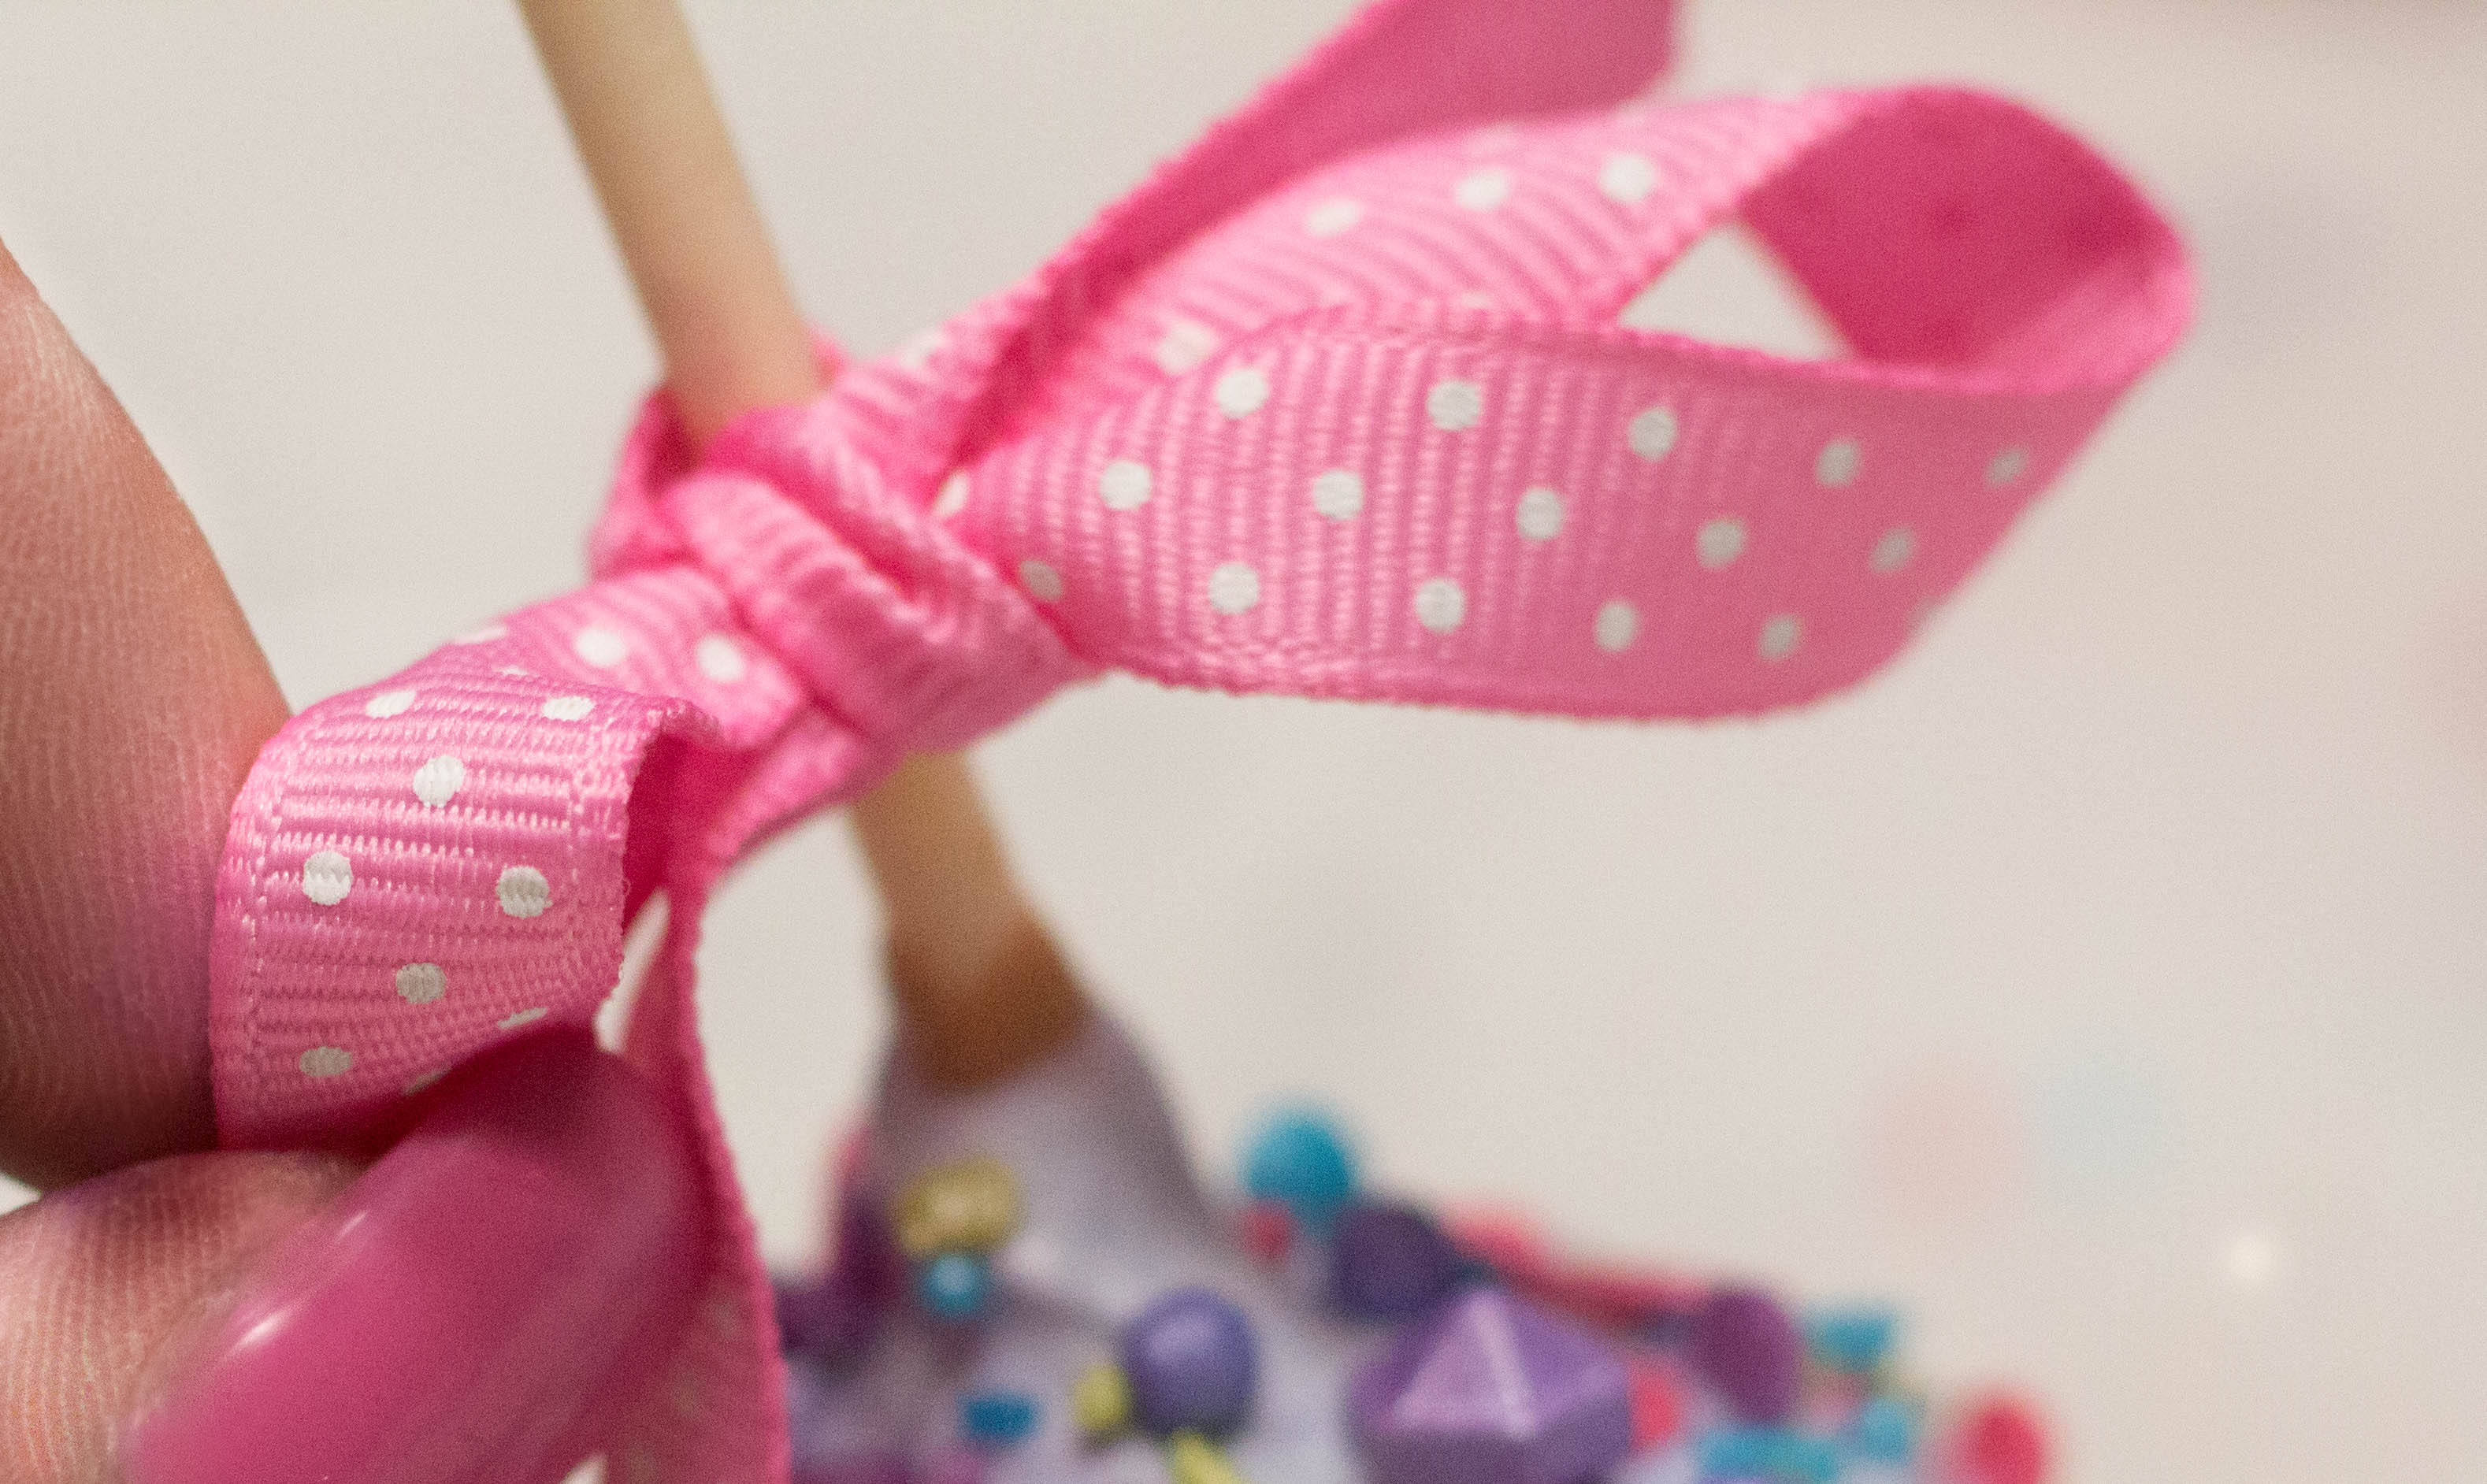
Using a fine brush, paint on stripes accents between the layers of chocolate, using the Pastel Pink Edible Art Paint. Add an accent ribbon to the top of the stick and press down until it meets the top of the apple.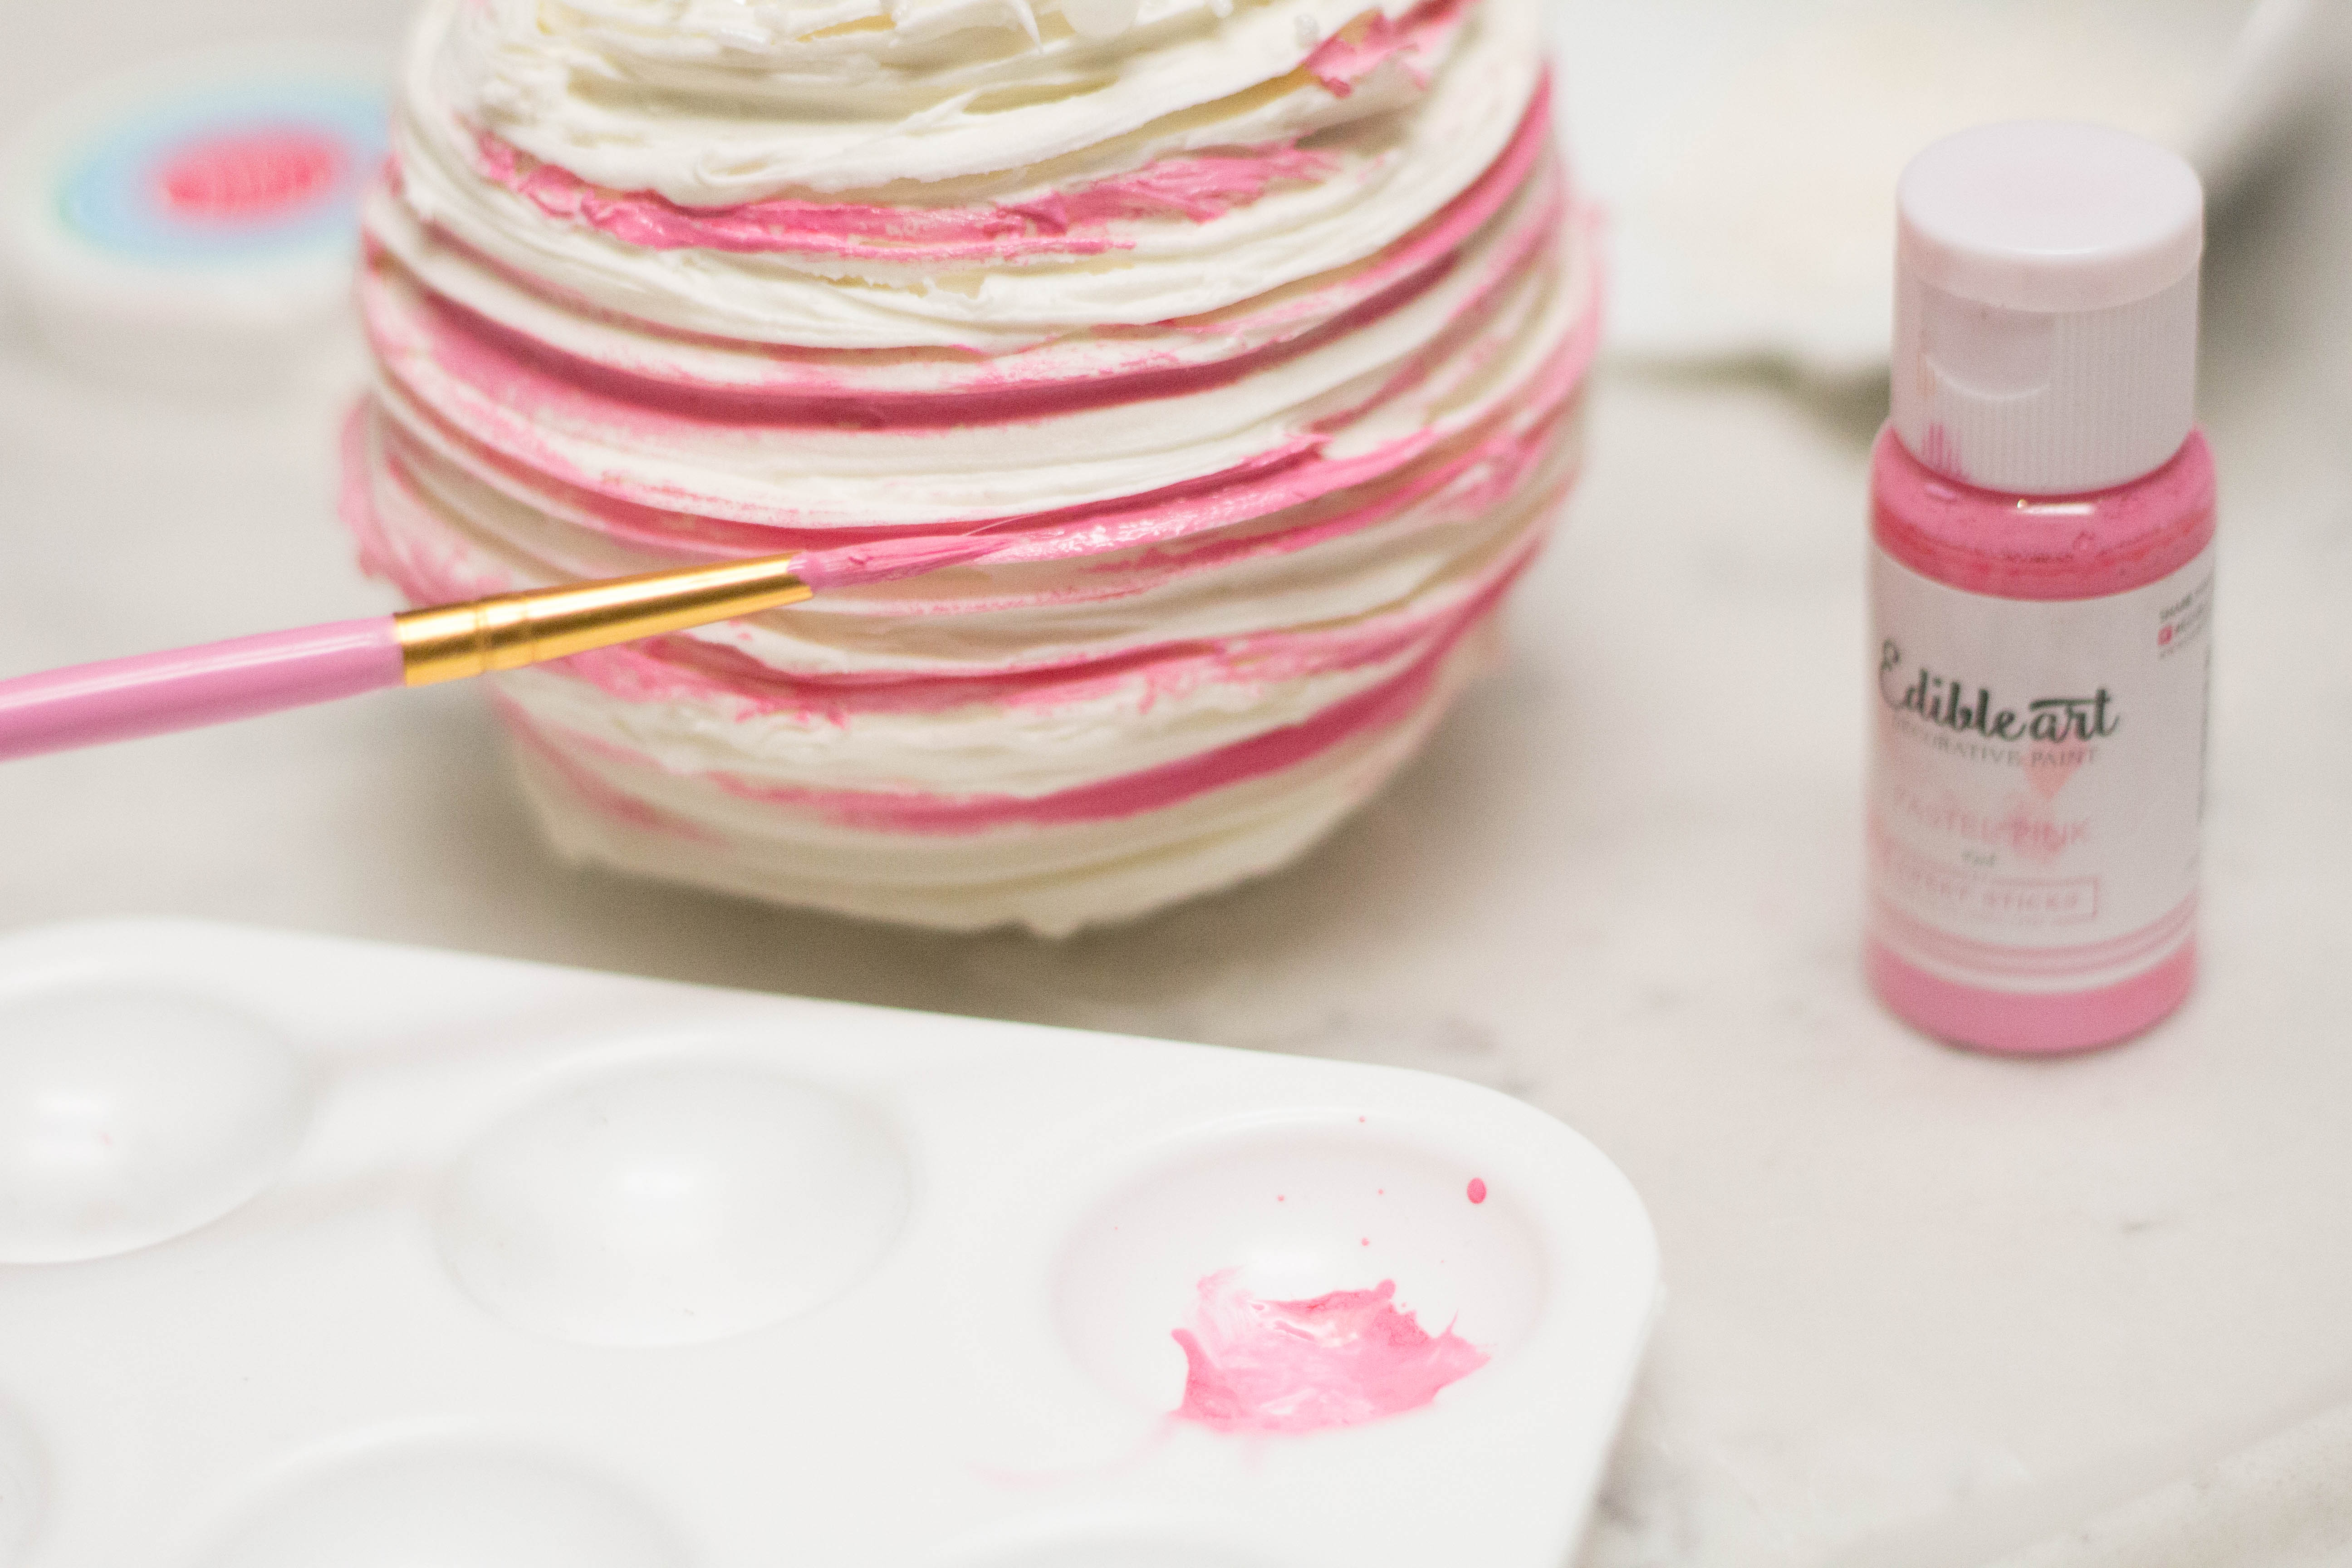
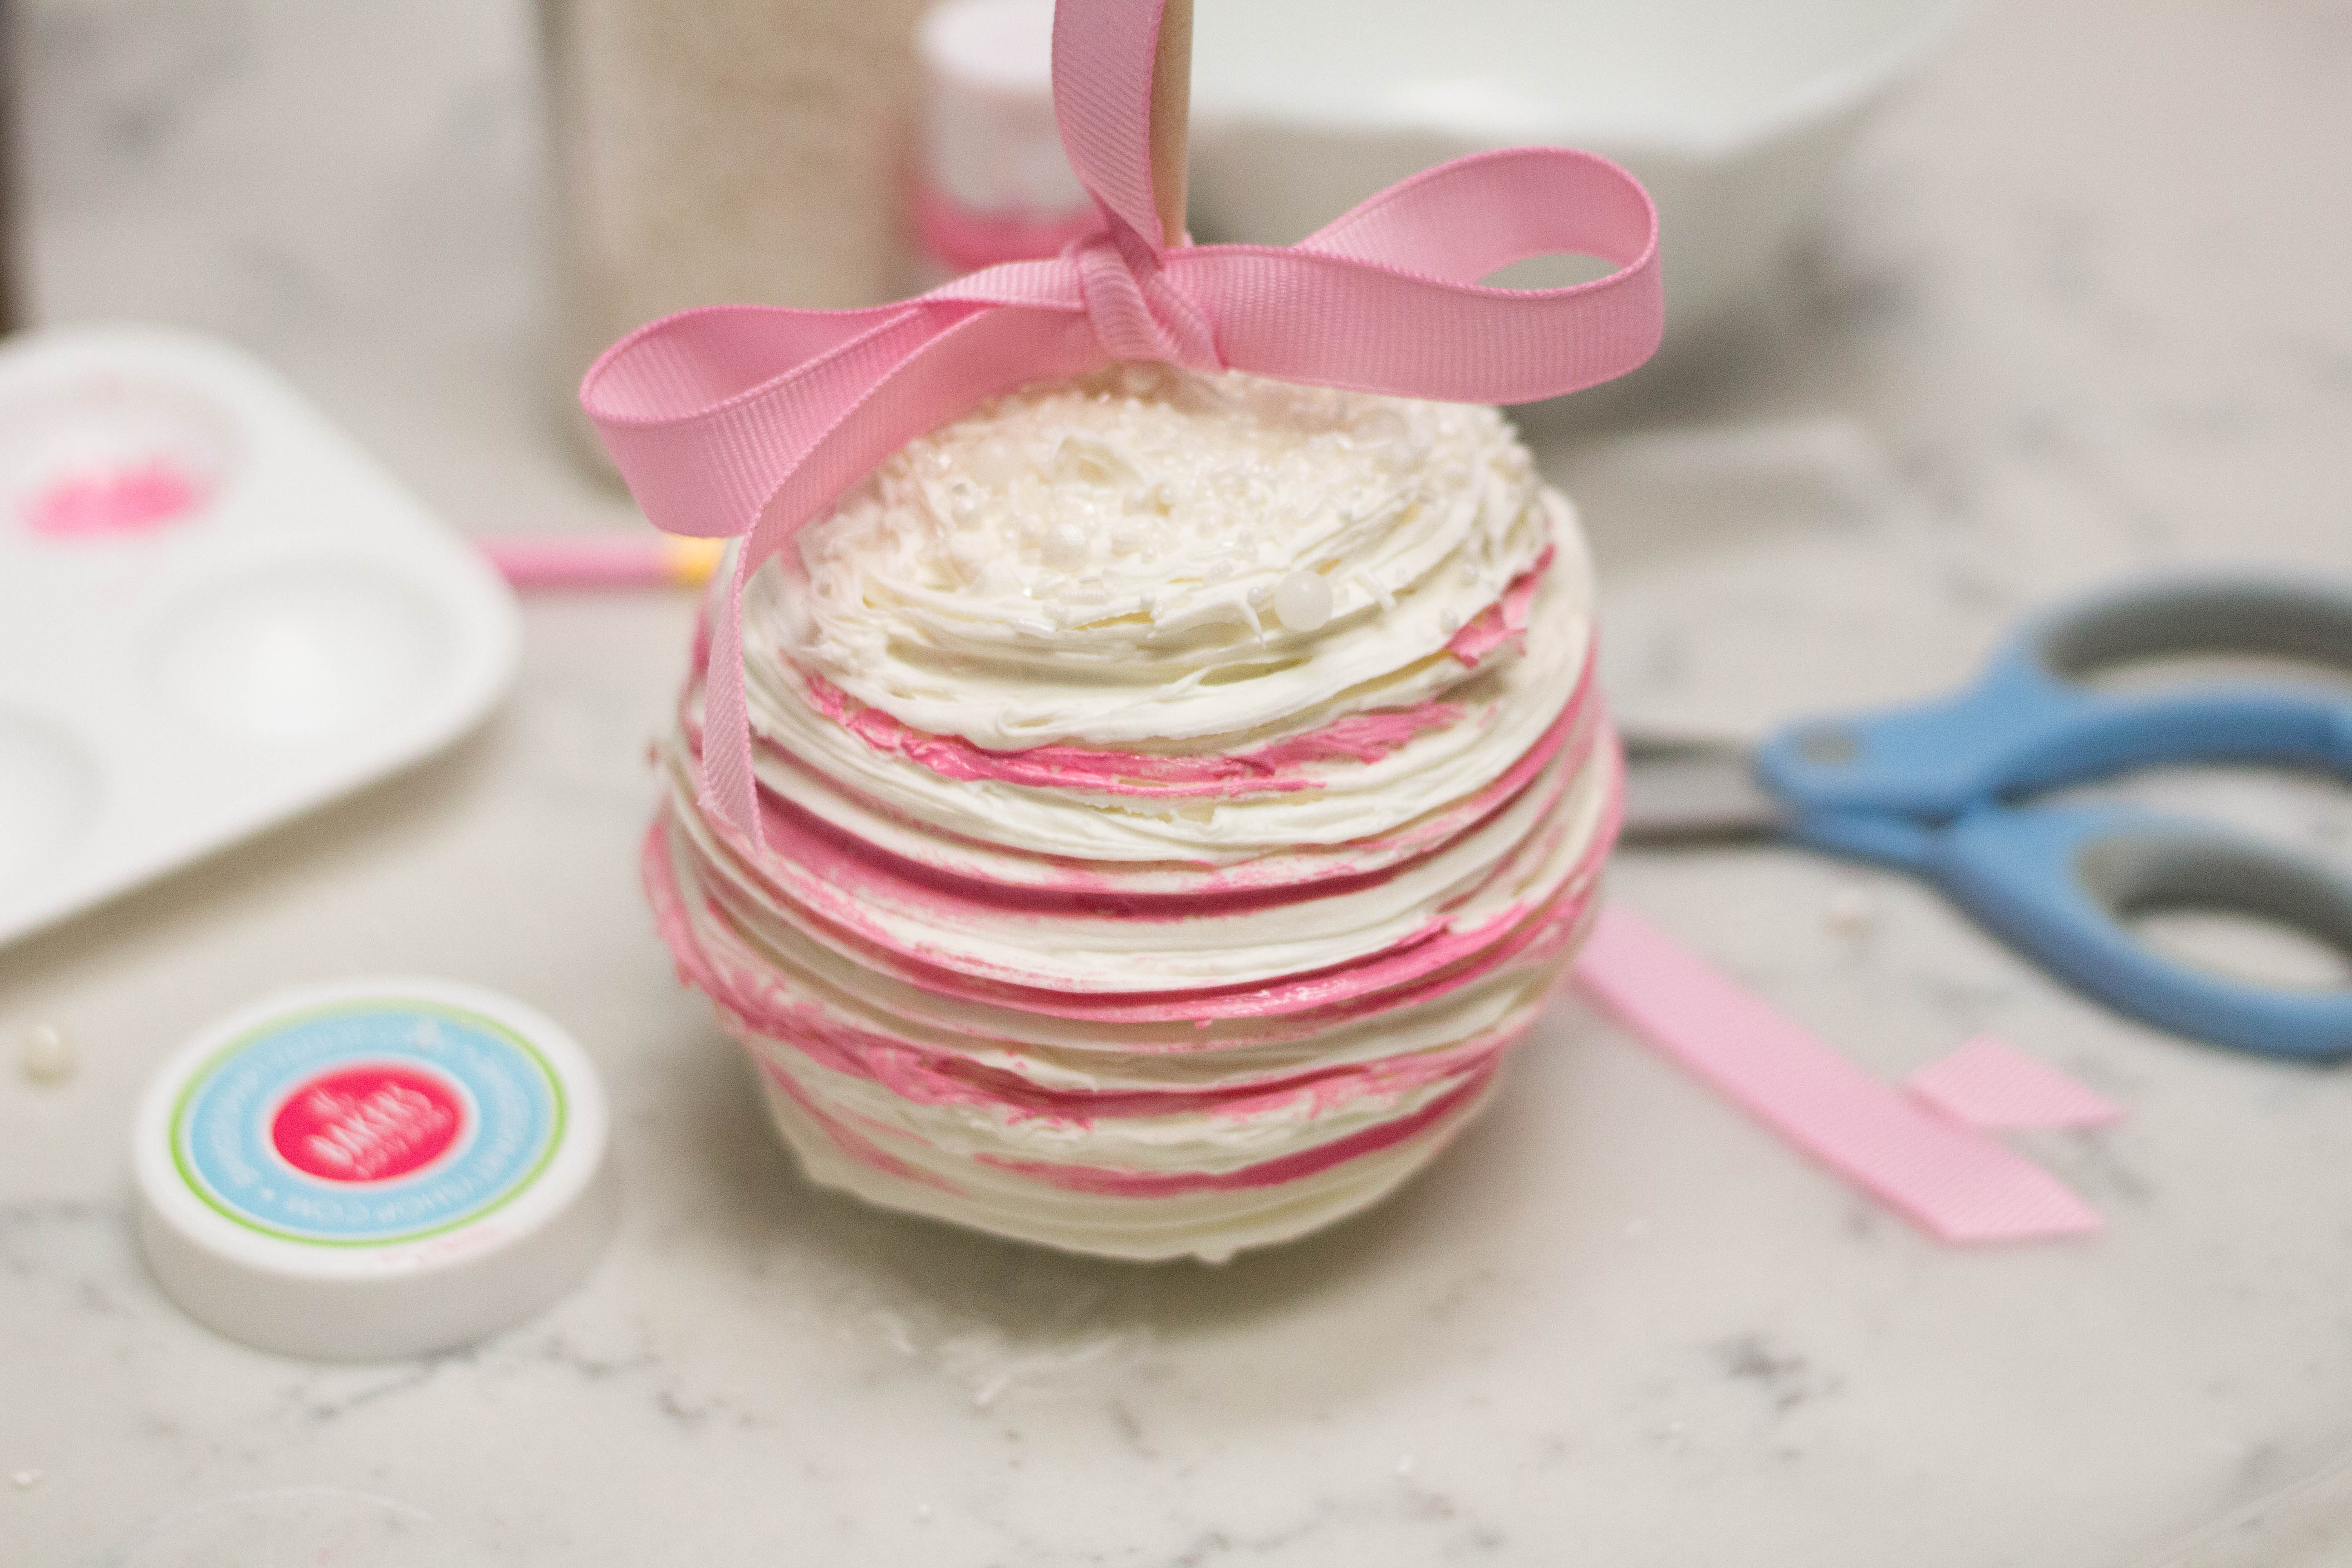
Sprinkle the striped areas with Hot Pink Disco Dust to soften the edges, then place the finished apple atop a blue cupcake liner.
As you can probably tell, I adore sprinkles, especially all the fun Sprinklefetti mixes from Bakers Party Shop! They’re so sweet, they’ve given me a coupon code just for you, to try any of your favorite colors and blends of Sprinklefetti!