
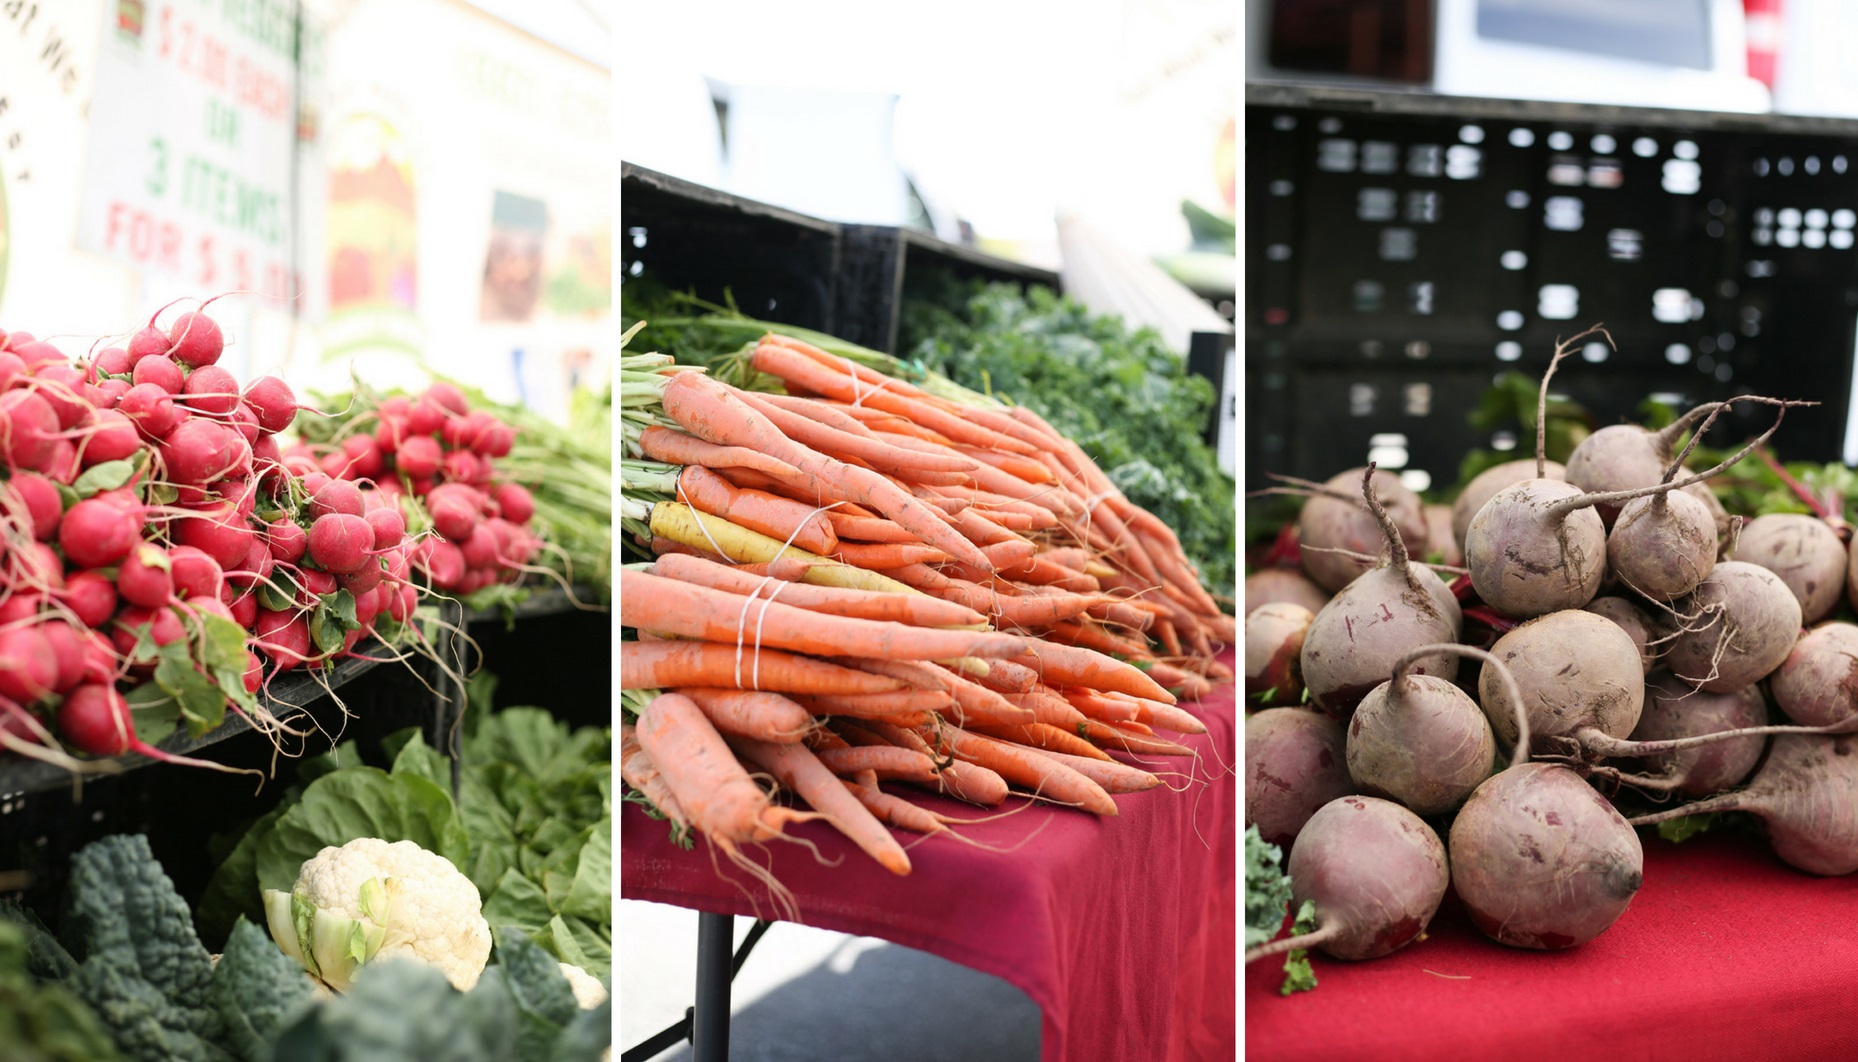
One of my favorite pastimes is wandering the aisles of the local farm stand or farmer’s market. I’m always on the hunt for wood crates brimming with fresh veggies and fruits of the season. One thing that’s important to remember is to keep an eye out for special items that can only be found at a farm stand, or farmer’s market in small quantities, like squash blossoms, melon greens, and prickly pear cactus.
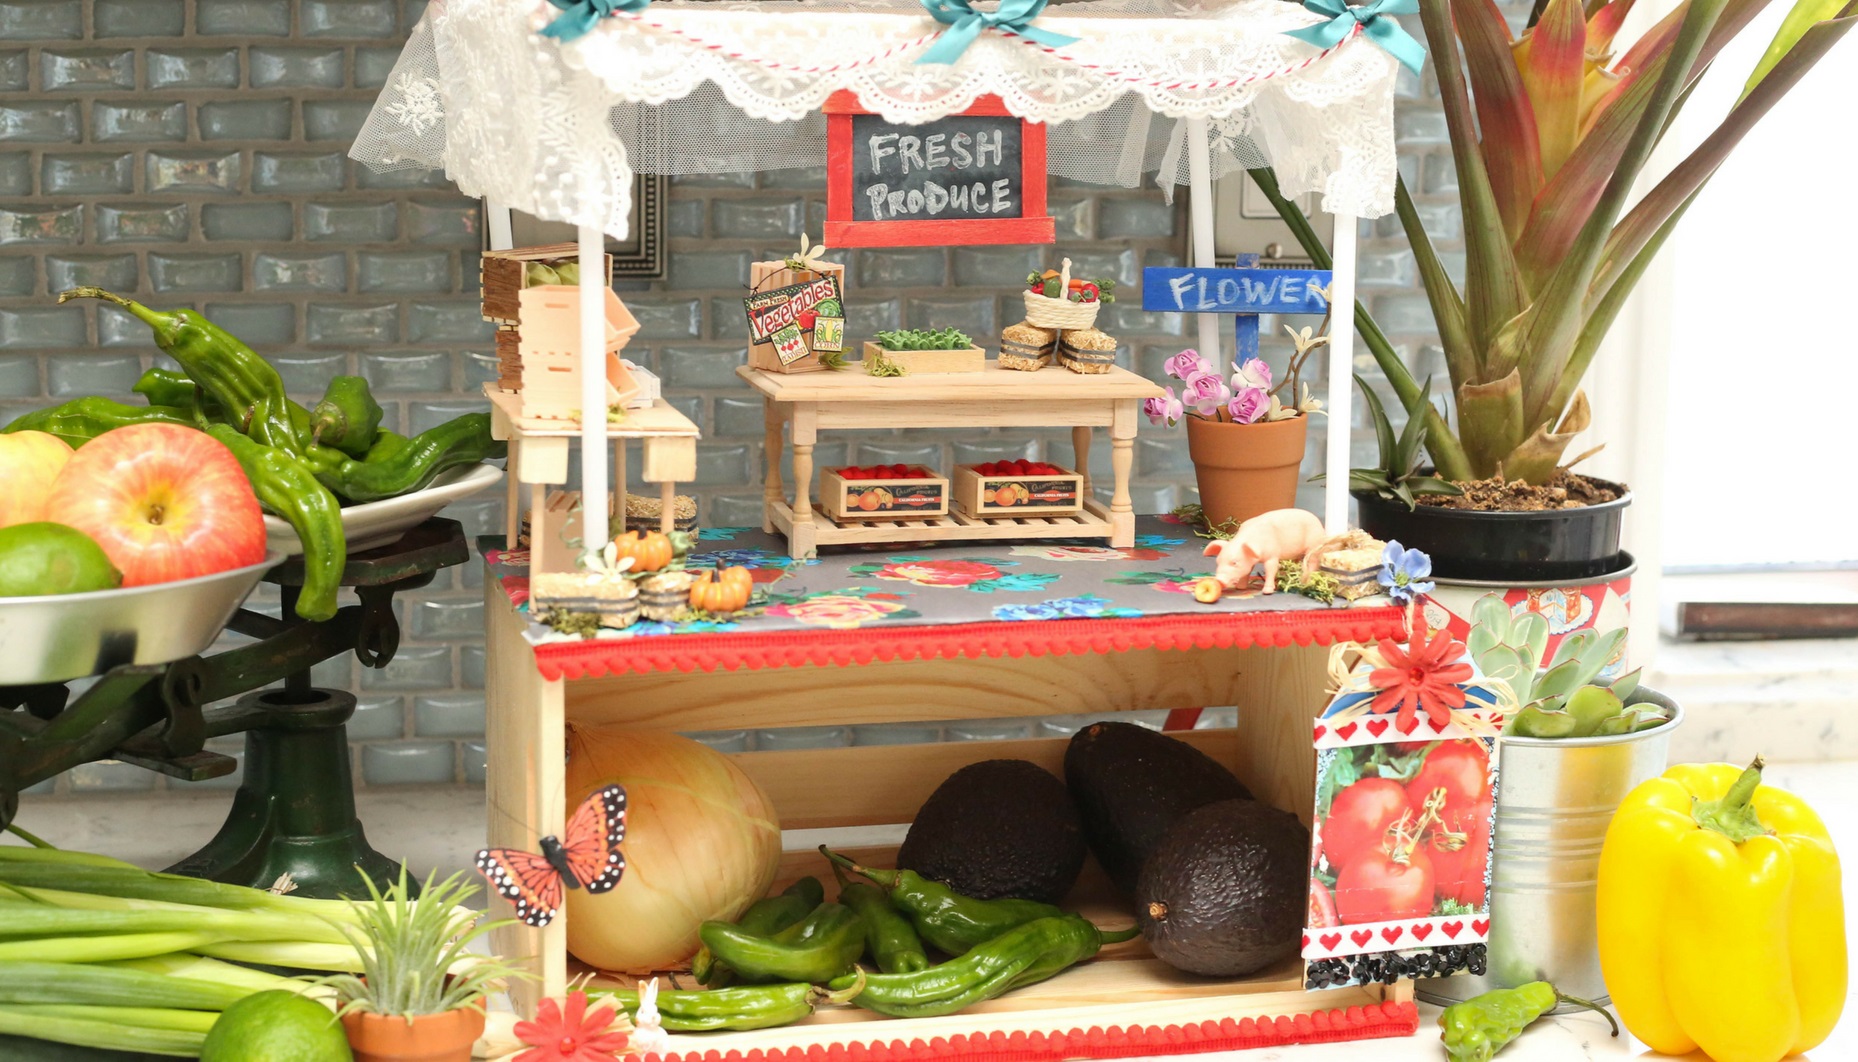
My love of miniatures inspired me to create this whimsical little shelf to house my onions and ripening avocados. I recreated the look of a fruit and veggie stand, complete with wood crates of produce, a darling sign, and even a friendly piggie, who helps clean up the leftovers when the selling day is done.
Miniatures.com has the most amazing selection of tiny décor pieces, furnishings and accessories. It was quite a task to narrow down my list; if you have a moment, you must go see all the other fun items available to create your own tiny scenes just like this!
Here’s what I used to whip up this fun miniature art piece:
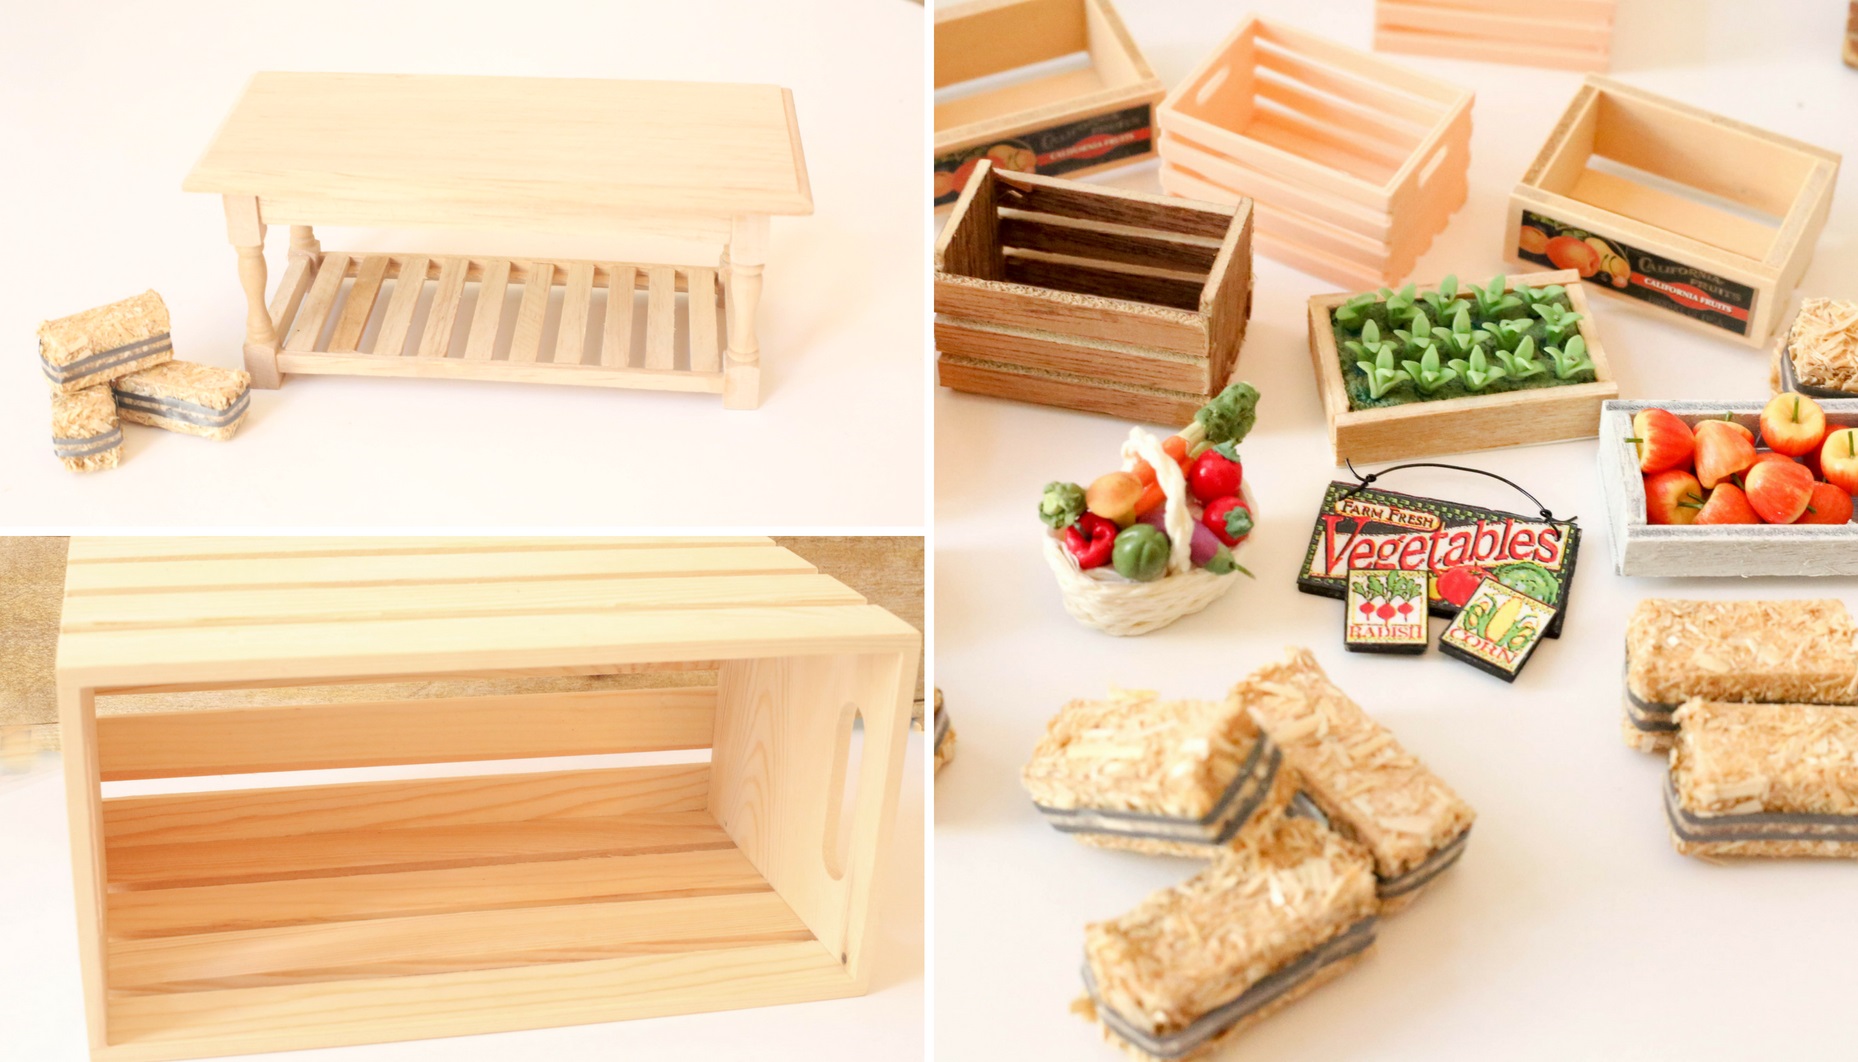
- Farmhouse Island Table
- Farm Fresh Vegetables Sign
- Vegetable Basket
- Vegetable Crates
- California Fruits Crates
- Large Crates
- Small Hay Bales
- Seedlings in a Flat
- Pig
- Pumpkins
- Rabbit
- Small Wood Crate
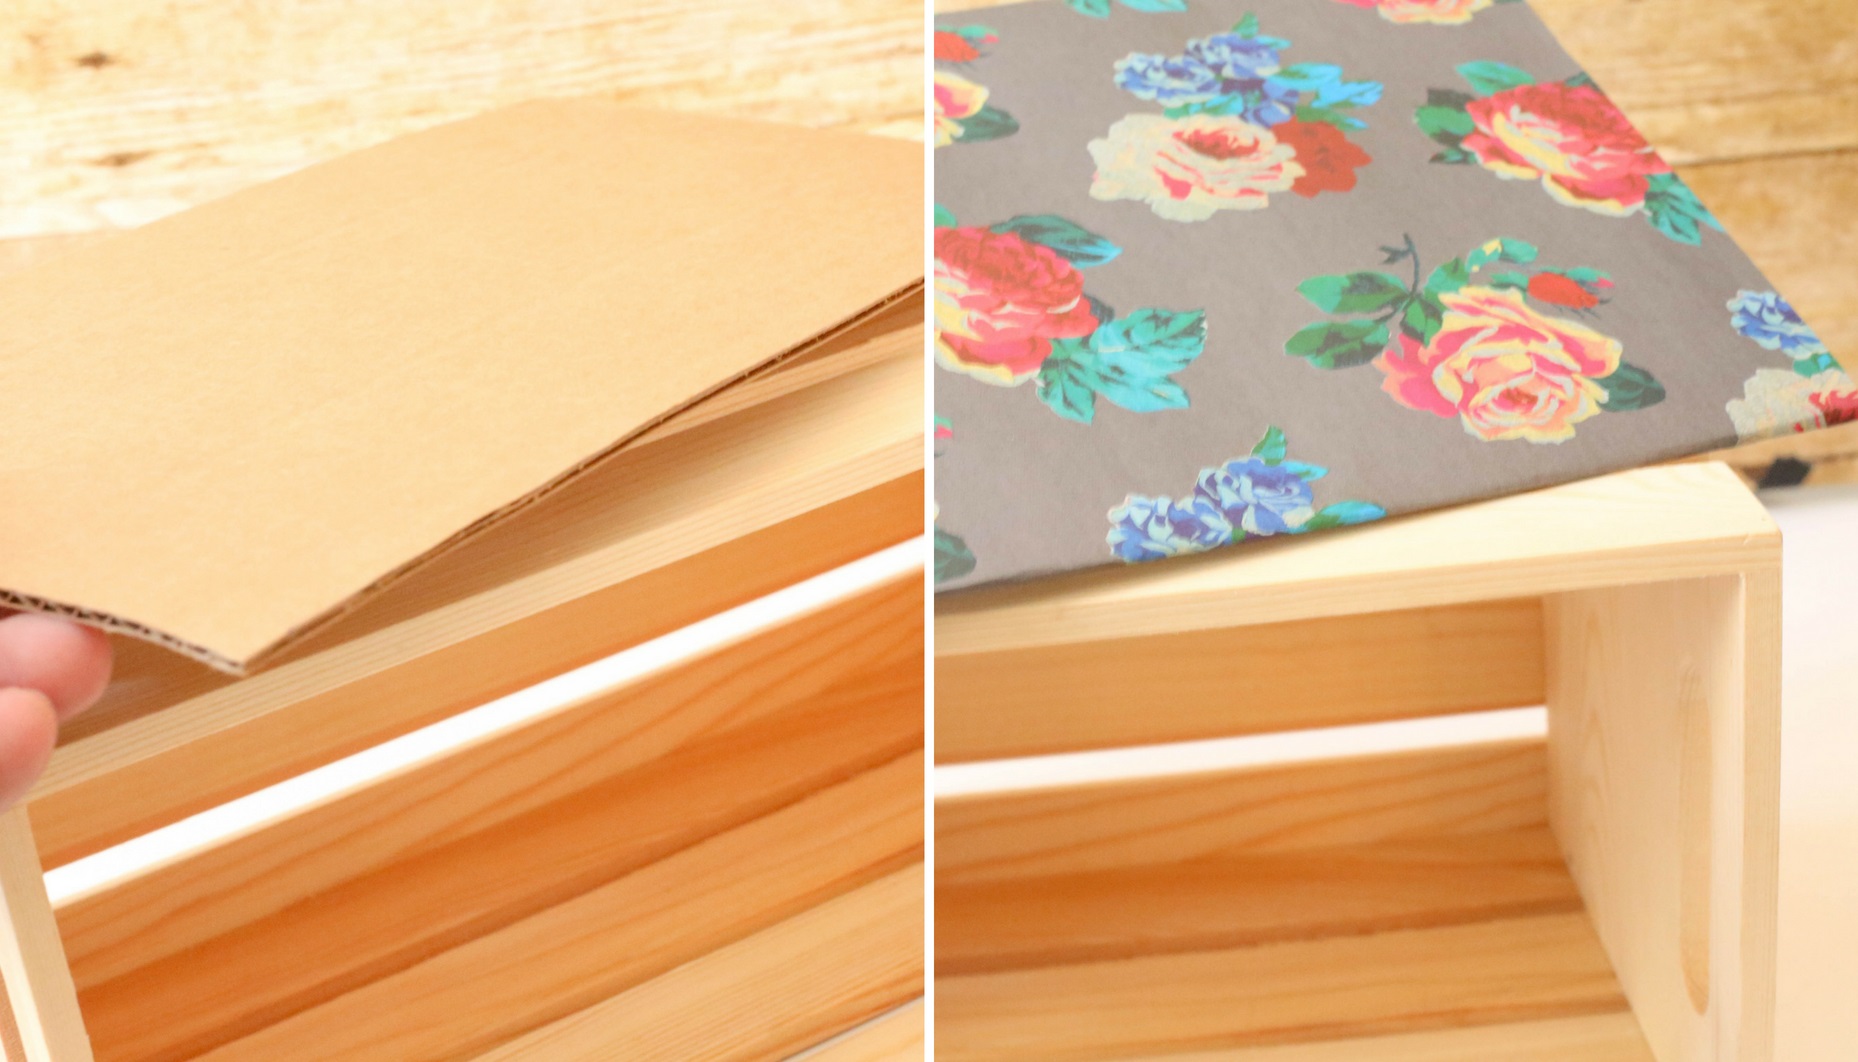
- Cardboard and scrapbook paper 12” x 12”
- Glue
- Four White Plastic Dowels cut to 10” length
- 12” section of Laurel Scalloped Lace Trim
- Baker’s Twine
- Popsicle Sticks
- Assorted findings for decorating
Step One
Measure and trim cardboard to fit the top of the wood crate, as shown. Cover with a sheet of scrapbook paper, trim to fit and glue to adhere.
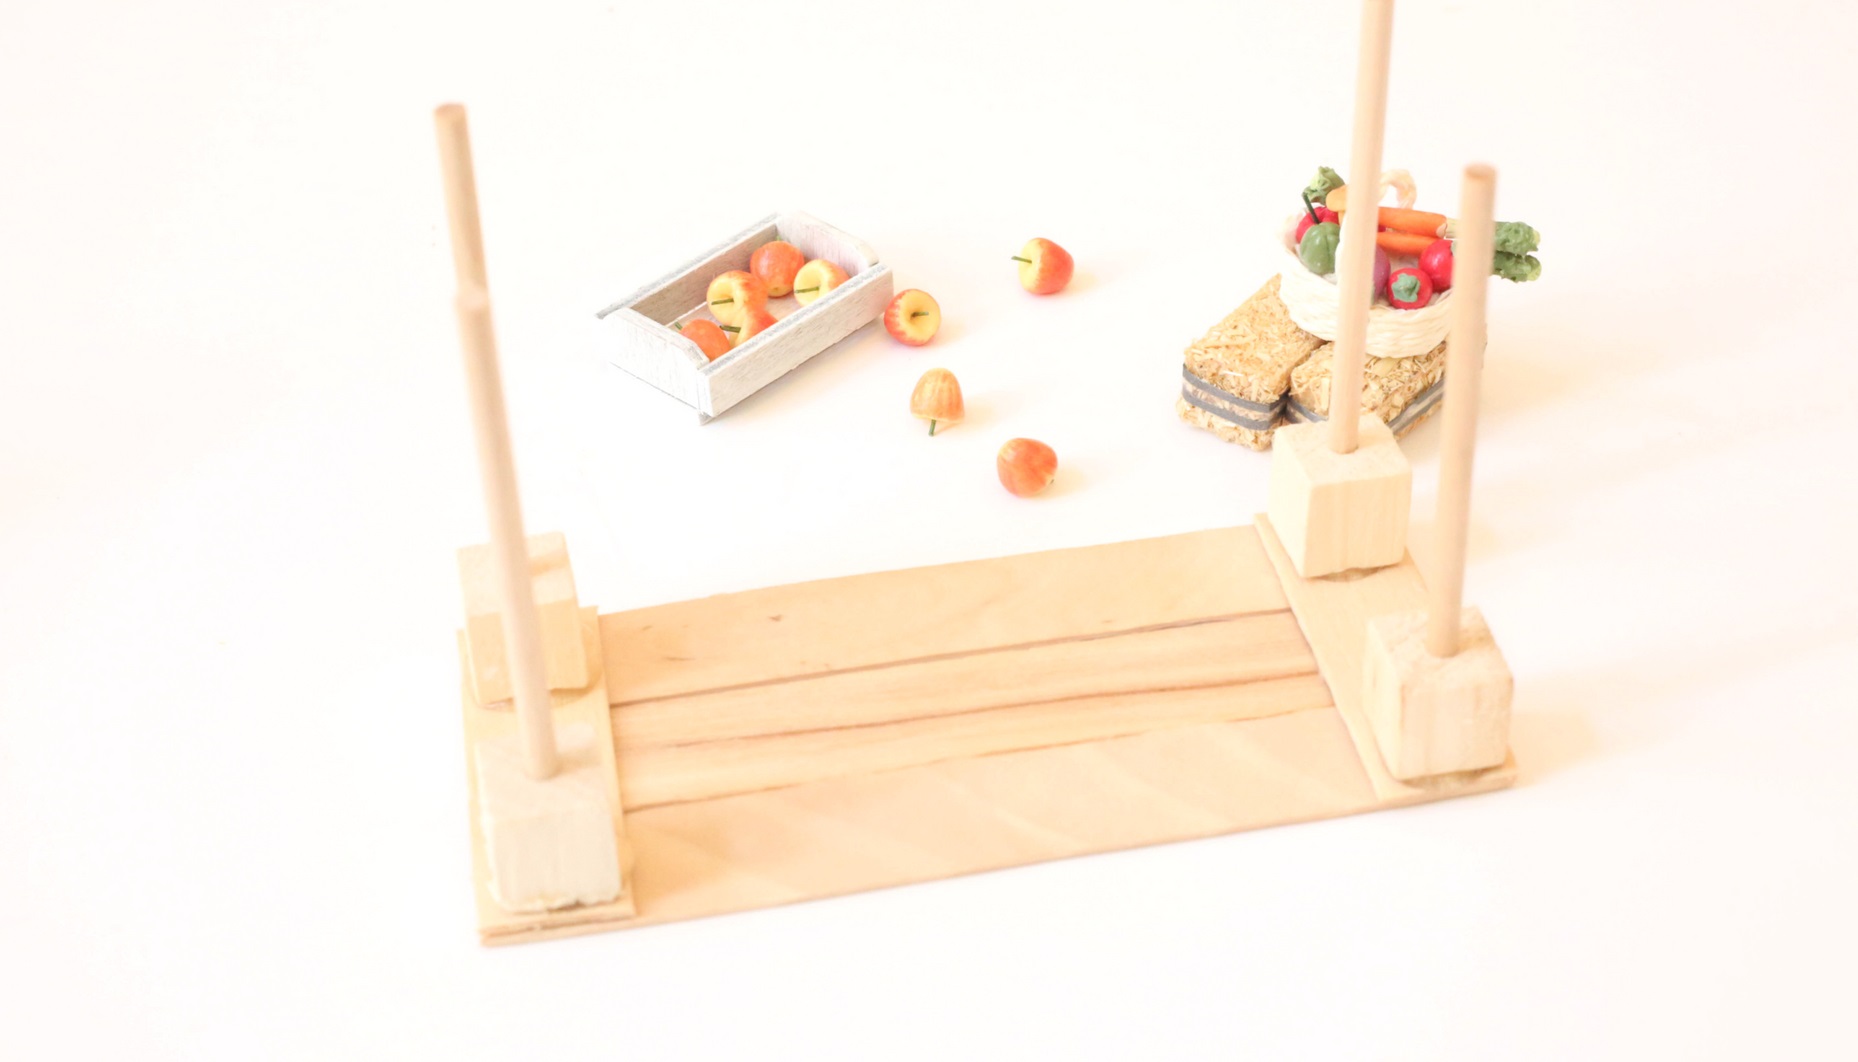
Step Two
Adhere the four white plastic dowels to the corners of the cardboard with hot glue. Hold in place by also gluing a mini hay bale on either side of the base of the “farm stand pole”. Once in place, add crossbars and lash together with baker’s twine.

Step Three
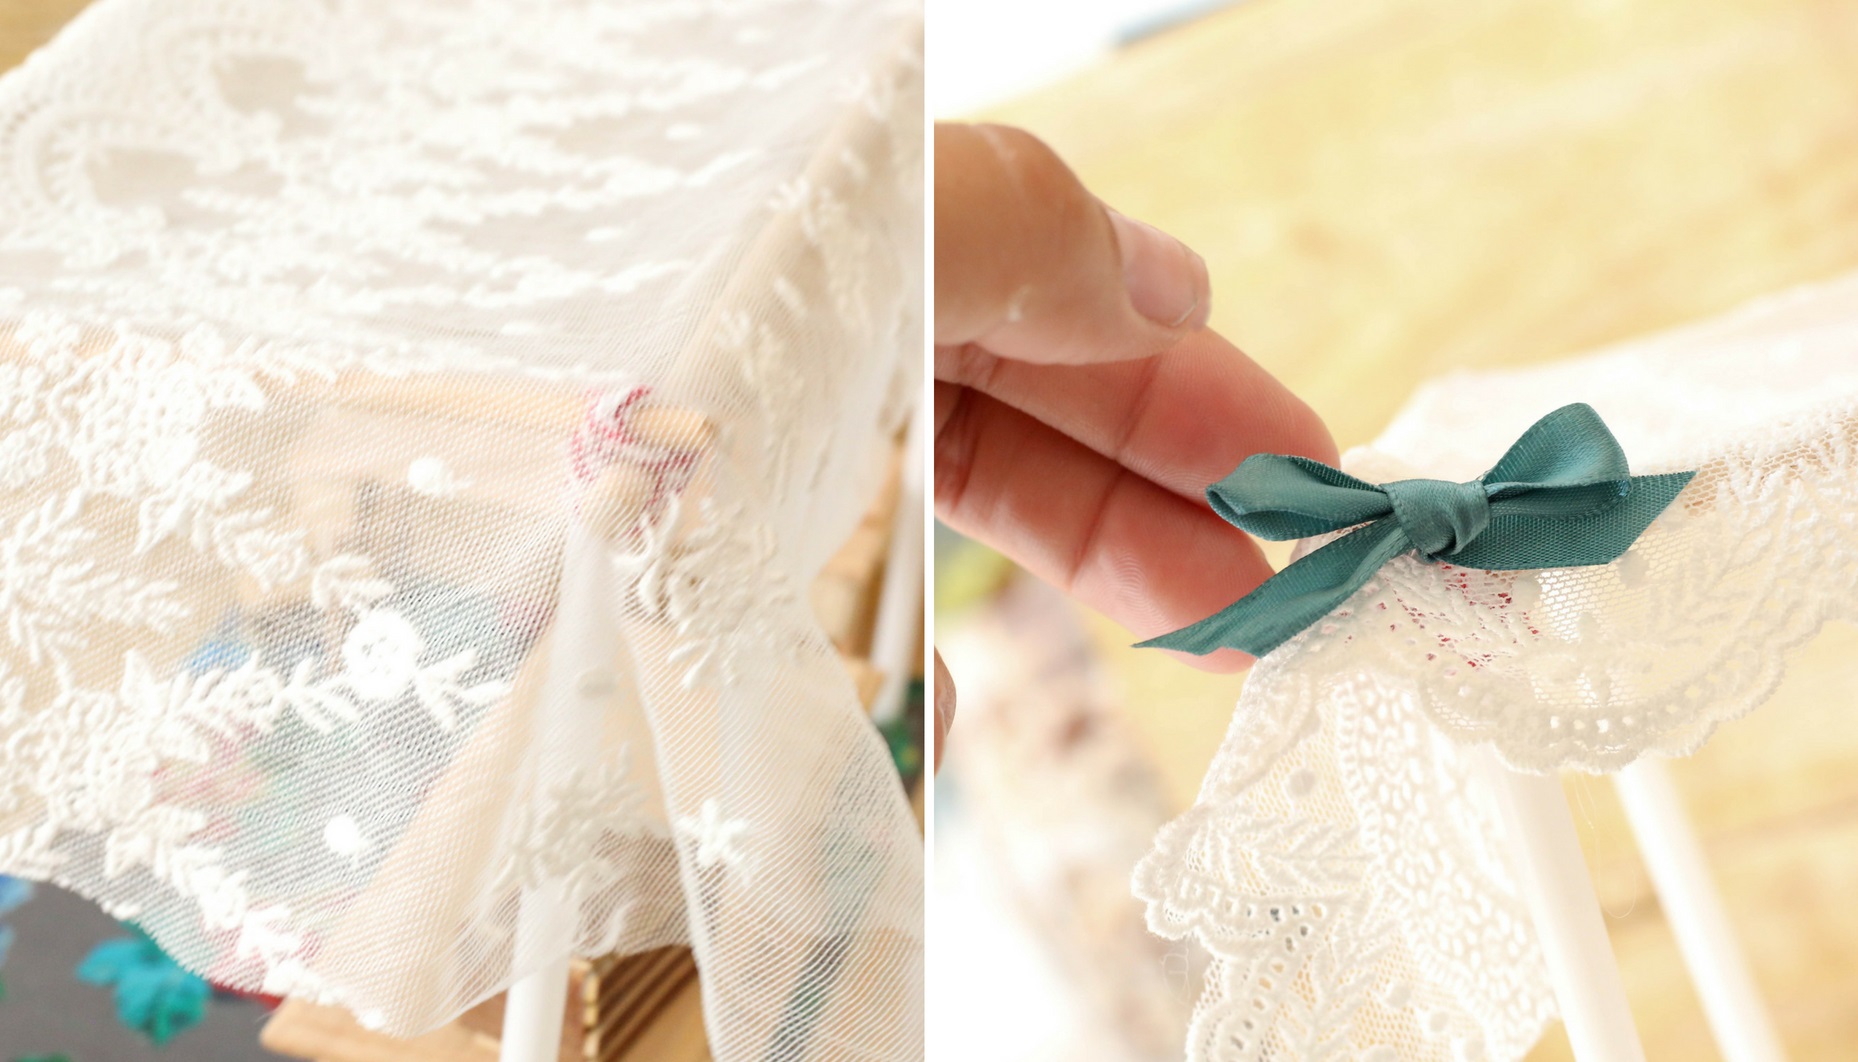
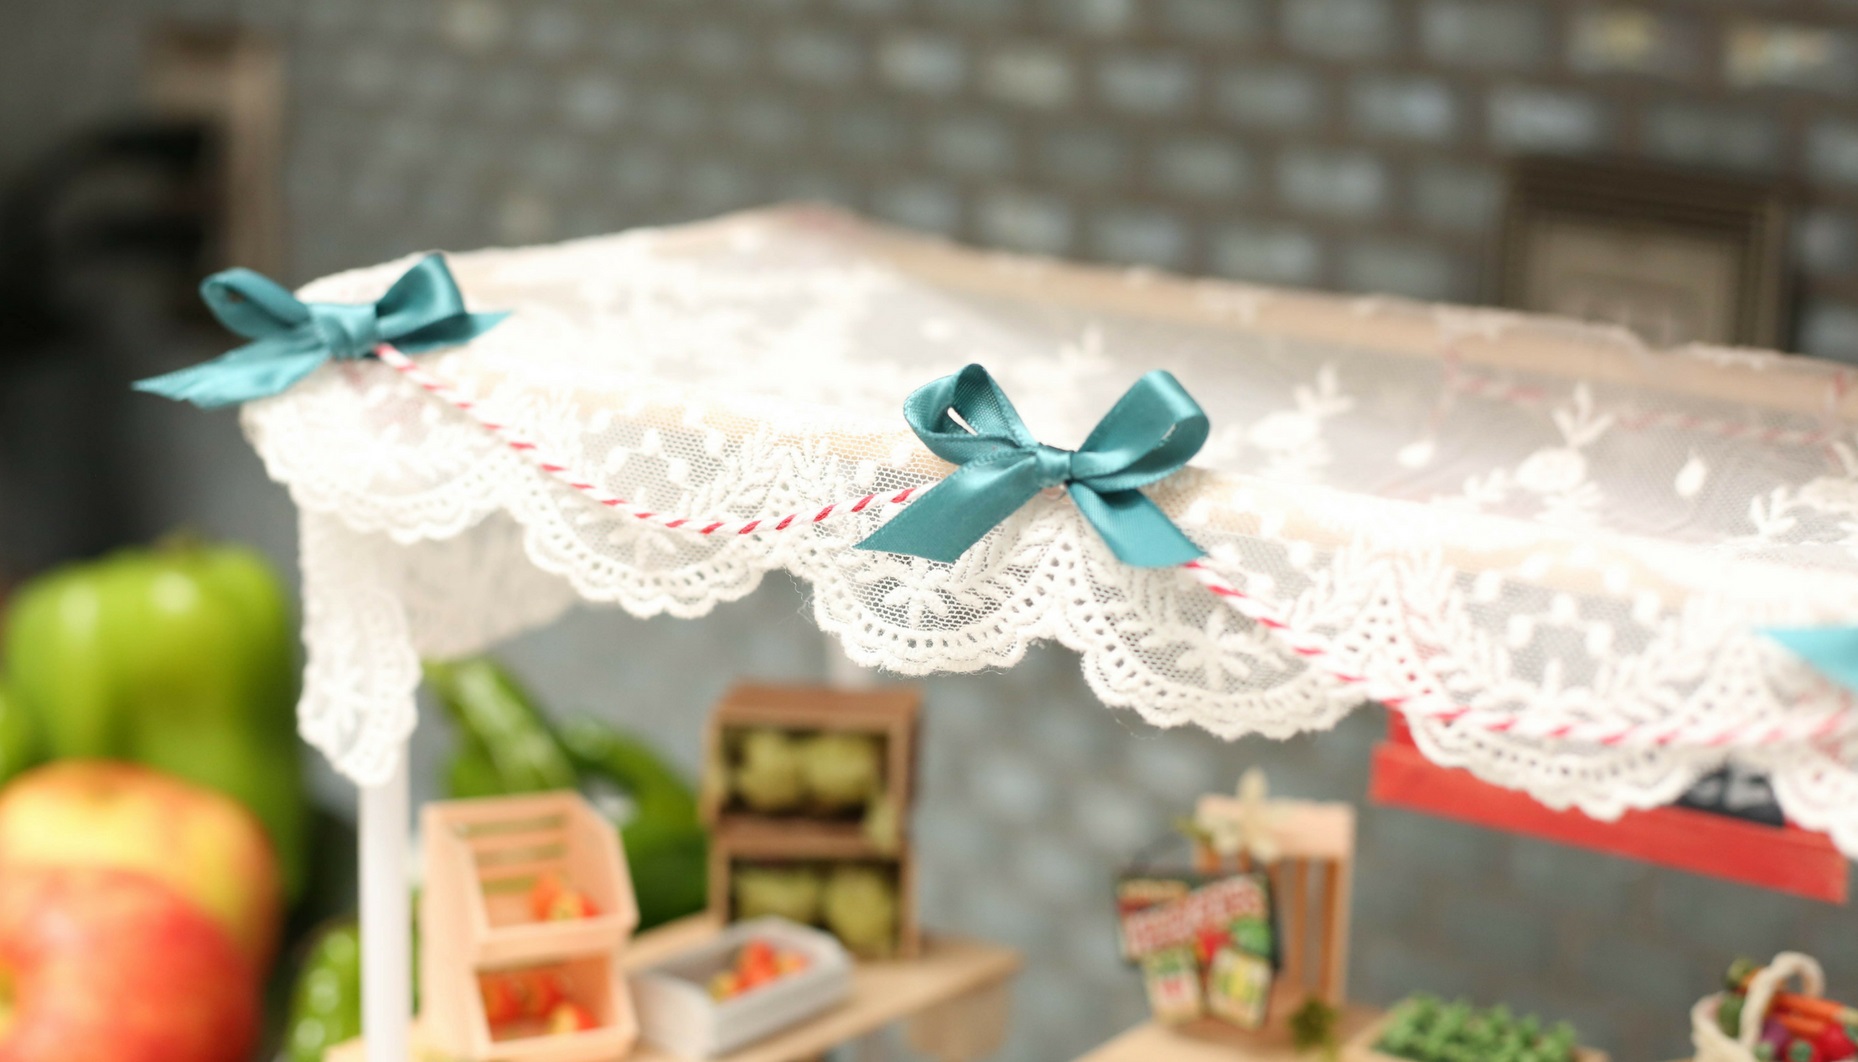
Lay a section of Laurel Scalloped Lace or (other sheer lacy trim fabric), across the top of the structure and glue at the corners. Add a pretty little bow in a complimentary color to conceal the glue drop.
Step Four
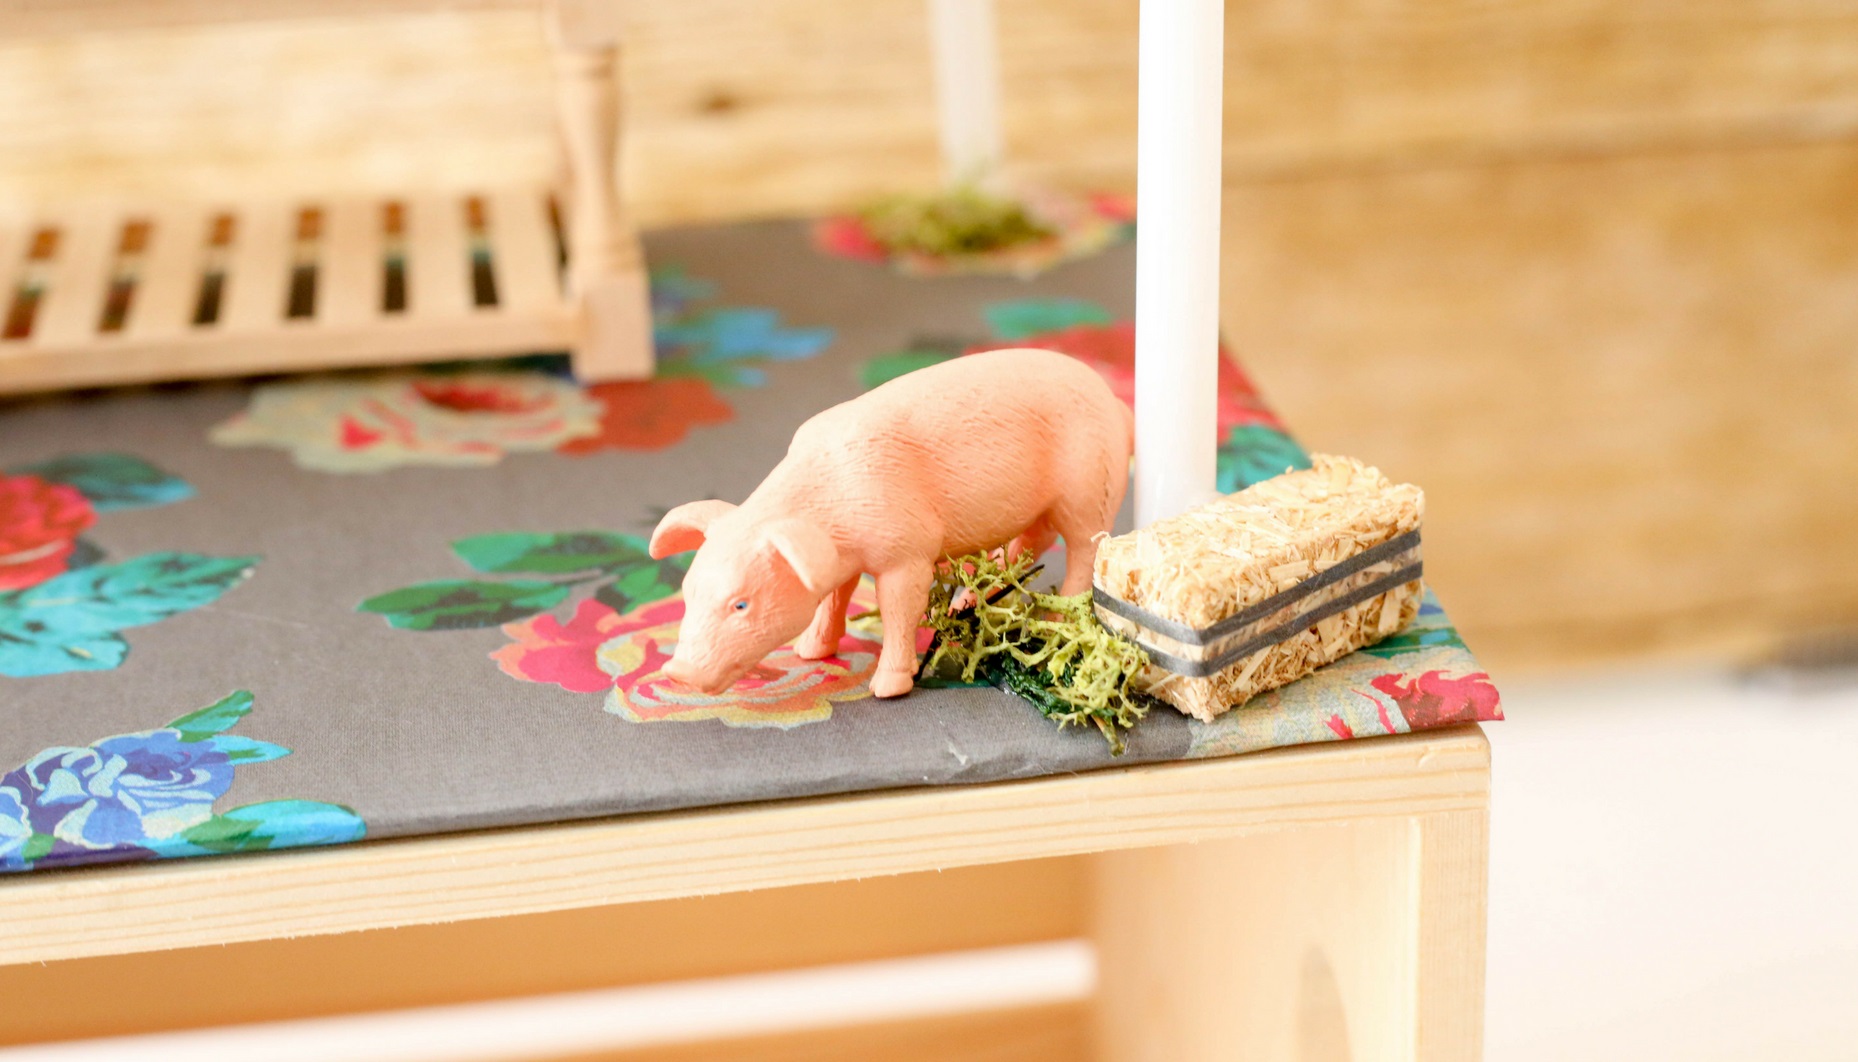
A friendly pig is a perfect accent for a miniature farm stand. Glue in place next to one of your market poles, and add some reindeer moss to conceal the glue. This is a clever way to add stability to the piece without sacrificing the design aesthetic.
Step Five
Popsicle sticks and wood findings (from my own collection of bits and pieces), were just what I needed to create a little side table for my farm stand.
Step Six
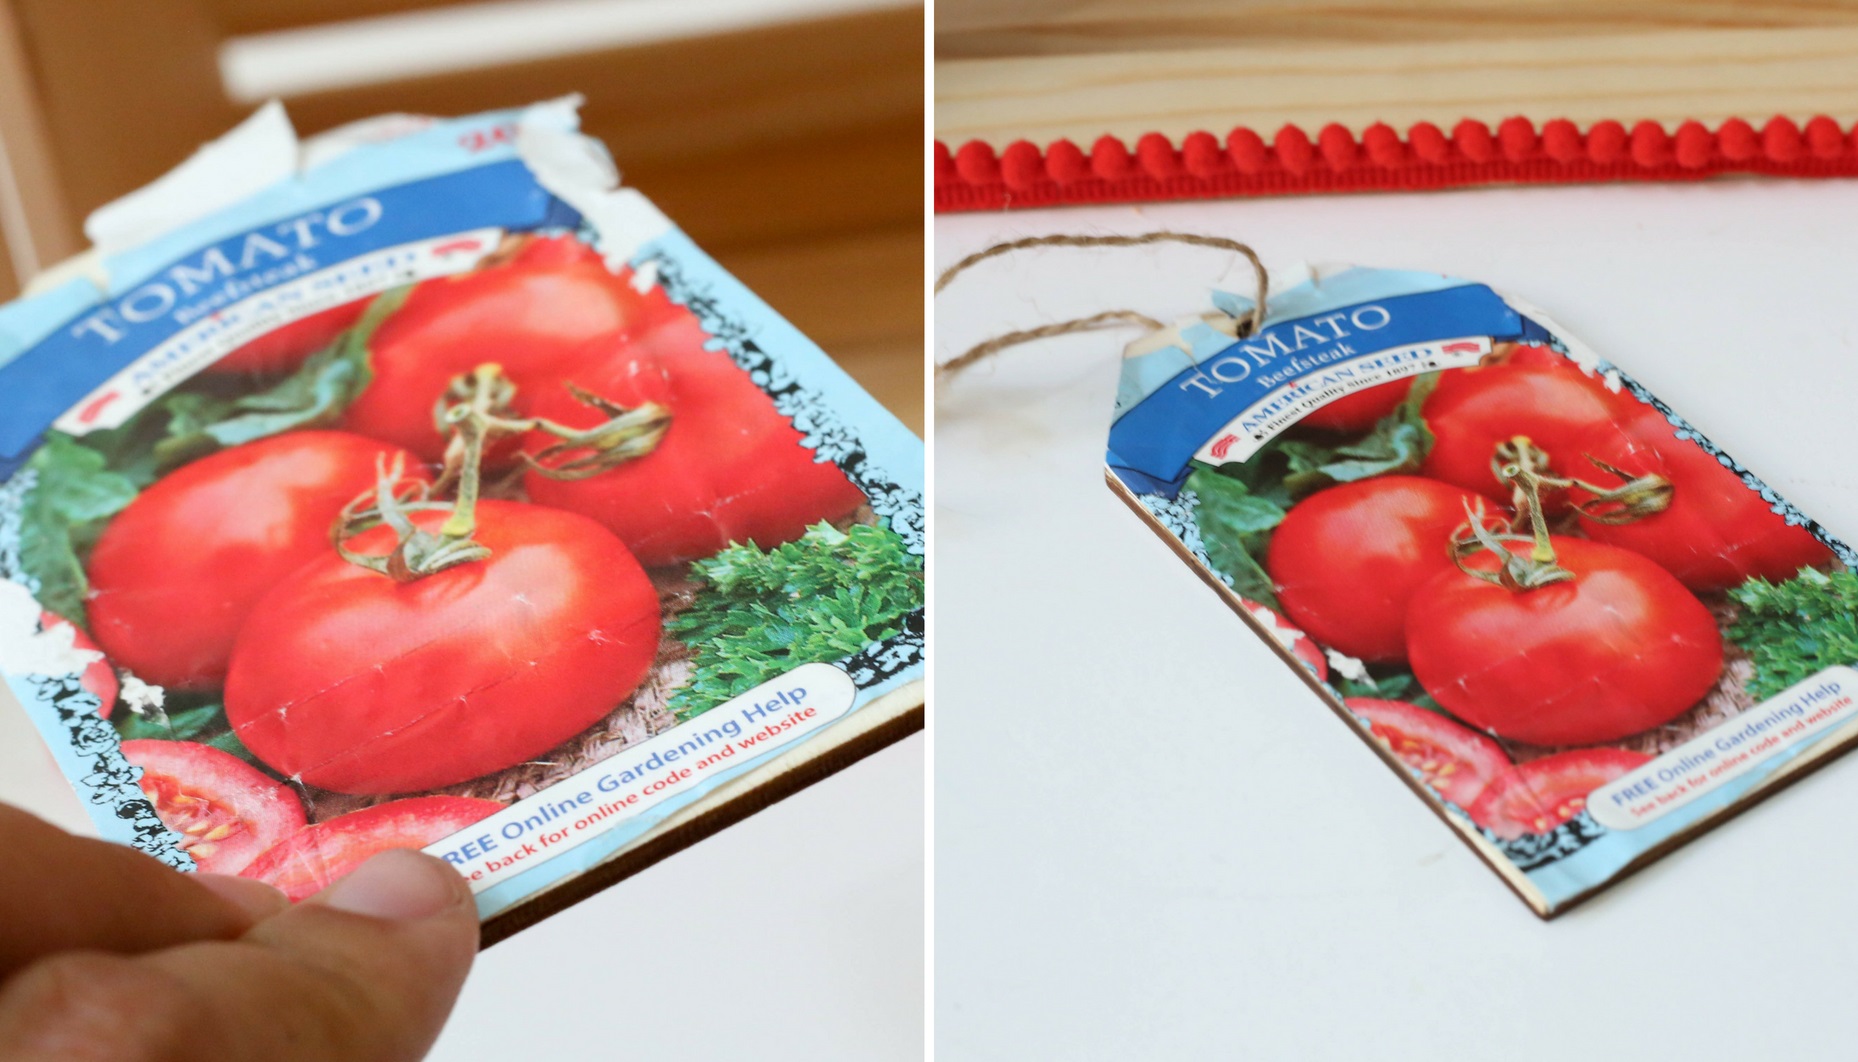
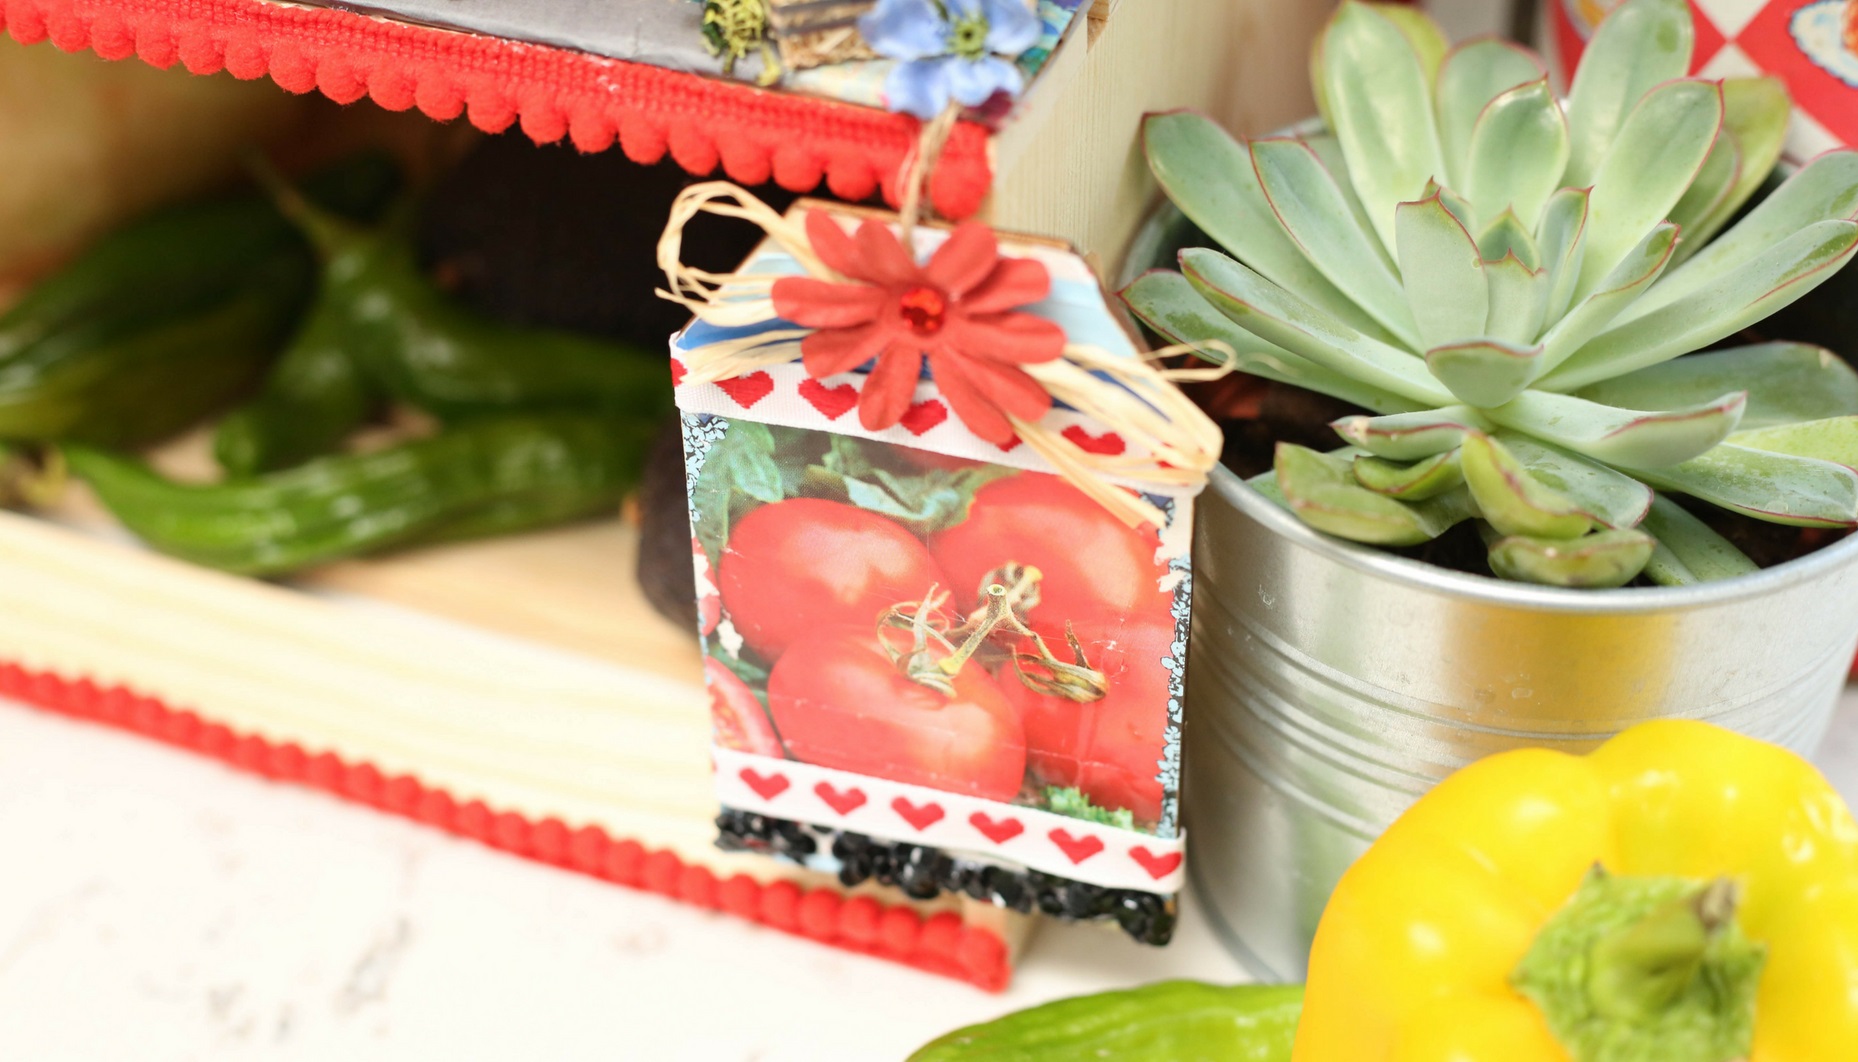
This simple wood tag was embellished with an authentic tomato seed packet from the nursery. Red pom pom trim was glued to the top and bottom of the wood crate to bring out the colors in the farm house stand. The inner portion of the crate is the perfect place to hold avocados as they ripen!
Step 7
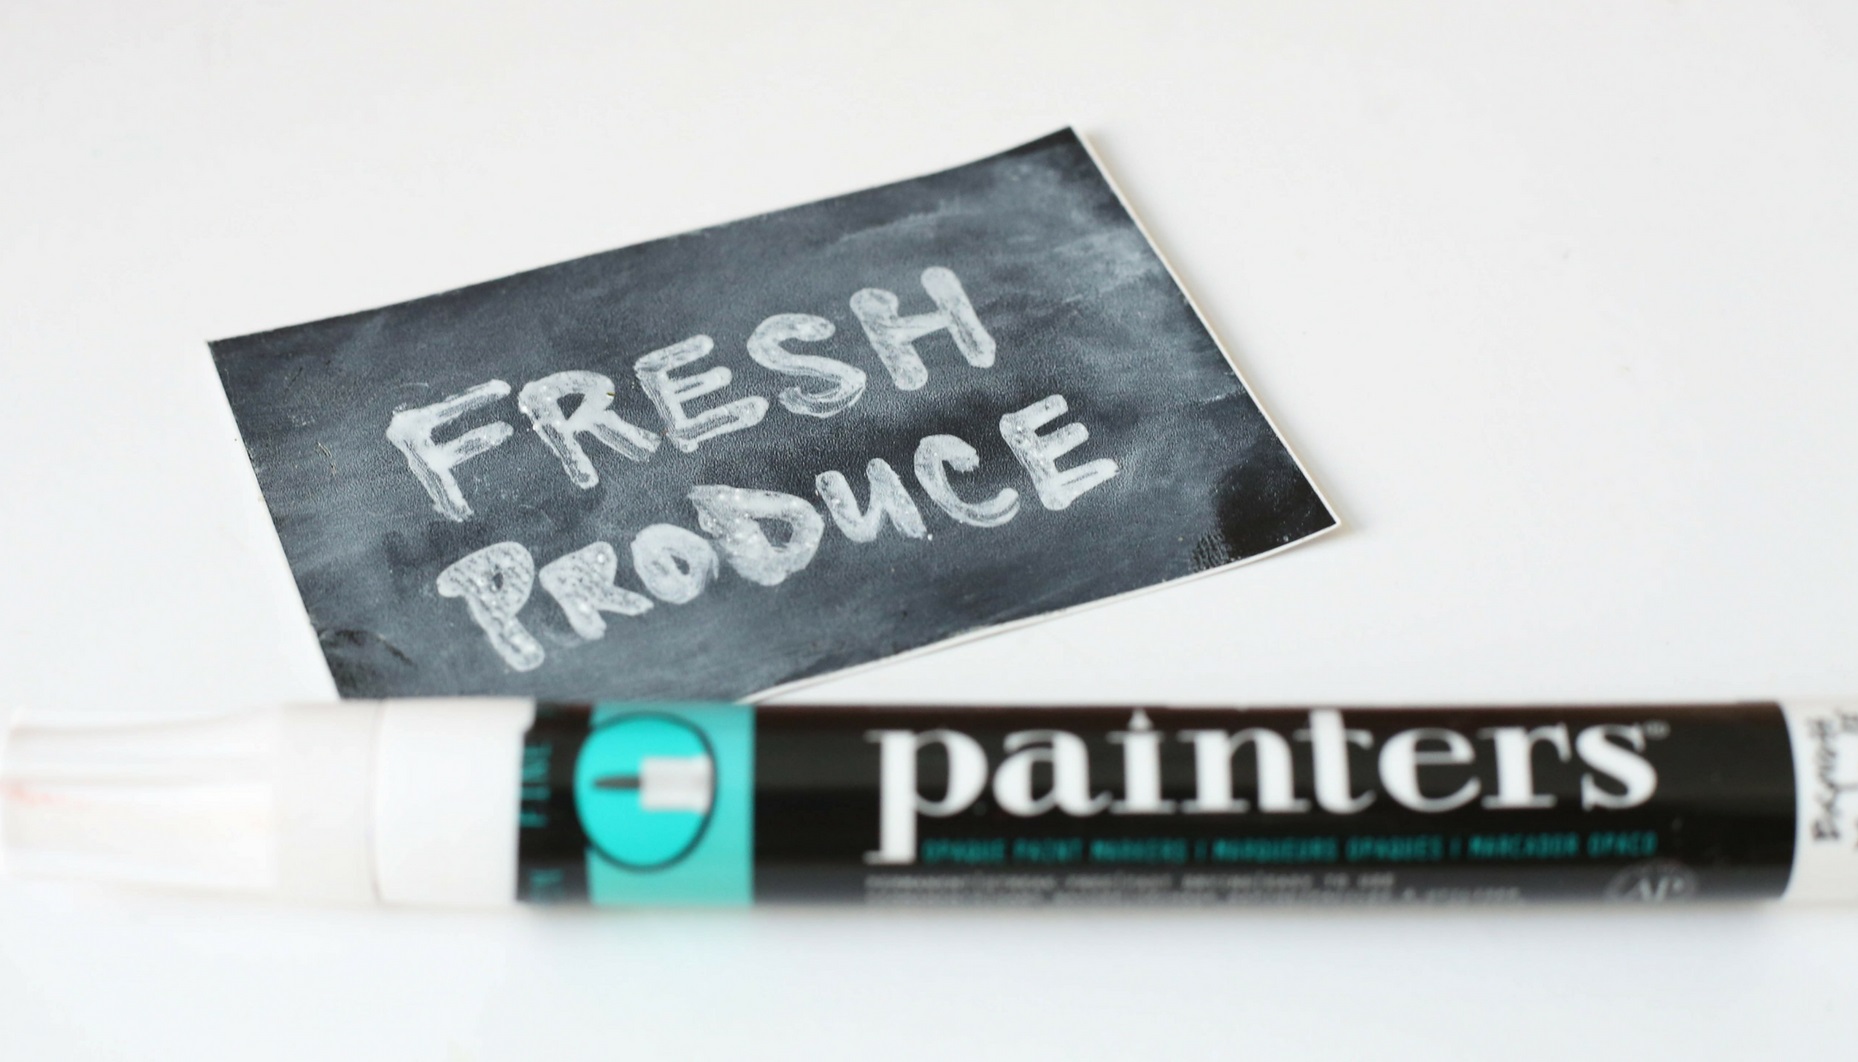
Making a miniature chalkboard is simple with a chalk marker and a fine point chalk pen. Be sure to “blur” your chalkboard for a really authentic look. This is achieved by scribbling chalk pen across the entire surface and then blotting with a damp cloth until the desired look is achieved. A red frame was created for the chalkboard with narrow wood craft sticks trimmed to fit.
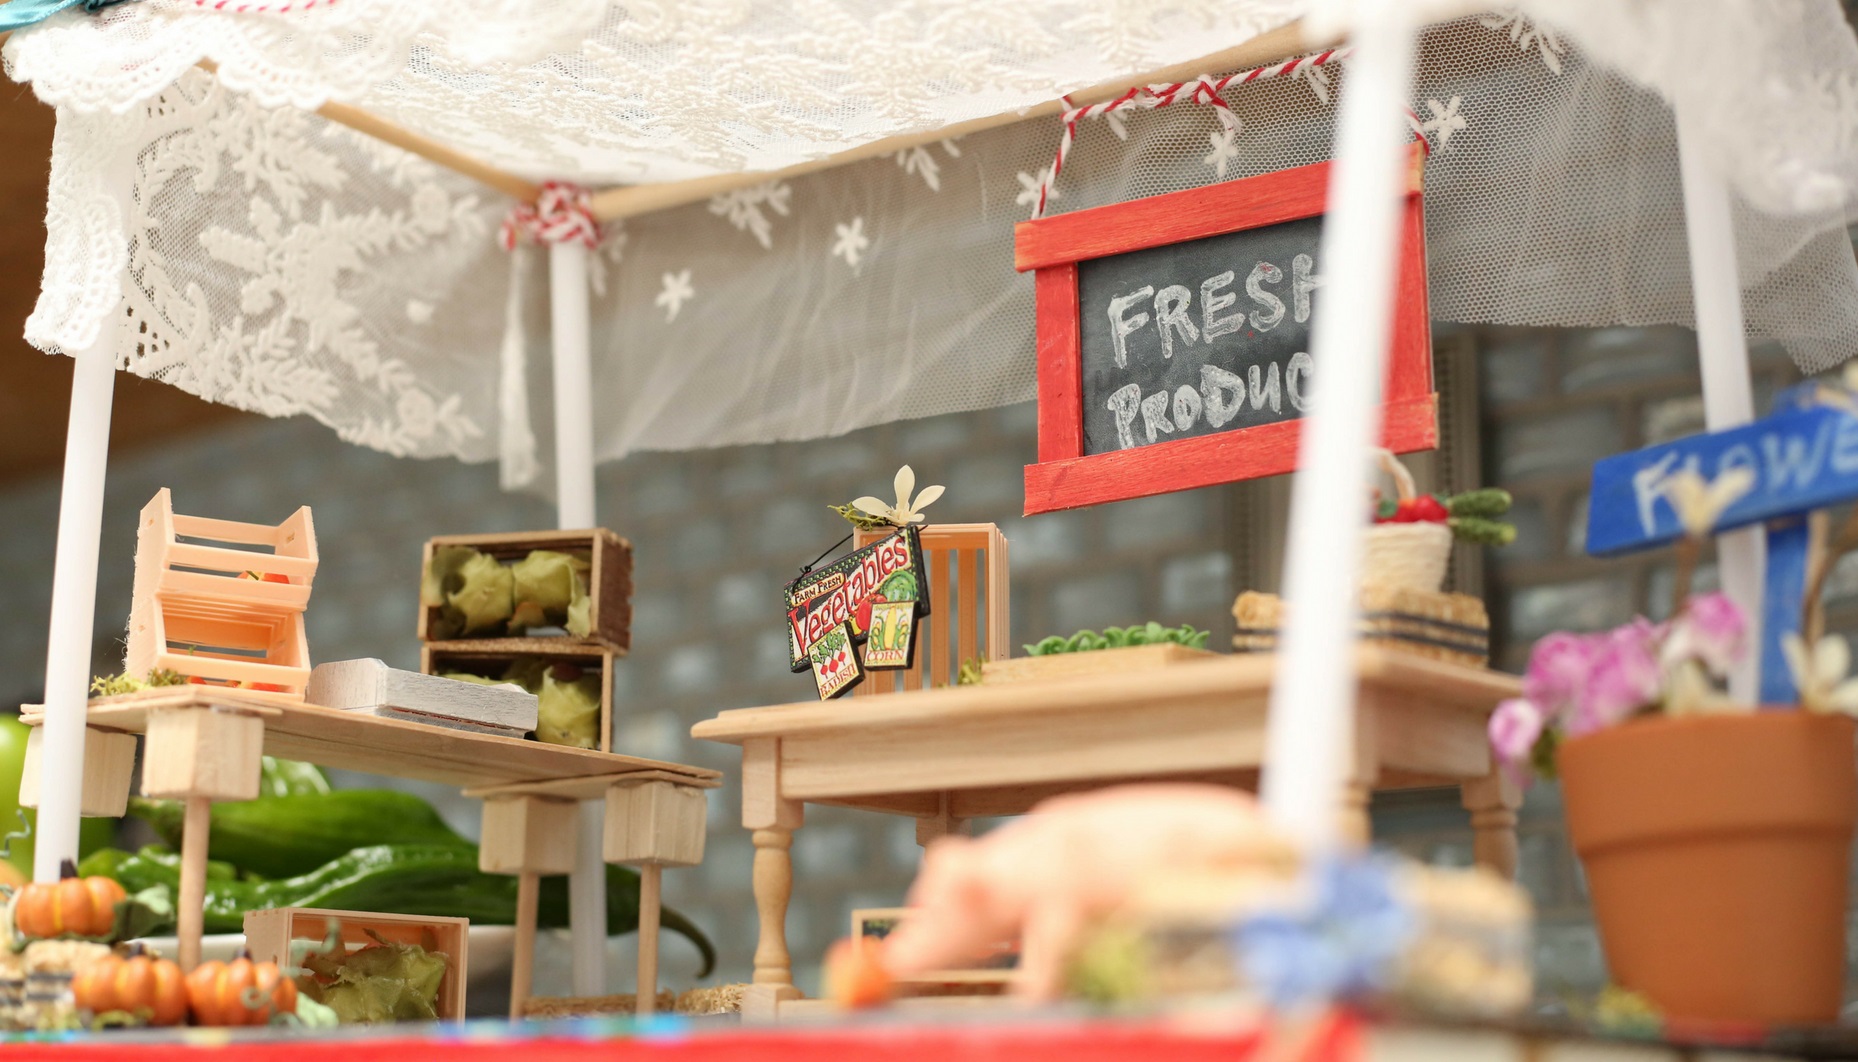
Finished Look
The completed miniature farm stand is such a darling little replica of the real thing! The wood crates, tiny apples, vegetable basket and darling sign from Minatures.com are just precious, and so detailed.
Peeking inside the farm stand is almost just like being at a real farmer’s market. The miniature accessories are so realistic, in size and color.

There’s my chalkboard, hung with red and white baker’s twine!
The wood tag, embellished with a red flower, raffia, and black glitter dots, is a fun hanging embellishment that could easily be personalized, stamped, or used for a gift message, poem or scripture.
The top of the canopy is a mini replica of a lovely road side farm stand. Baker’s twine is used as rope in this design, and complements the colors of the veggies and fruits perfectly.
Thank you for visiting and celebrating tiny things with me! This post was sponsored by Miniatures.com, who provided me with products to complete the project. The selections, design and photos are my own!
Check out more fun from MINIATURES.COM